
Increasing Phishing Awareness at Halodoc by Simulating Phishing Attacks
In this article, we are going to discuss about the phishing attack, how to simulate a phishing attack using the tool called Gophish and how to enhance phishing awareness by introducing awareness session and quizzes .
What is Phishing?
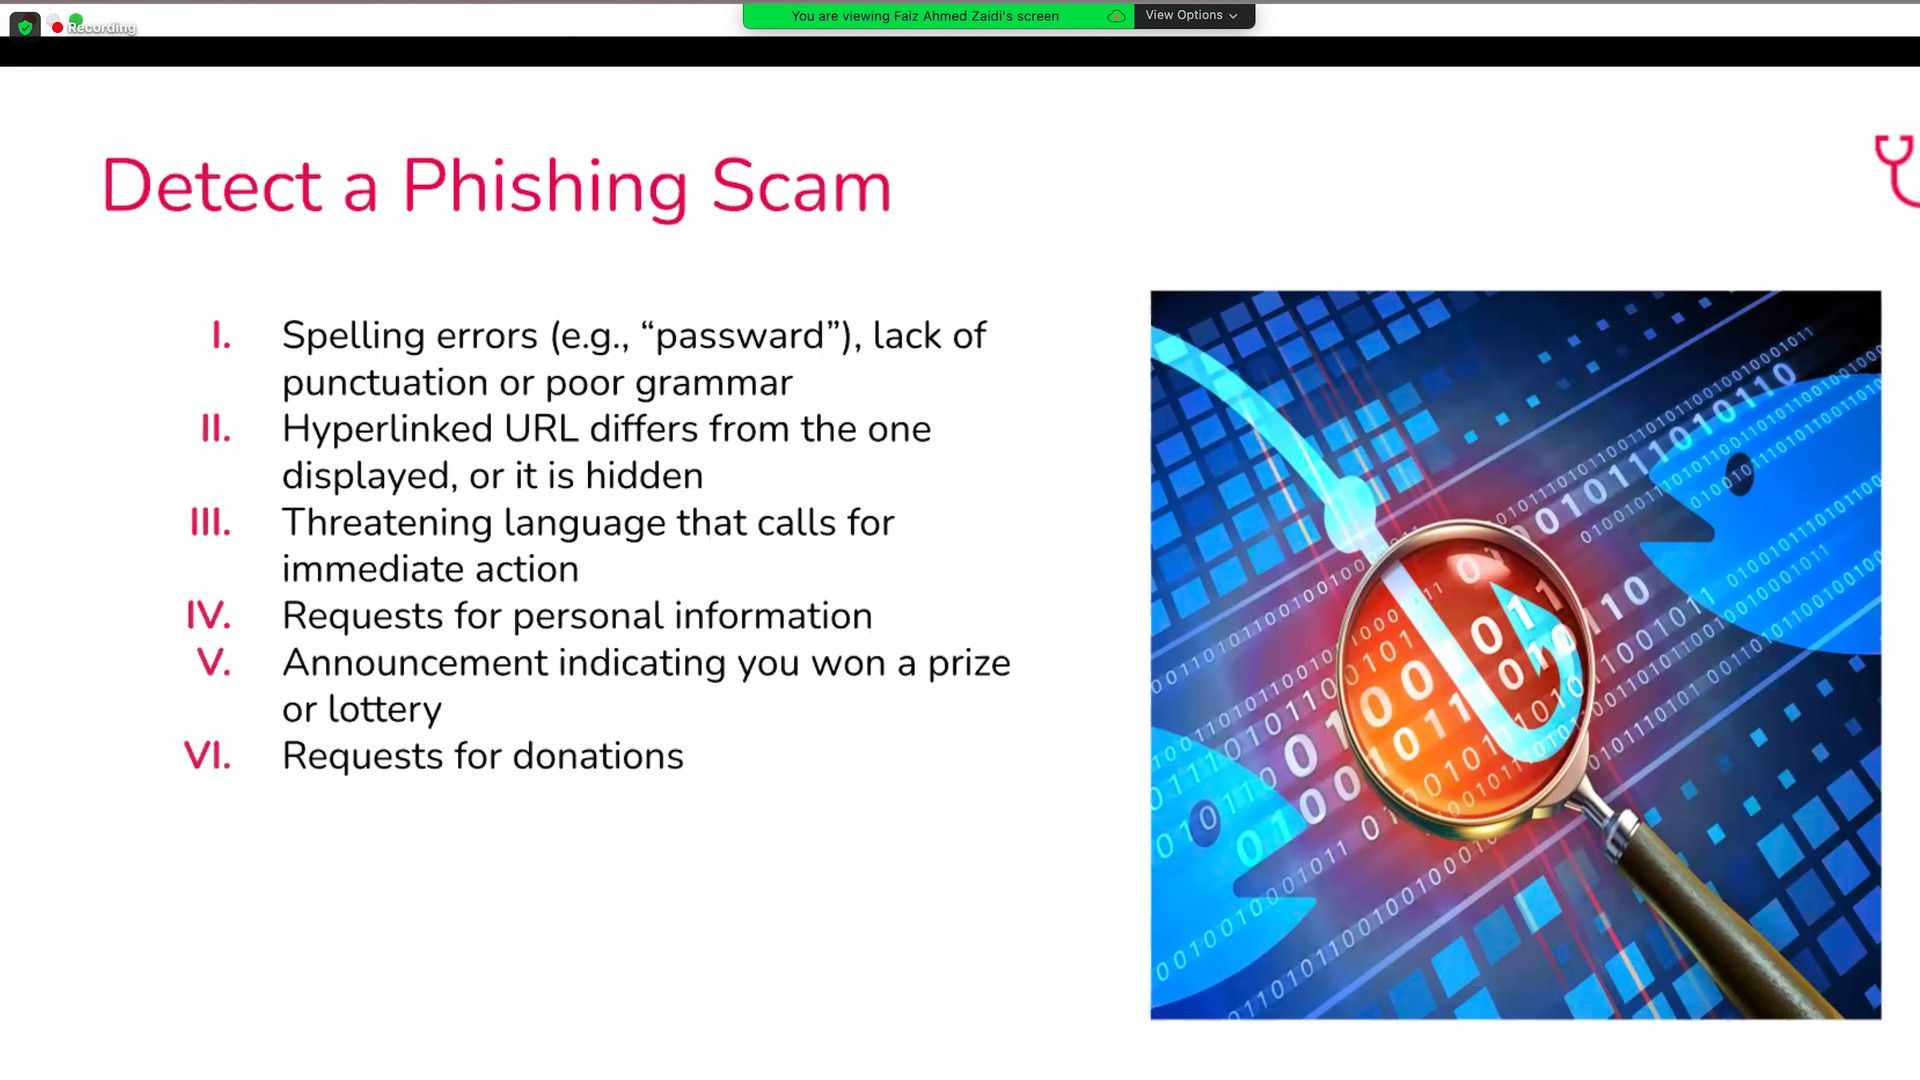
Phishing is a social engineering attack which attempts to get a user to click on a link that goes to a malicious site containing malware or steals users credentials.
“The best defense is a good offense.” — Jack Dempsey
At Halodoc, we believe in the quote above. We also believe in sharing of knowledge related to phishing and ransomware attacks.
In order to enhance the phishing awareness among all Halodoc employees, we have simulated a controlled phishing attack so that we can increase the awareness among the employees and reduce the likelihood of that person falling for a real phishing attack.
To achieve our goal we have setup and configured an attack environment with the help of Gophish tool which we will learn in below parts.
What is Gophish?
A Gophish is a phishing framework that makes the simulation of real-world phishing attacks dead-simple. The idea behind gophish is simple – make industry-grade phishing training available to everyone.
How to setup it up on AWS
We have created an EC2 instance and selected the region.
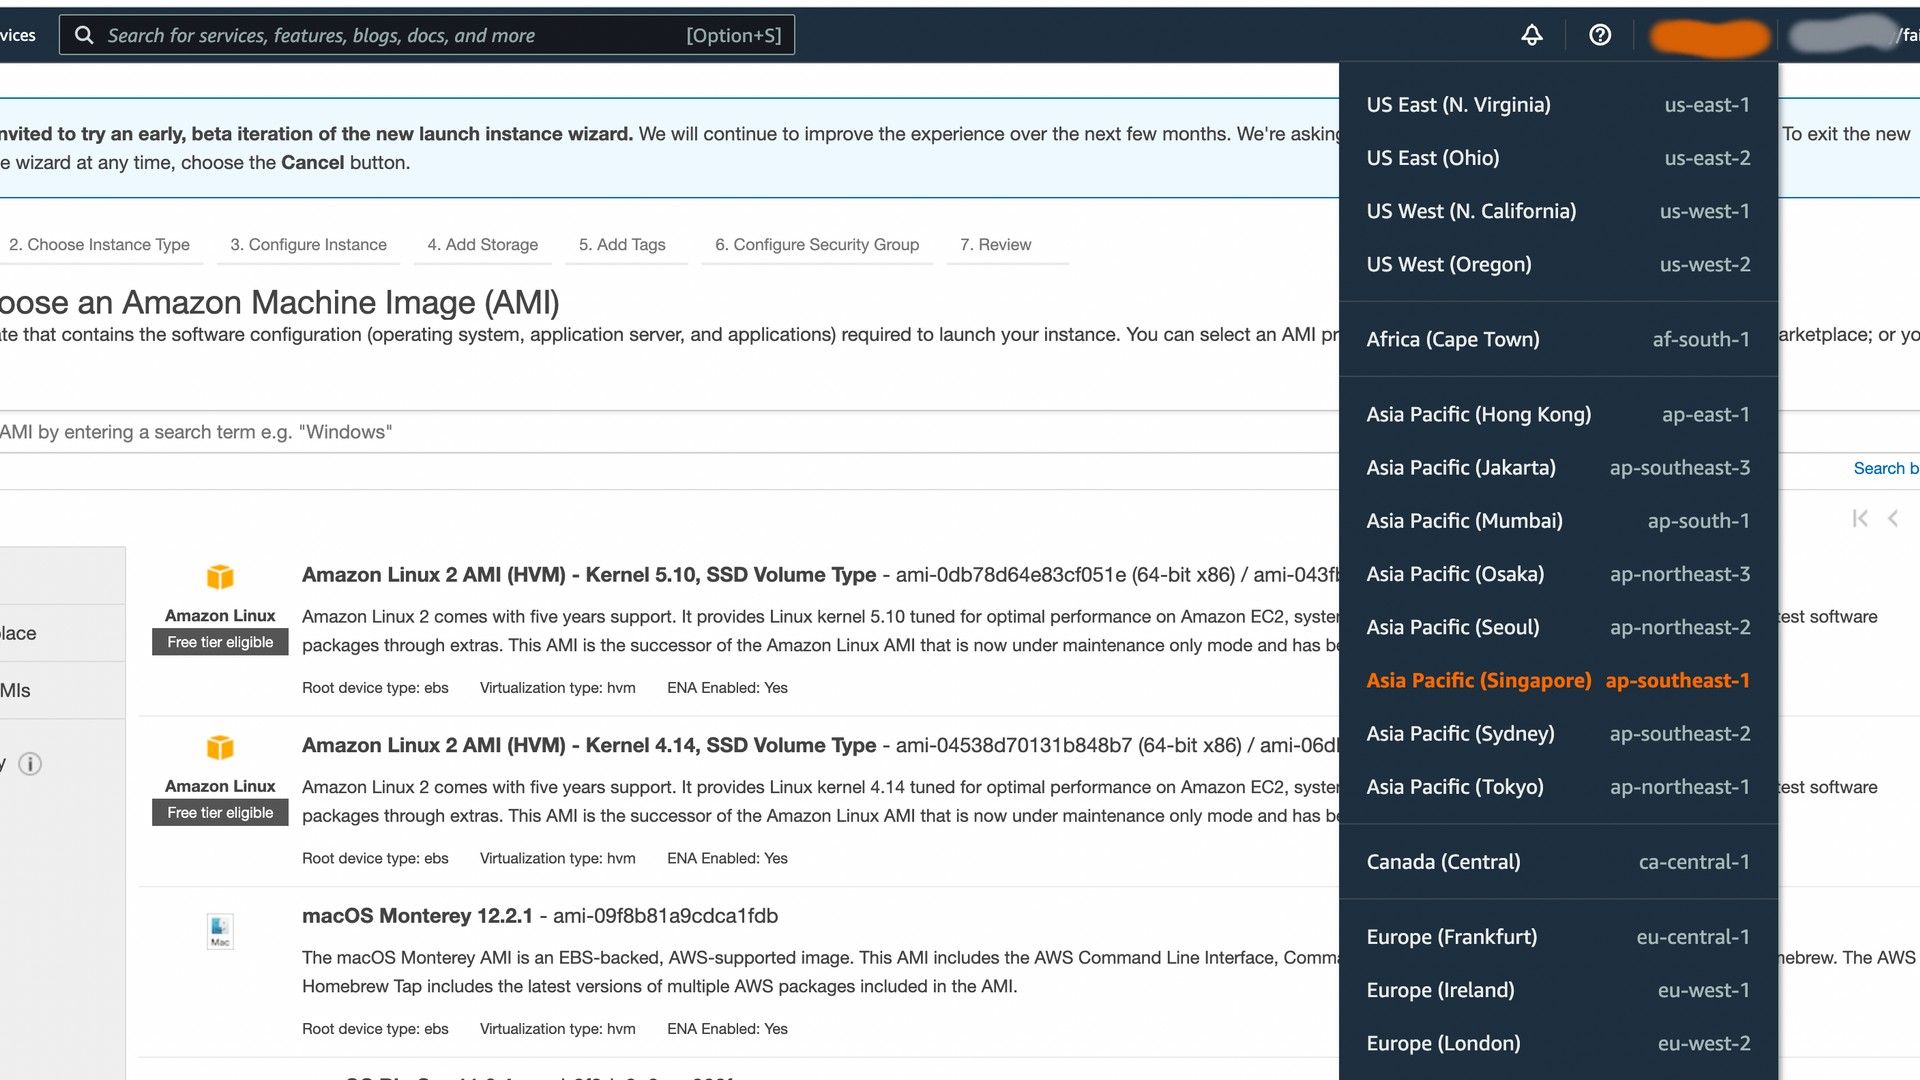
Then launched a new EC2 instance on which to run Gophish, following the various screens to configure the instance options.
Step 1: Choose AMI

Step 2: Instance type as per requirements

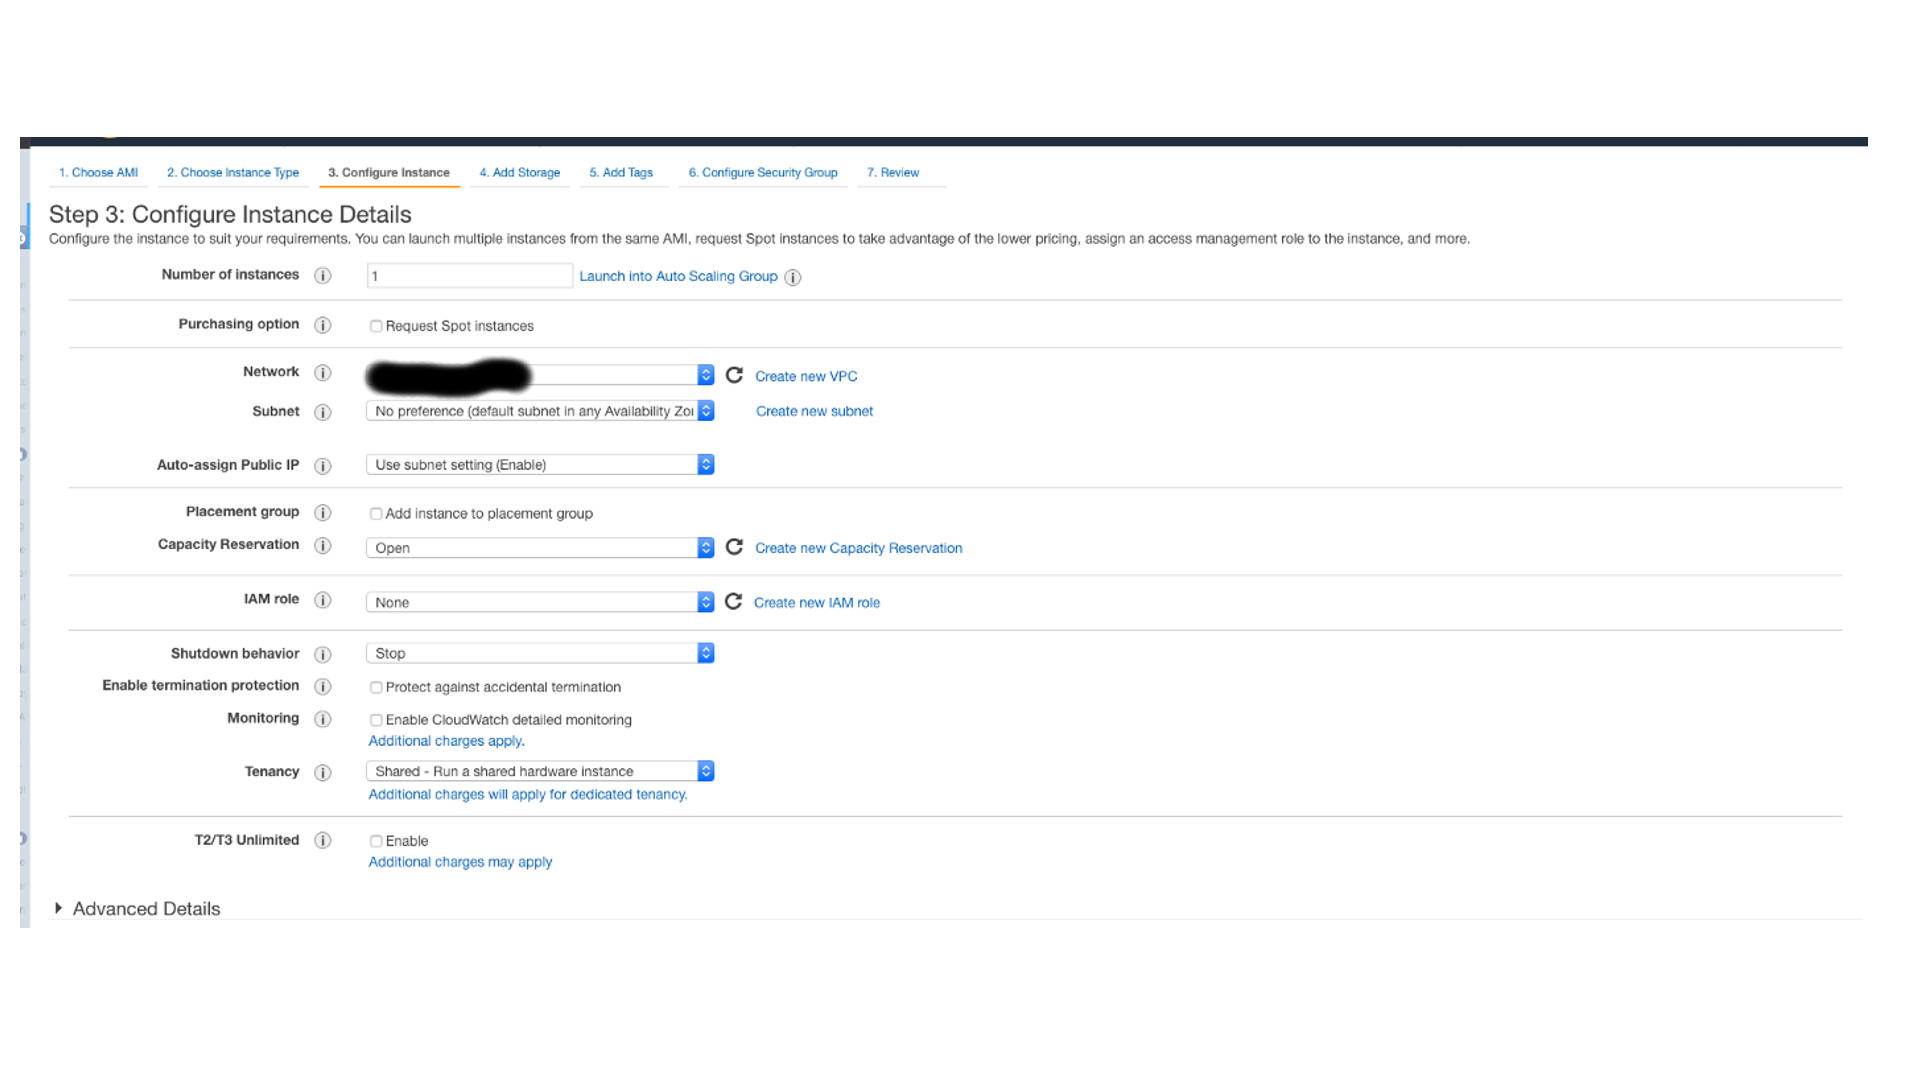
Step 3: Instance details
We selected the default VPC, choosing all default options for the instance details, including to assign a public IP (full details in the image below).
Note: If you have an existing non-default VPC , you would want to place the instance in a public subnet and choose to assign a public IP.
Step 4: Storage
Storage was left at defaults; 8GB of storage on the root device will be plenty.
Step 5: Tagging
Add some appropriate tagging.
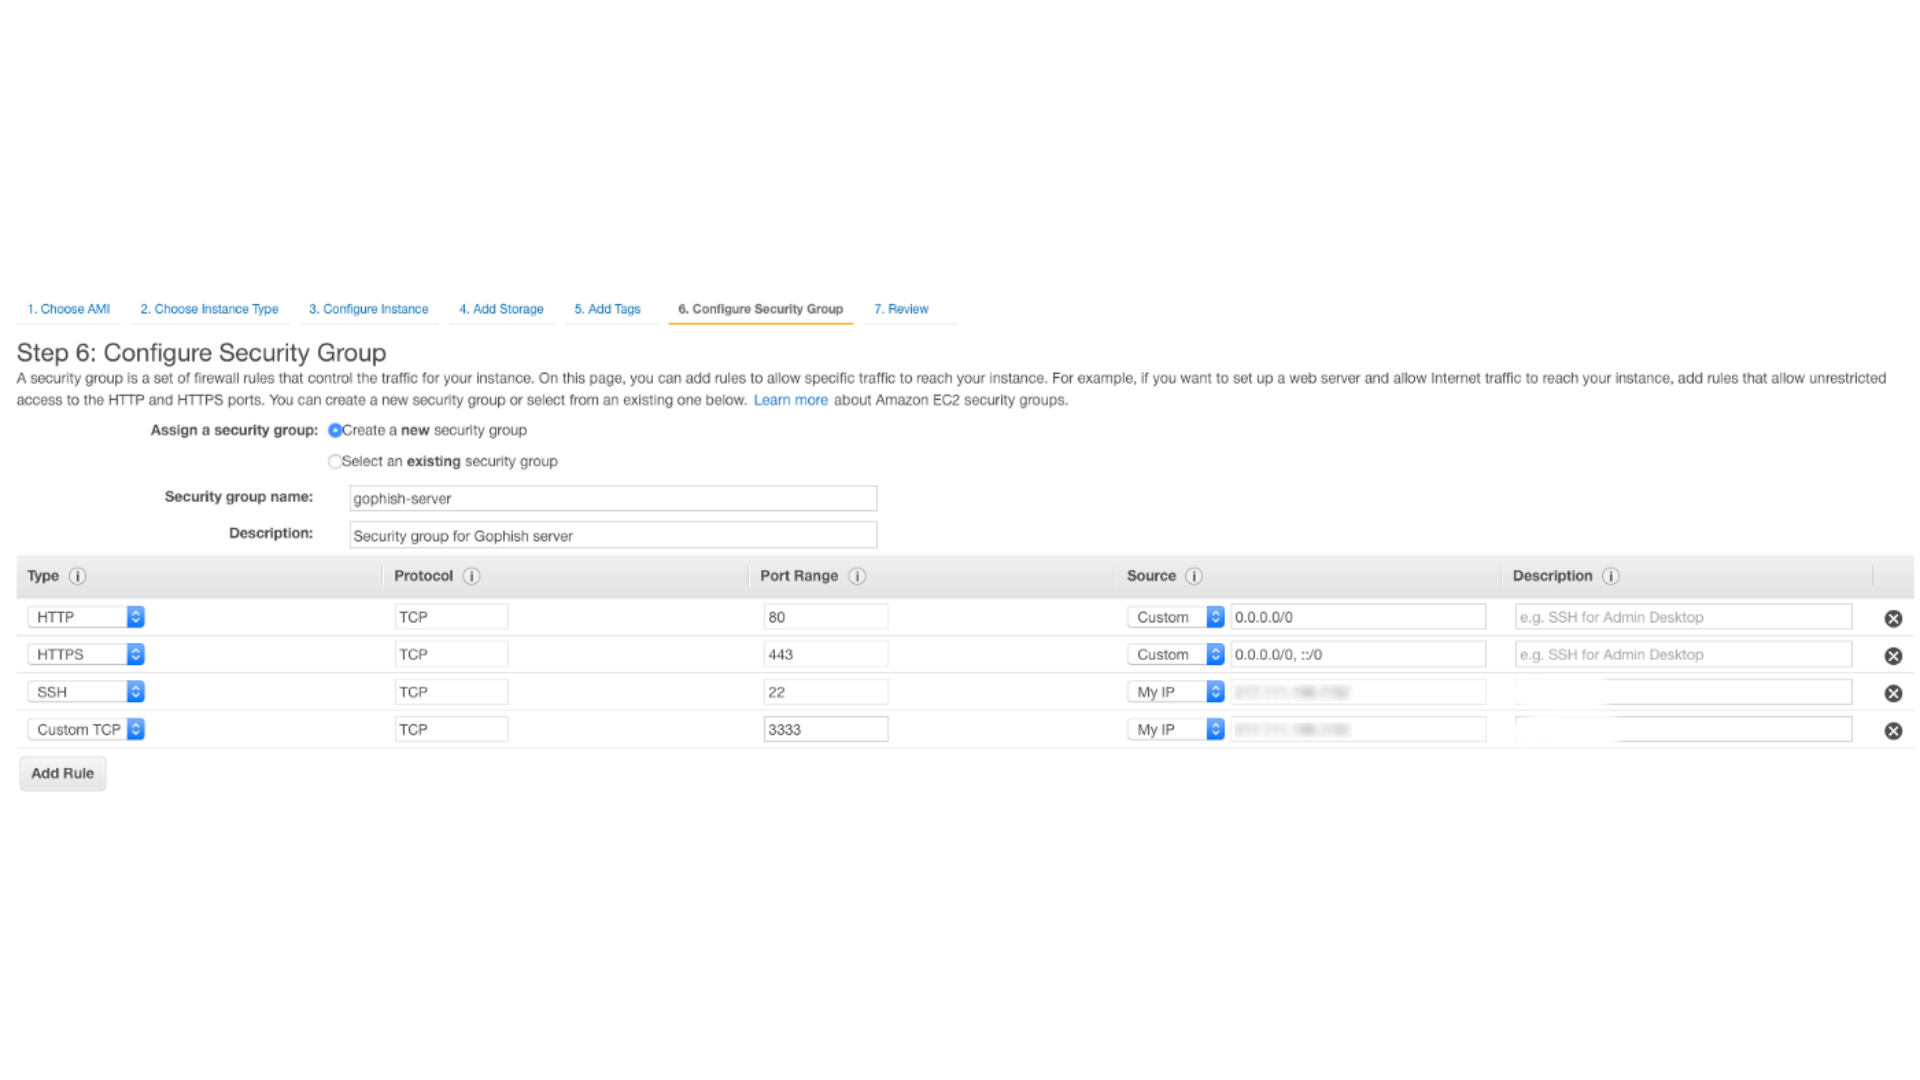
Step 6: Security Groups
We created a new security group, allowing:
- HTTPS (TCP/443) from anywhere — required for the pingbacks and to host landing pages
- SSH (TCP/22) from our office IP address
- TCP/3333 from our office IP address — this is the admin console for Gophish which we would use in our browser to control the campaigns
Step 7: Review:
We reviewed the settings (see below) and launched the instance — selecting the SSH key pair and accepting the terms.

After waiting for the instance to launch, we allocated an Elastic IP address and associated it with the instance. This would ensure that even after restart the EC2 instance would retain the same IP.
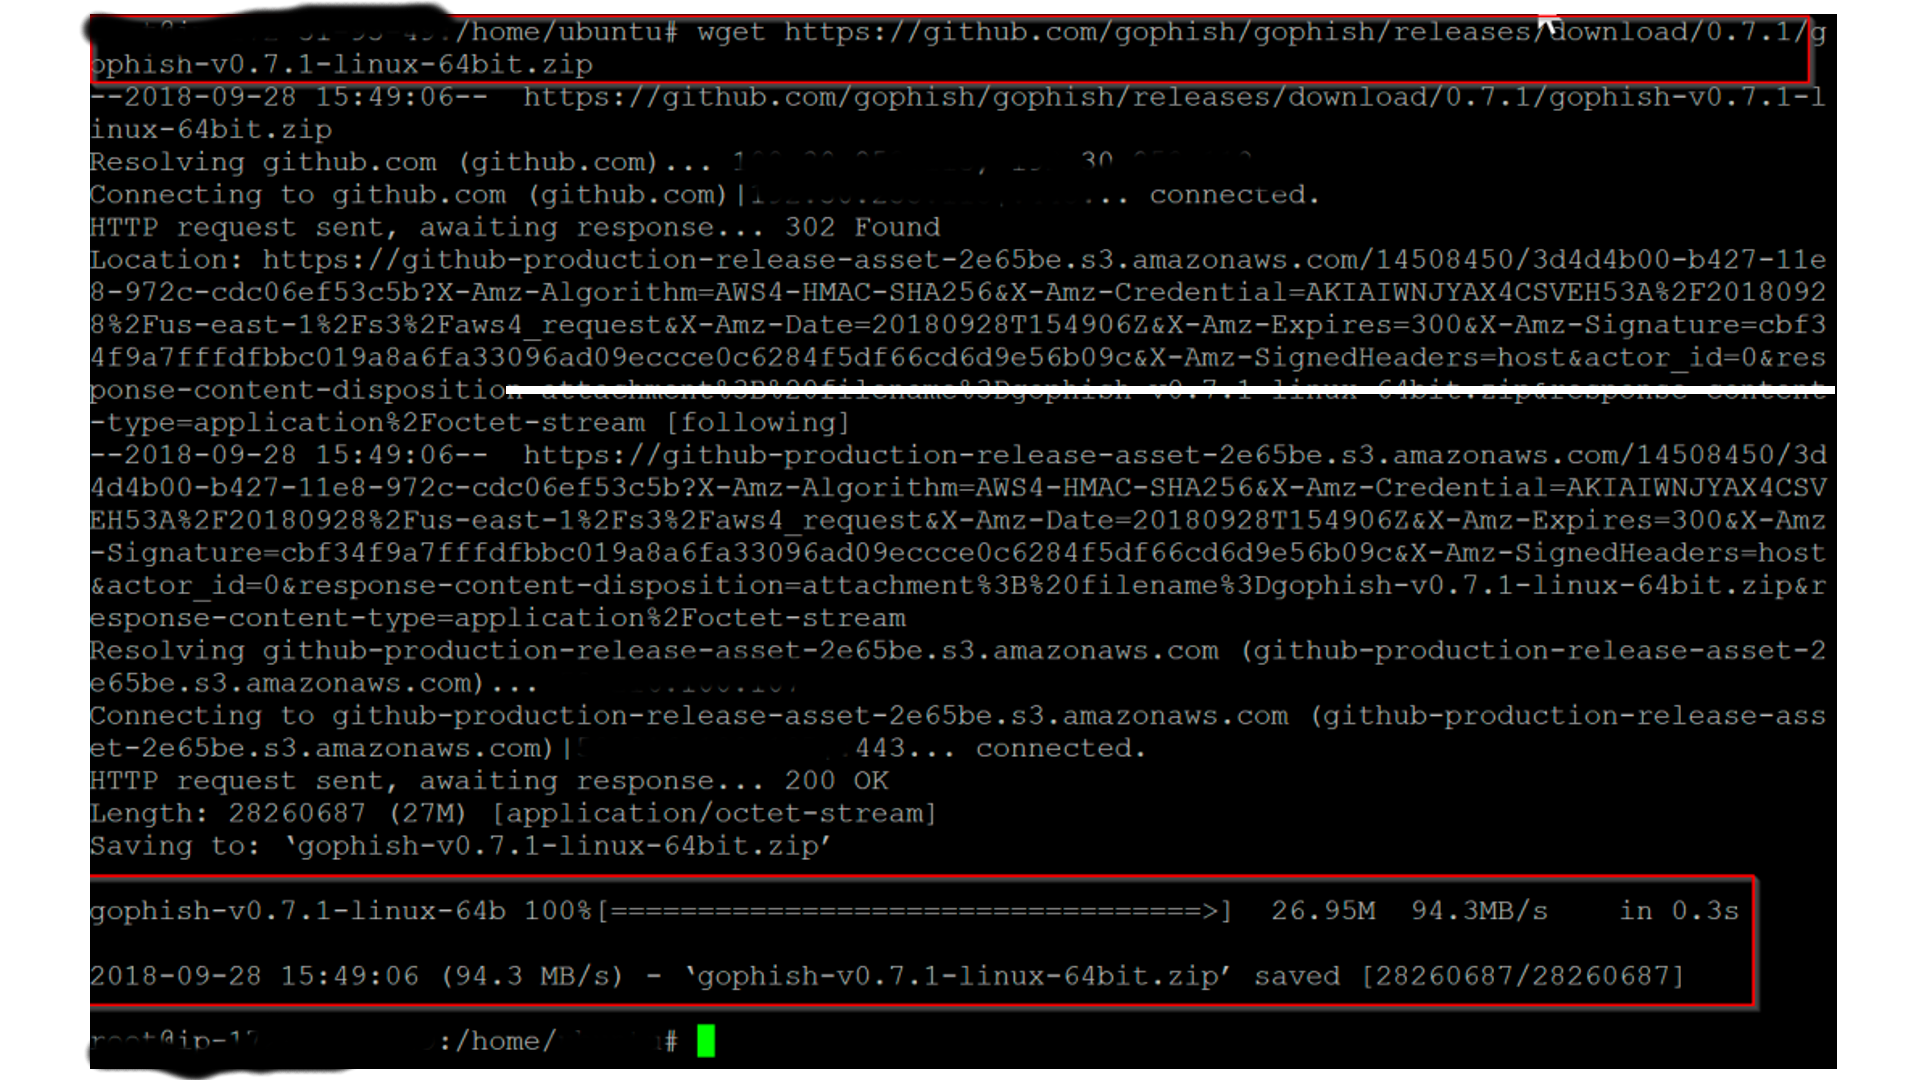
Setup GoPhish
Next step is to wget the latest GoPhish version, you do this by typing this into your SSH session:
wget https://github.com/gophish/gophish/releases/download/0.7.1/gophish-v0.7.1-linux-64bit.zip
apt install unzipunzip gophish-v0.7.1-linux-64bit.zipTo keep things simple, we will leave GoPhish where it is.
Now to get to the admin interface, we will need to make some changes to the config.json file.
nano config.jsonYou should then see a screen like below:
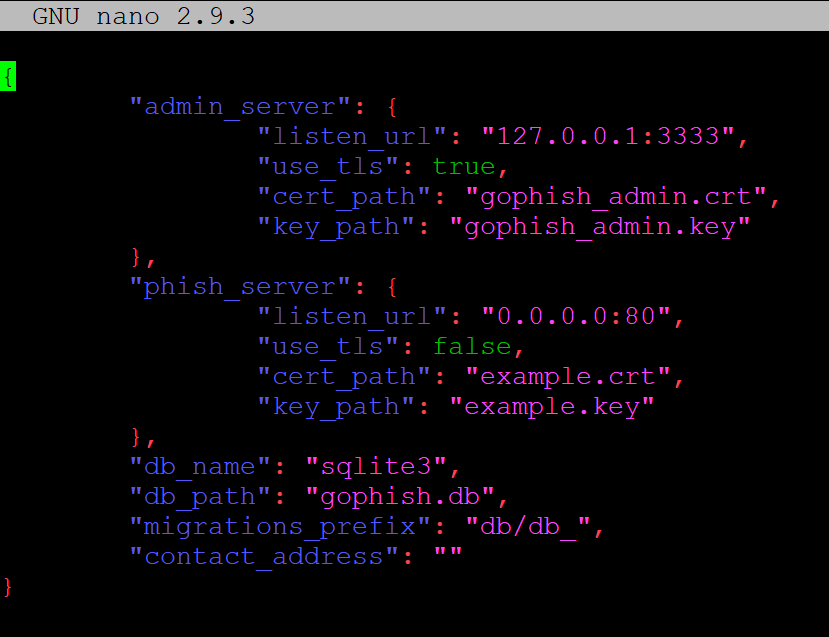
Where you see the “listen_url” under the admin_server area needs to be changed to 0.0.0.0:3333
Once done save it.
It should look the same as the screenshot below:
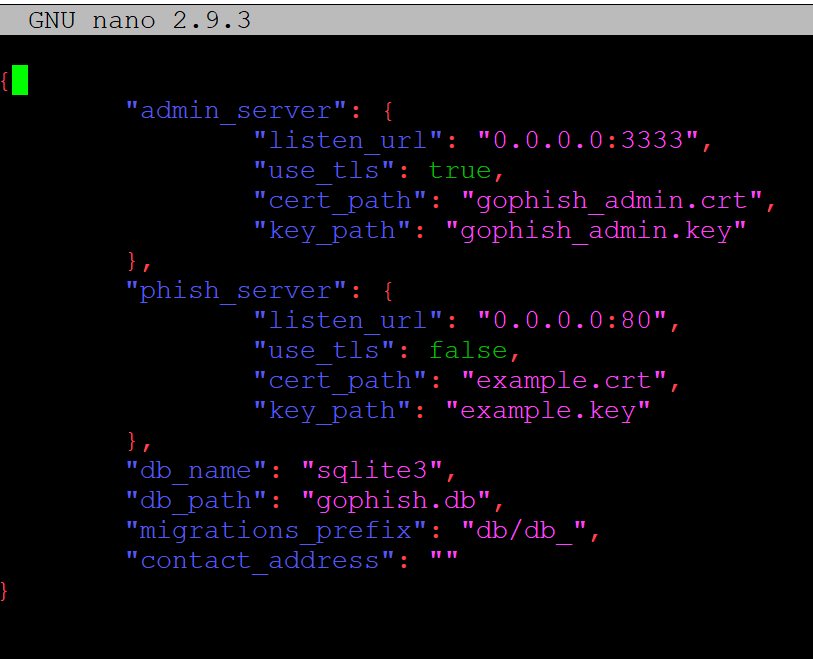
Once this is done let’s go ahead and make sure we can load up GoPhish.
Type in:
./gophish
Now that GoPhish is running, open a browser and go the IP address of your EC2 instance by typing https://<IP address here>:3333 (You can get this from the EC2 dashboard) and you should have a login page such as shown below:
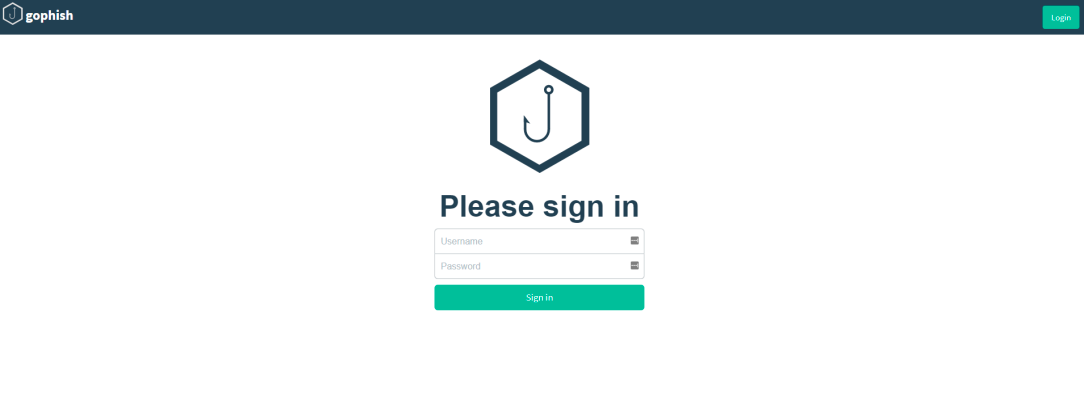
Default credentials to login are:
Username: admin
Password will be generated inside the console of gophish.
You can also point the Public IP to domain.
Creating a Phishing template?
To create the template for the campaign, first navigate to the "Email Templates" page and click the "New Template" button.
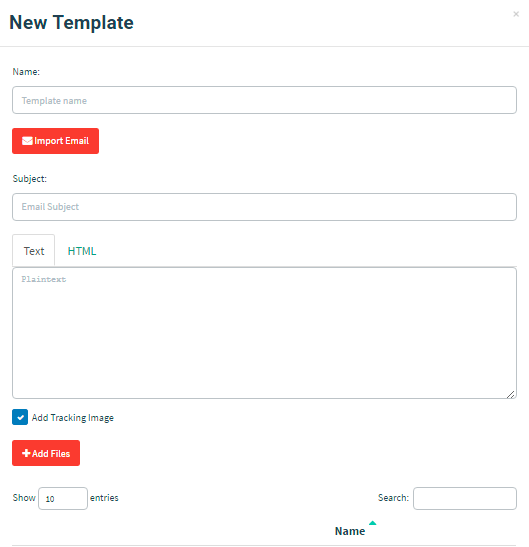
Let’s craft a simple template that suggests the user needs to go reset their password. Obviously, this is a simple scenario and by using the "Import Email" feature, you can import existing emails directly into gophish for a greater effect.
We'll use the following subject line:
Password Reset for {{.Email}}You'll notice we used the {{.Email}} template value. This will populate with the target's email address when the emails are sent. This is Gophish's way to tailor emails to individuals to increase the chance of success.
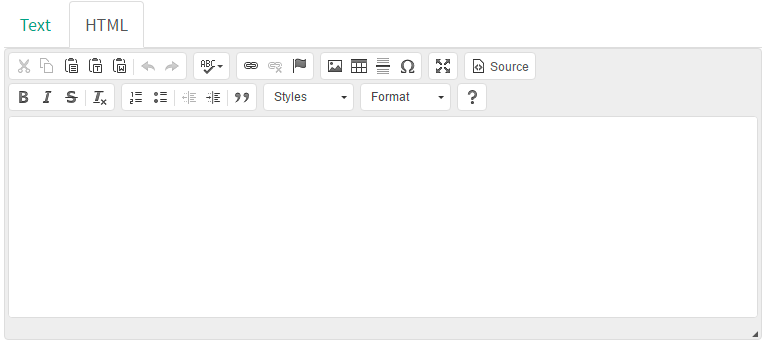
By clicking the "HTML" tab, we will see the editor we can use to create our HTML content:
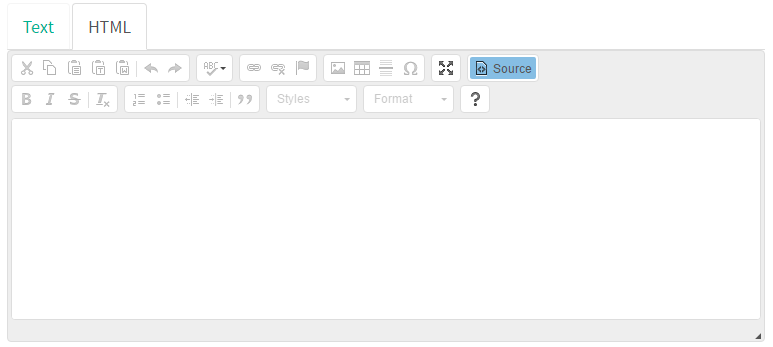
Since our content is pretty simple, we can just click the "Source" button and be taken to the more visual editor, which will be enough for our purposes:
Our template will be simple for the sake of demonstration. I'll start by adding the message:
{{.FirstName}}, The password for {{.Email}} has expired. Please reset your password here. Thanks, Morning Catch IT TeamSpeaking of links, now we need to add our phishing link. Highlight the word "here" and click the chain icon in the menu, exposing the "Link" dialog. In this dialog, we'll set the link to {{.URL}}, another template value, so that our link is automatically created and inserted into the email.

Finally, make sure the "Add Tracking Image" checkbox is checked, and click "Save Template".
After creating the template we will launch the attack within the organization.
Conclusion:
To educate our employees who got hooked or were not impacted by the phishing attack we have conducted the awareness session for the entire organization in foreign and regional languages.
After the awareness program, we have initiated a mandatory phishing quiz for the organization where the people have participated and tested their updated knowledge about phishing and ransomware practices. Overall, we got pretty positive results in the Quiz, which showed increased awareness after the phishing simulation.
About Halodoc
Halodoc is the number 1 all around Healthcare application in Indonesia. Our mission is to simplify and bring quality healthcare across Indonesia, from Sabang to Merauke. We connect 20,000+ doctors with patients in need through our Tele-consultation service. We partner with 3500+ pharmacies in 100+ cities to bring medicine to your doorstep. We've also partnered with Indonesia's largest lab provider to provide lab home services, and to top it off we have recently launched a premium appointment service that partners with 500+ hospitals that allow patients to book a doctor appointment inside our application. We are extremely fortunate to be trusted by our investors, such as the Bill & Melinda Gates Foundation, Singtel, UOB Ventures, Allianz, GoJek, Astra, Temasek and many more. We recently closed our Series C round and In total have raised around USD$180 million for our mission. Our team works tirelessly to make sure that we create the best healthcare solution personalised for all of our patient's needs, and are continuously on a path to simplify healthcare for Indonesia.
Join us
We are always looking out for top engineering talent across all roles for our tech team. If challenging problems that drive big impact enthral you, do reach out to us at careers.india@halodoc.com
We have a Security Responsible Disclosure Program and a dedicated security team that identify and report vulnerabilities in our products. If you feel you have identified any potential security threat our products or services, please feel free to write to us at security@halodoc.com.
Reference:
https://github.com/gophish/gophish
https://docs.getgophish.com/user-guide/what-is-gophish
https://medium.com/@IraqNoPhobia/how-to-make-a-free-phishing-server-with-aws-1e6146014243
https://medium.com/airwalk/practical-phishing-with-gophish-7dd384ad1840