Step by Step Guide to AWS EKS Upgrade with Zero Downtime
Amazon Elastic Kubernetes Service (Amazon EKS) is a fully managed Kubernetes service offering from AWS. At Halodoc, we rely on EKS to run our sensitive and mission critical applications because of the security, reliability and scalability that EKS offers. It provides high availability and scalability for the Control Plane to run across multiple availability zones (thus eliminating a single point of failure situation).
Since EKS is a fully managed service, EKS Updates deliver new features, design updates, and bug fixes. So, it is always recommended to update the EKS cluster once the new EKS version is released, unless your application requires a specific version of Kubernetes.
This blog post explains the steps to upgrade your EKS cluster from v1.14 to v1.15 with zero downtime.
EKS Update – Steps
Note: It is always recommended to test the behaviour of your application against new the Kubernetes version in a non-prod environment, before updating your production environment.
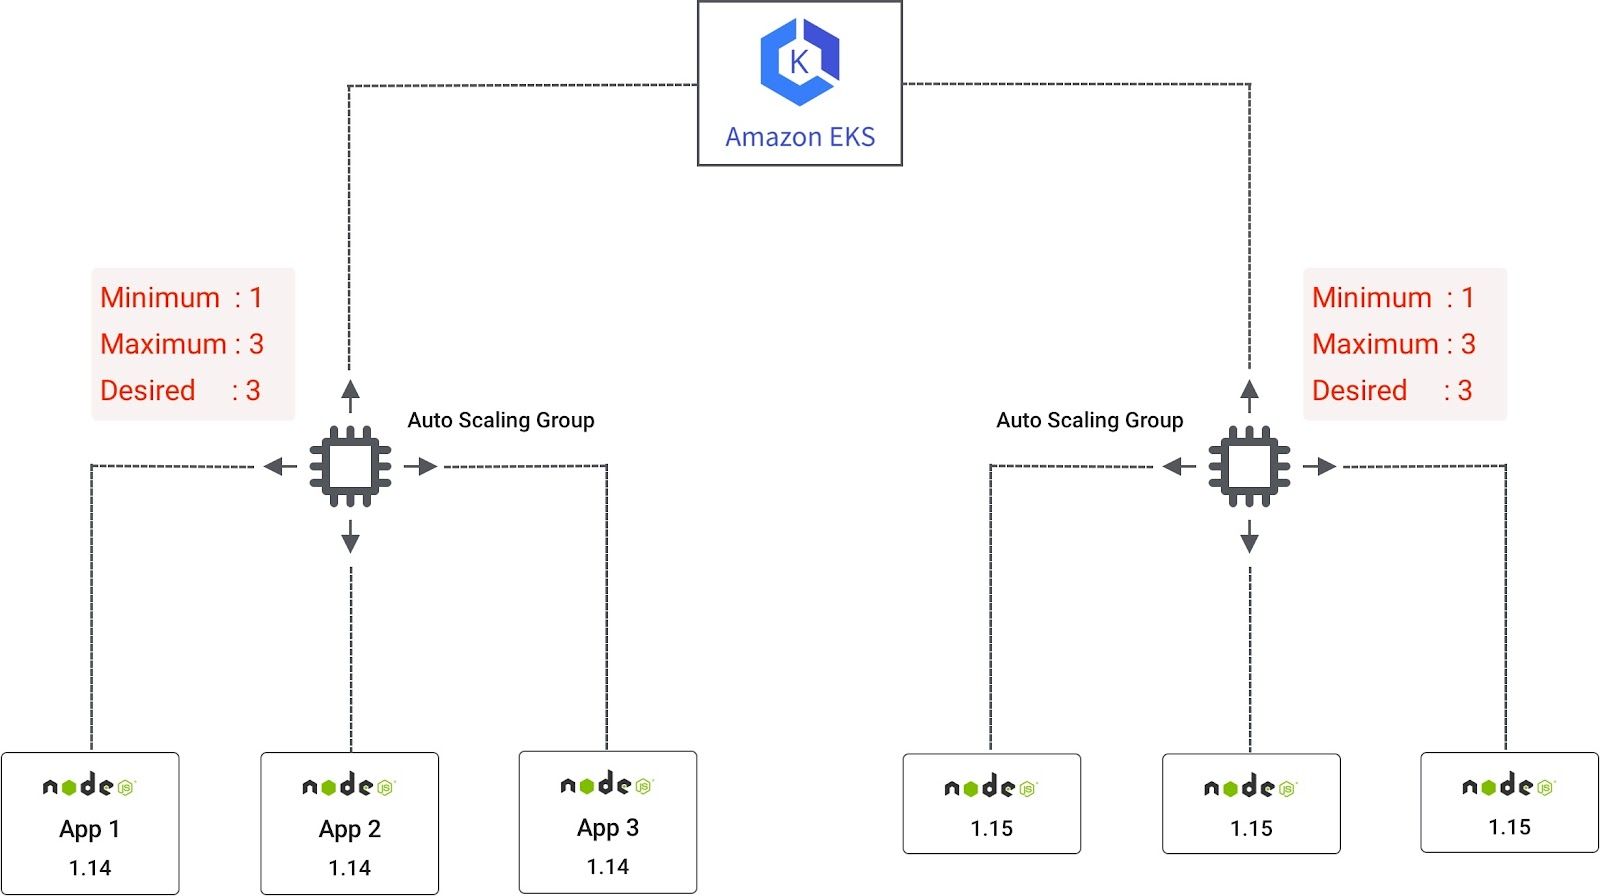
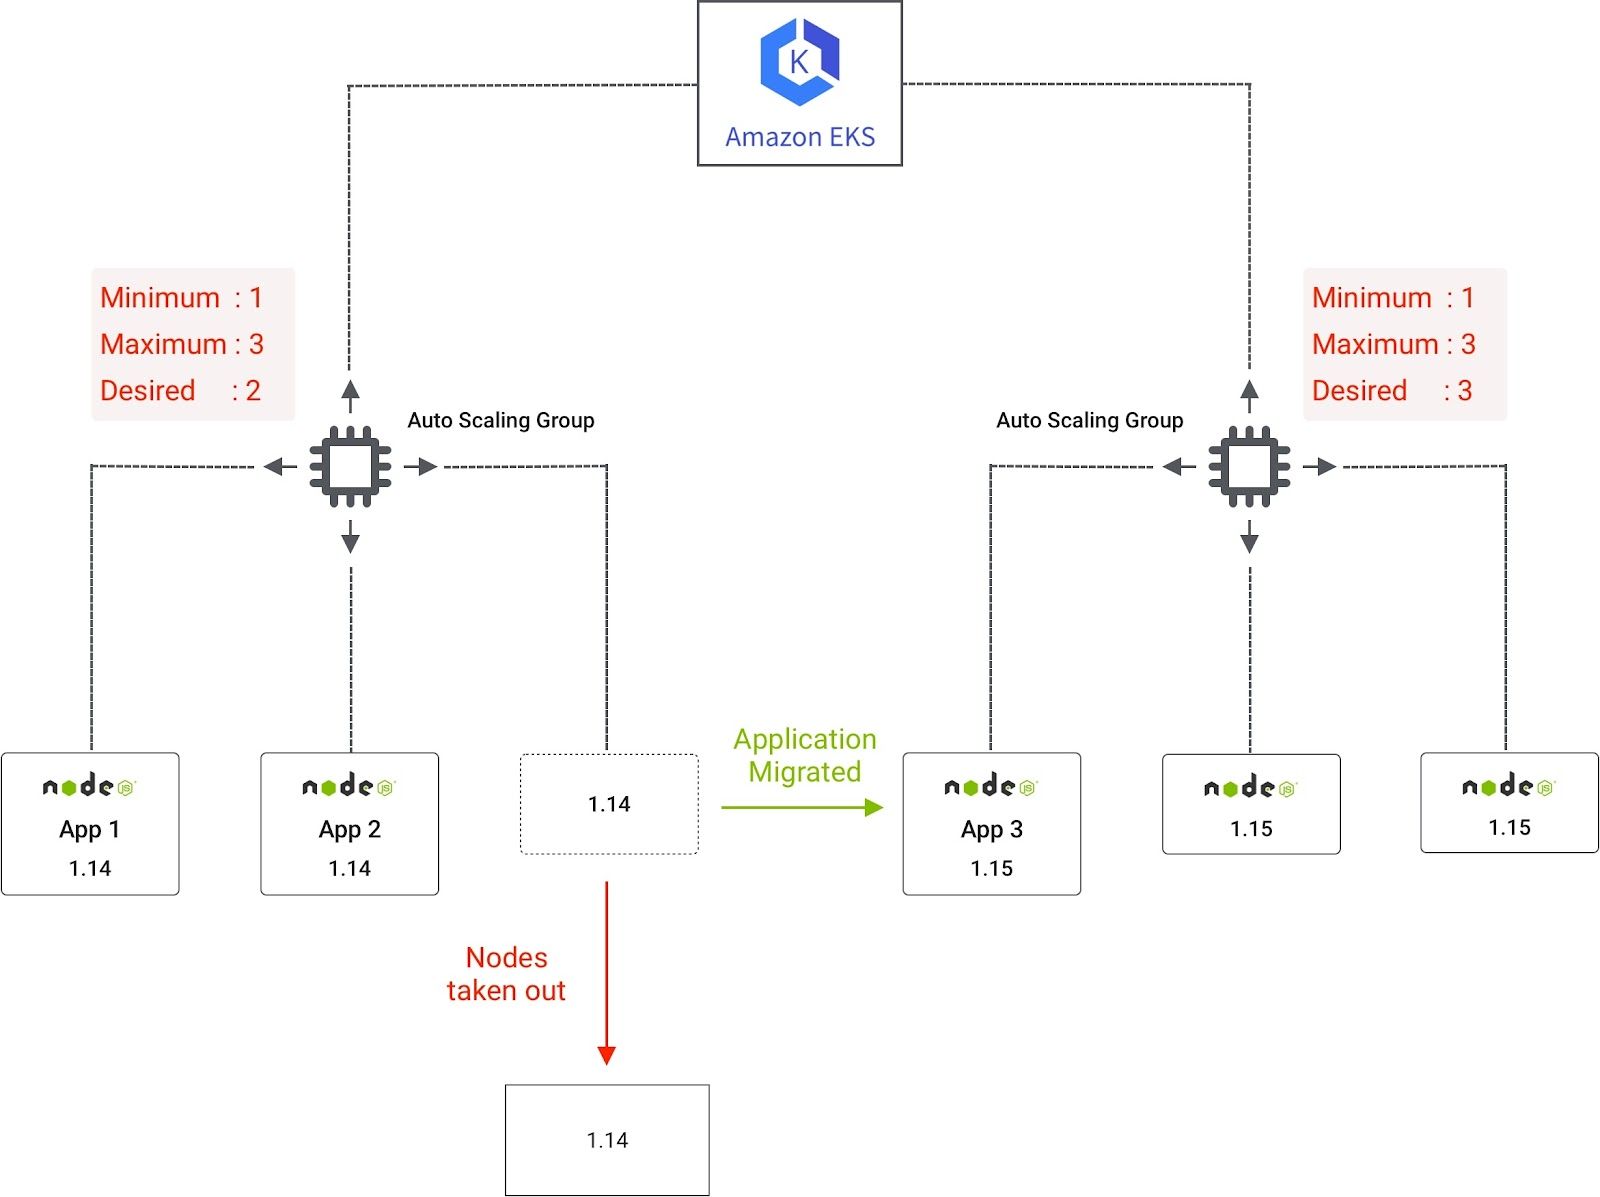
To update the EKS worker node , new Auto-scaling Group(ASG) with v1.15 of worker nodes needs to be created with a lifecycle=1.15 label. After creating a new worker node, we need to apply Pod Disruption Budget (PDB) to all our applications which will help 100 percent availability of our pod in case any disruption. We are using NodeSelector to migrate the application from version 1.14 to 1.15. Once the application is migrated to v1.15, because of cluster autoscaler, worker nodes based on version 1.14 will automatically be scaled down. When all the applications are migrated to v1.15 nodes, v1.14 worker nodes will be reduced to the minimum node count provided in the autoscaling configuration. This is explained in the image below.
Below are the detailed steps to upgrade the cluster as well as migration of applications to worker node from v1.14 to v1.15.
- Upgrade Control Plane
- Upgrade kube-proxy version
- Upgrade CoreDns version
- Upgrade Amazon VPC CNI version
- Upgrade Cluster AutoScaler version
- Apply pod disruptions budget (pdb)
- Edit Deployment for application
Step 1: Update control Plane
Before updating the Control plane, check the version of your Kubernetes cluster and worker node. If your worker node version is older than your current Kubernetes version, then you must update your worker node first then only proceed with updating your control plane.
Check Kubernetes Control Plane version and worker node from the following command:
kubectl version --short
kubectl get nodes
This will give you the node(s) and their version.
Since, Pod Security Policy(PSP) admission controller is enabled by default from 1.13 and later version of Kubernetes, we need to make sure that proper pod security policy is in place, before updating the Kubernetes version on the Control Plane.
Check the default security policy using the command below:
kubectl get psp eks.privileged
If you get any server error, then you must install psp. Below are the steps to install psp.
- Copy and create a file named psp.yml from this link. (follow the instruction in the section "To install or restore the default pod security policy")
2. Apply yml using the command below:
kubectl apply -f psp.yml
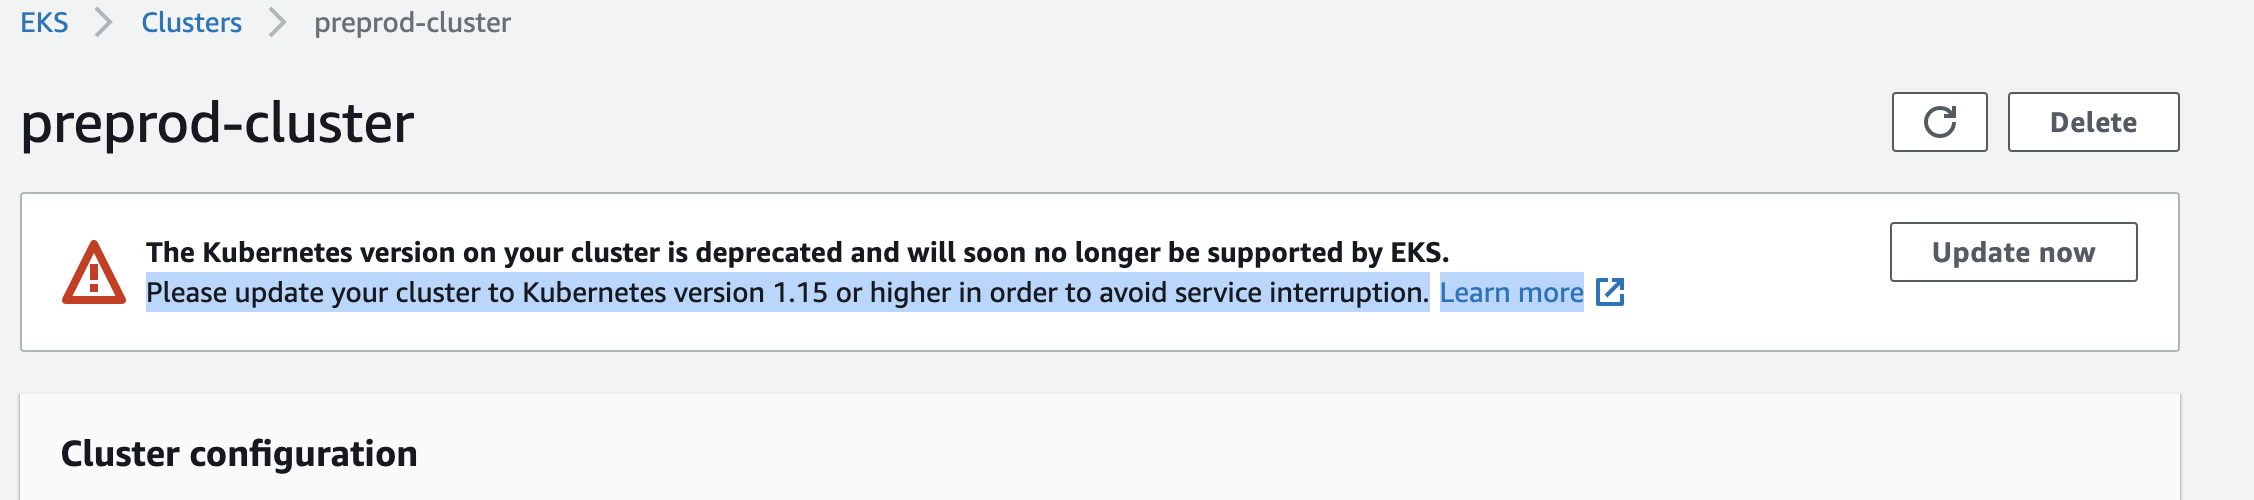
After applying all the changes, now update the cluster from AWS console.
- Login to AWS console and click on update now in the EKS cluster which you want to update. During the process of updating you cannot make any changes on your cluster and no scheduling of the nodes will take place. So, it is preferred to do this activity during non-peak, non-business hours.
- After the update, the IP of API server endpoint will change so, if there is any dependency on deployment with these IP then you must change old IPs with New IPs.
Step 2: Update kube-proxy version
We will patch the kube-proxy daemonset to use the image that corresponds to the cluster's Region and current Kubernetes version.
Retrieve the kube-proxy version:
kubectl get daemonset kube-proxy --namespace kube-system -o=jsonpath='{$.spec.template.spec.containers[:1].image}'
Update the kube-proxy:
kubectl set image daemonset.apps/kube-proxy -n kube-system kube-proxy=your-fqdn.com/eks/kube-proxy:v1.15.11
Step 3: Upgrade CoreDns version
Check if cluster is running on CoreDNS and its version:
kubectl get pod -n kube-system -l k8s-app=kube-dns

kubectl describe deployment coredns --namespace kube-system | grep Image | cut -d "/" -f 3
Upgrade CoreDns version:
kubectl edit configmap coredns -n kube-system
Replace the word proxy from the line containing /etc/resolve.conf with forward on the line. (if proxy is written)
forward . /etc/resolv.conf
Retrieve and replace CoreDNS version and URL in the command below:
kubectl get deployment coredns --namespace kube-system -o=jsonpath='{$.spec.template.spec.containers[:1].image}'
kubectl set image --namespace kube-system deployment.apps/coredns
coredns=your-fqdn.com/eks/coredns:v1.6.6
Step 4: Upgrade Amazon VPC CNI version
Check the version of the VPC CNI:
kubectl describe daemonset aws-node --namespace kube-system | grep Image | cut -d "/" -f 2
Update VPC CNI version:
curl -o aws-k8s-cni.yaml https://raw.githubusercontent.com/aws/amazon-vpc-cni-k8s/release-1.6/config/v1.6/aws-k8s-cni.yaml
sed -i -e 's/us-west-2/region-code/' aws-k8s-cni.yaml
(change the region-code to the region you are using)
kubectl apply -f aws-k8s-cni.yaml
Step 5: Upgrade Cluster AutoScaler
Check the latest release of the ClusterScaler for the 1.15 version and run the command by replacing the version. Refer link for the latest release of cluster autoscaler:
kubectl -n kube-system set image deployment.apps/cluster-autoscaler cluster-autoscaler=asia.gcr.io/k8s-artifacts-prod/autoscaling/cluster-autoscaler:v1.15.6
We have finally updated our control plane. Now, we must migrate all our pods to the latest version of the new worker nodes.
Now, Create a node group with the node selector as ‘--node-labels=lifecycle=1.15'. To do this you can pass this value as an extra argument in user data of the newly created worker node with AMI version 1.15.
You can validate if the node selector is implemented on the worker node or not by running below command:
kubectl get nodes --label-columns=lifecycle --selector=lifecycle=1.15
Step 6: Create pdb (Pod disruptions Budget) for all the services
Create pdb.yml file same as below:
apiVersion: policy/v1beta1
kind: PodDisruptionBudget
metadata:
  name: service-name-pdb
  namespace: namespace
spec:
  minAvailable: 100%
  selector:
    matchLabels:
      app.kubernetes.io/name: service-name
(Service-name and namespace is the name of your service and Namespaces which is deployed on k8s. Replace the value)
Apply pdb file:
kubectl apply -f pdb.yml
Validate if pdb applied for the namespace using the command below:
kubectl describe pdb pdb_name -n namespace
Step 7: Edit deployment for applications
Edit the deployment with the NodeSelector which we have given for the newly created Node:
kubectl edit deploy deployment_name -n namespaces
spec:
  nodeSelector:      	--- add this line
     lifecycle: “1.15”   --- add this line
  containers:
This will create new pods on different nodes which have lifecycle=1.15 node label. Once the application comes up, the old pods will automatically be deleted. Once all the applications are migrated to v1.15, because of cluster autoscaler, worker nodes based on version 1.14 will automatically be scaled down.
This needs to be done for each of the services running on older version of kubernetes.
Summary
In this blog, we have provided step by step guidelines to upgrade EKS cluster with zero downtime. Here we have implemented Pod Disruptions Budget to all our applications which will minimize downtime in case of any disruption. Also, to avoid downtime for migrating application for one service to another we have used NodeSelector which allows scheduling a Pod onto a node whose labels match the nodeSelector labels specified.
Join us
We are always looking out for top engineering talent across all roles for our tech team. If challenging problems that drive big impact enthral you, do reach out to us at careers.india@halodoc.com
About Halodoc
Halodoc is the number 1 all around Healthcare application in Indonesia. Our mission is to simplify and bring quality healthcare across Indonesia, from Sabang to Merauke. We connect 20,000+ doctors with patients in need through our Tele-consultation service. We partner with 3500+ pharmacies in 100+ cities to bring medicine to your doorstep. We've also partnered with Indonesia's largest lab provider to provide lab home services, and to top it off we have recently launched a premium appointment service that partners with 500+ hospitals that allow patients to book a doctor appointment inside our application. We are extremely fortunate to be trusted by our investors, such as the Bill & Melinda Gates Foundation, Singtel, UOB Ventures, Allianz, GoJek and many more. We recently closed our Series B round and In total have raised USD$100million for our mission. Our team works tirelessly to make sure that we create the best healthcare solution personalised for all of our patient's needs, and are continuously on a path to simplify healthcare for Indonesia.
References:
https://docs.aws.amazon.com/eks/latest/userguide/update-cluster.html