
Automated Testing of Android app with AWS device farm
At Halodoc, we intend to provide convenience and speed to our customers via our apps. Testing our apps on devices with different screen sizes, resolutions, and capabilities ranging across versions and OS is crucial and thus we treat this as utmost priority.
In order to make sure that our app behaviour is consistent across wide range of devices, a comprehensive automated testing strategy allows us to make use of device labs or device farms infrastructure.
A device farm is a testing environment that allows QAs to remotely test the performance of mobile apps on a significant number of real devices. It offers access to both modern and legacy versions of devices from multiple manufacturers. Furthermore, these devices come with pre-installed OS and browsers.
Multiple device farm vendors are available in the market. When choosing the vendor we considered the following - range of devices supported for both Android and iOS, testing framework support along with debugging and reporting capabilities. We zeroed in on AWS device farm as best fit for our needs.
AWS device farm
AWS Device Farm is an application testing service. It lets you improve the quality of your web and mobile apps by testing them across an extensive range of desktop browsers and real mobile devices. Additionally, you do not have to manage any testing infrastructure.
AWS device farms allow application testing in two modes:
- Automated Testing : Allows you to upload your own tests packages or to use AWS built-in, script-free compatibility tests.
- Remote Access : You can upload your app and interact with a device through your web browser in real-time.
We used automated testing, which helped to test our app in parallel against a massive collection of physical devices in the AWS Cloud.
Automated Testing of Android app with AWS device farm
Pre-requisites
- Appium
- Cucumber
- TestNG
- IAM user account and access to device farm console
Writing TestNG Tests using Appium elements and Cucumber specifications
Configure scripts
- Set up pom.xml
Here we will go through the plugins and dependencies to be added to our pom.xml file that is required to work with AWS device farm.
The first thing to do is to make sure that your pom.xml file contains the following line:<packaging>jar</packaging>
This line indicates that you will be building your Maven project into a single compressed JAR output file. For the same reason, make sure to add following maven-jar plugin.
jar: Allows to package our main classes as a jar filetest-jar: Allows to package our test classes as a jar file
<plugin>
  <groupId>org.apache.maven.plugins</groupId>
  <artifactId>maven-jar-plugin</artifactId>
  <version>2.6</version>
  <executions>
    <execution>
      <goals>
        <goal>test-jar</goal>
      </goals>
    </execution>
  </executions>
</plugin>
Define the dependencies for Appium, TestNG and cucumber
<dependencies>
    <dependency>
        <groupId>org.testng</groupId>
        <artifactId>testng</artifactId>
        <version>6.11</version>
        <scope>test</scope>
    </dependency>
    <dependency>
        <groupId>io.appium</groupId>
        <artifactId>java-client</artifactId>
        <version>4.1.2</version>
    </dependency>
</dependencies>
<dependency>
    <groupId>info.cukes</groupId>
    <artifactId>cucumber-java</artifactId>
    <version>1.2.5</version>
    <scope>test</scope>
</dependency>
<dependency>
    <groupId>info.cukes</groupId>
    <artifactId>cucumber-testng</artifactId>
    <version>1.2.4</version>
</dependency>
Plugin below makes sure that all of the dependencies for your project gets included with the resultant JAR file.
<plugin>
  <groupId>org.apache.maven.plugins</groupId>
  <artifactId>maven-dependency-plugin</artifactId>
  <version>2.10</version>
  <executions>
    <execution>
      <id>copy-dependencies</id>
      <phase>package</phase>
      <goals>
        <goal>copy-dependencies</goal>
      </goals>
      <configuration>
        <outputDirectory>${project.build.directory}/dependency-jars/</outputDirectory>
      </configuration>
    </execution>
  </executions>
</plugin>
The below plugin is the assembly tool to parse your instruction file.
<plugin>
  <artifactId>maven-assembly-plugin</artifactId>
  <version>2.5.4</version>
  <executions>
    <execution>
      <phase>package</phase>
      <goals>
        <goal>single</goal>
      </goals>
      <configuration>
        <finalName>zip-with-dependencies</finalName>
        <appendAssemblyId>false</appendAssemblyId>
        <descriptors>
          <descriptor>src/main/assembly/zip.xml</descriptor>
        </descriptors>
      </configuration>
    </execution>
  </executions>
</plugin>
2. Create a file called zip.xml in the following path src/main/assembly/zip.xml with below Assembly
<assembly
    xmlns="http://maven.apache.org/plugins/maven-assembly-plugin/assembly/1.1.0"
    xmlns:xsi="http://www.w3.org/2001/XMLSchema-instance"
    xsi:schemaLocation="http://maven.apache.org/plugins/maven-assembly-plugin/assembly/1.1.0 http://maven.apache.org/xsd/assembly-1.1.0.xsd">
  <id>zip</id>
  <formats>
    <format>zip</format>
  </formats>
  <includeBaseDirectory>false</includeBaseDirectory>
  <fileSets>
    <fileSet>
      <directory>${project.build.directory}</directory>
      <outputDirectory>./</outputDirectory>
      <includes>
        <include>*.jar</include>
      </includes>
    </fileSet>
    <fileSet>
      <directory>${project.build.directory}</directory>
      <outputDirectory>./</outputDirectory>
      <includes>
        <include>/dependency-jars/</include>
      </includes>
    </fileSet>
  </fileSets>
</assembly>
3. Set up your project
Add the feature files to the resources folder in the following path src/test/resources:
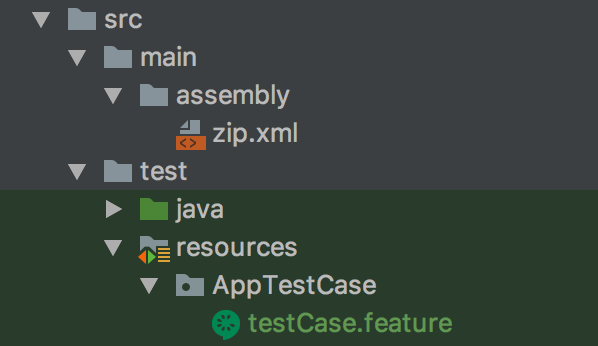
Similarly add data providers (property files which includes location, test data files etc.) to the same path as that of feature files.
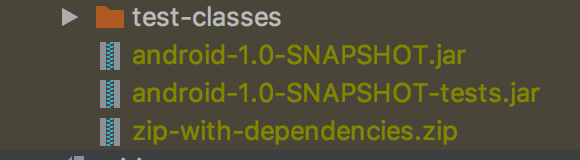
4. Run mvn clean command which helps to clear out the previous JAR files created
5. Run mvn -DskipTests package command which helps to run the script to generate JAR file by skipping running the test cases. We need to include our files and folders in such a way that when the zip file is generated after the build is successful, it includes all the necessary jar files required for execution of our tests.
Note: We can check for the jar files in the zip file generated by using JD-GUI application.
Uploading test package and start running on AWS Device Farm:
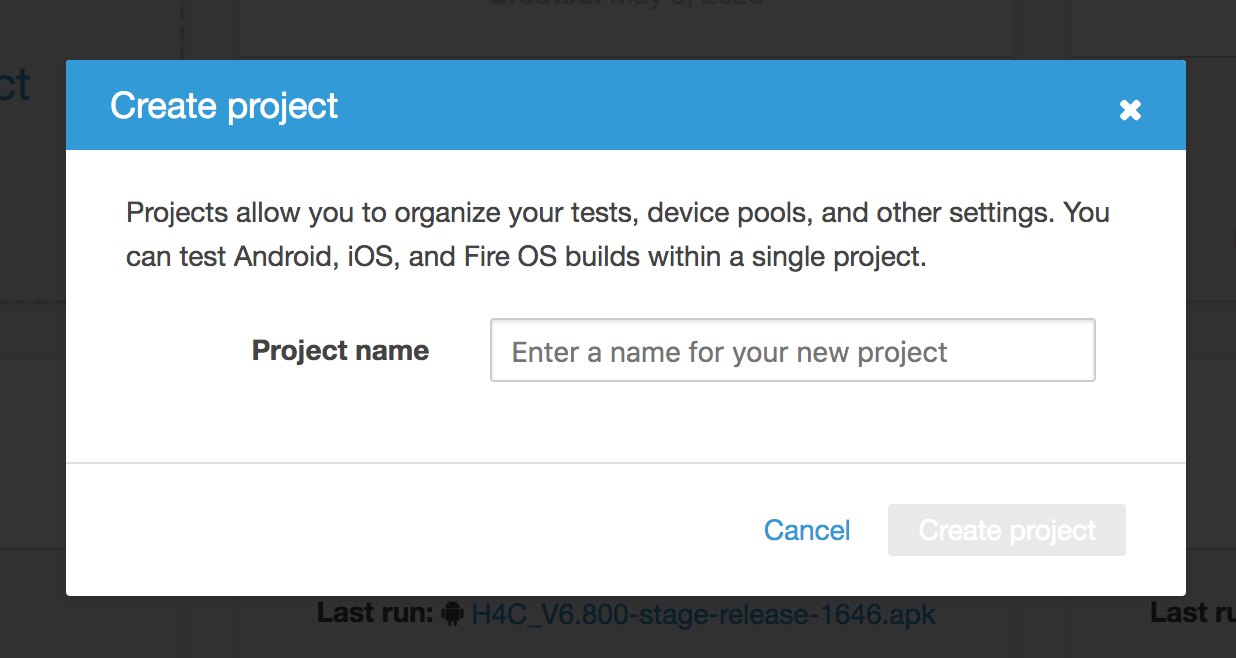
- To upload the test package and run on device farm, first you need to have IAM user account on AWS with write permission access.
- Then go to device farm console and create a new project by giving the name of your project.
3. Create a new run where you will have 5 steps to complete to run your test package.

Upload your .apk file to be tested.
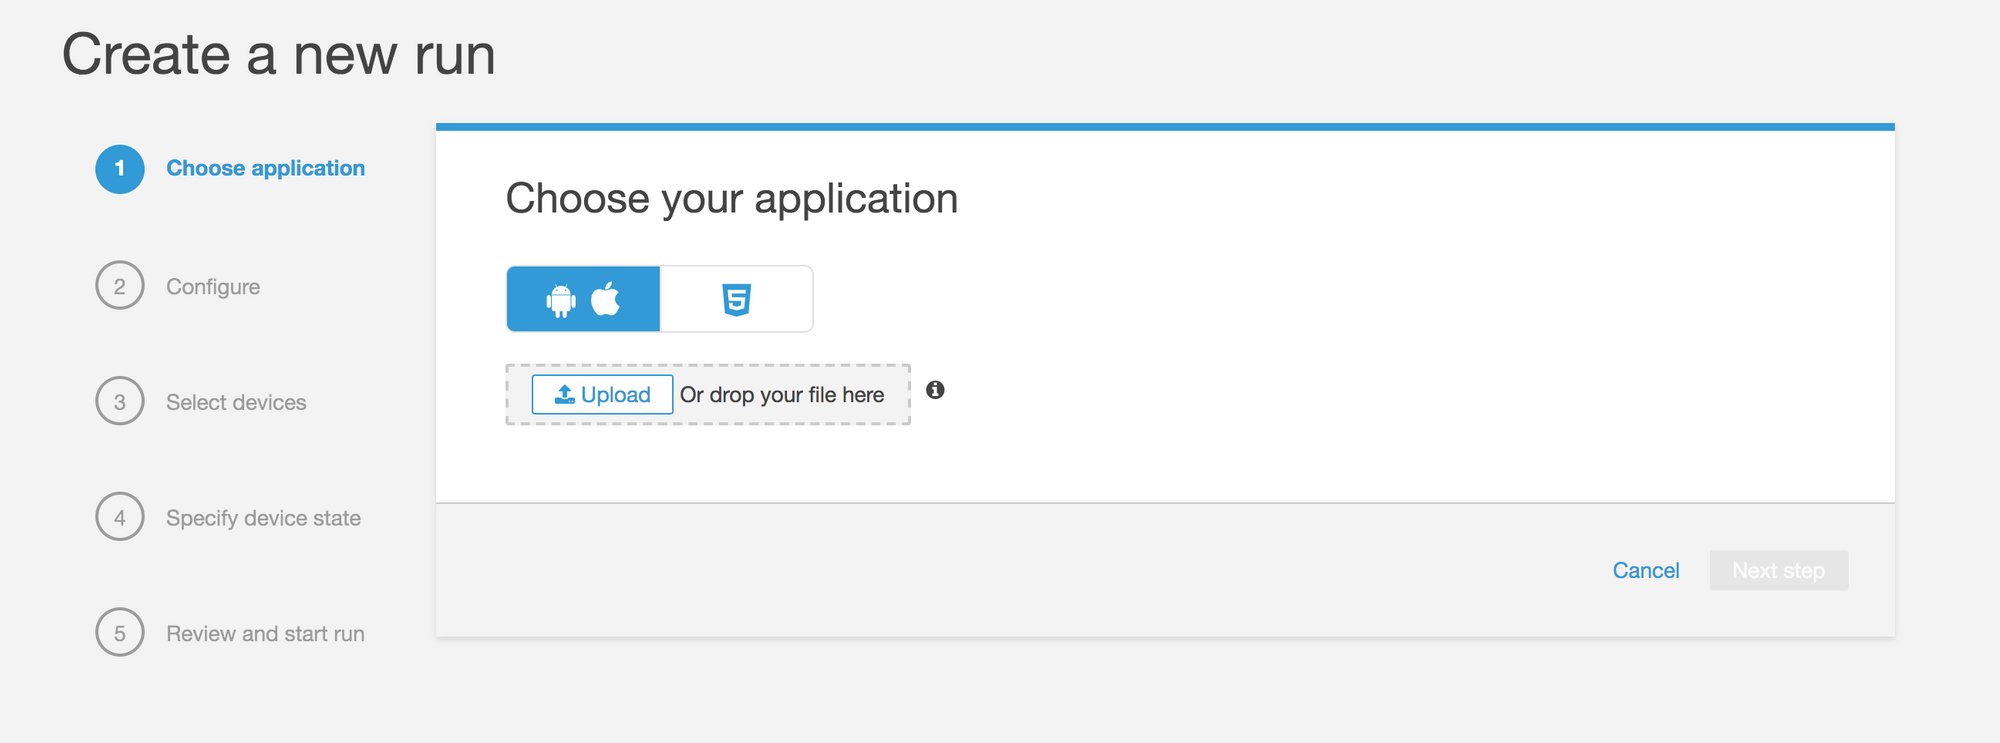
Here in this step choose Appium Java TestNG and then upload your zip file generated for your test package.
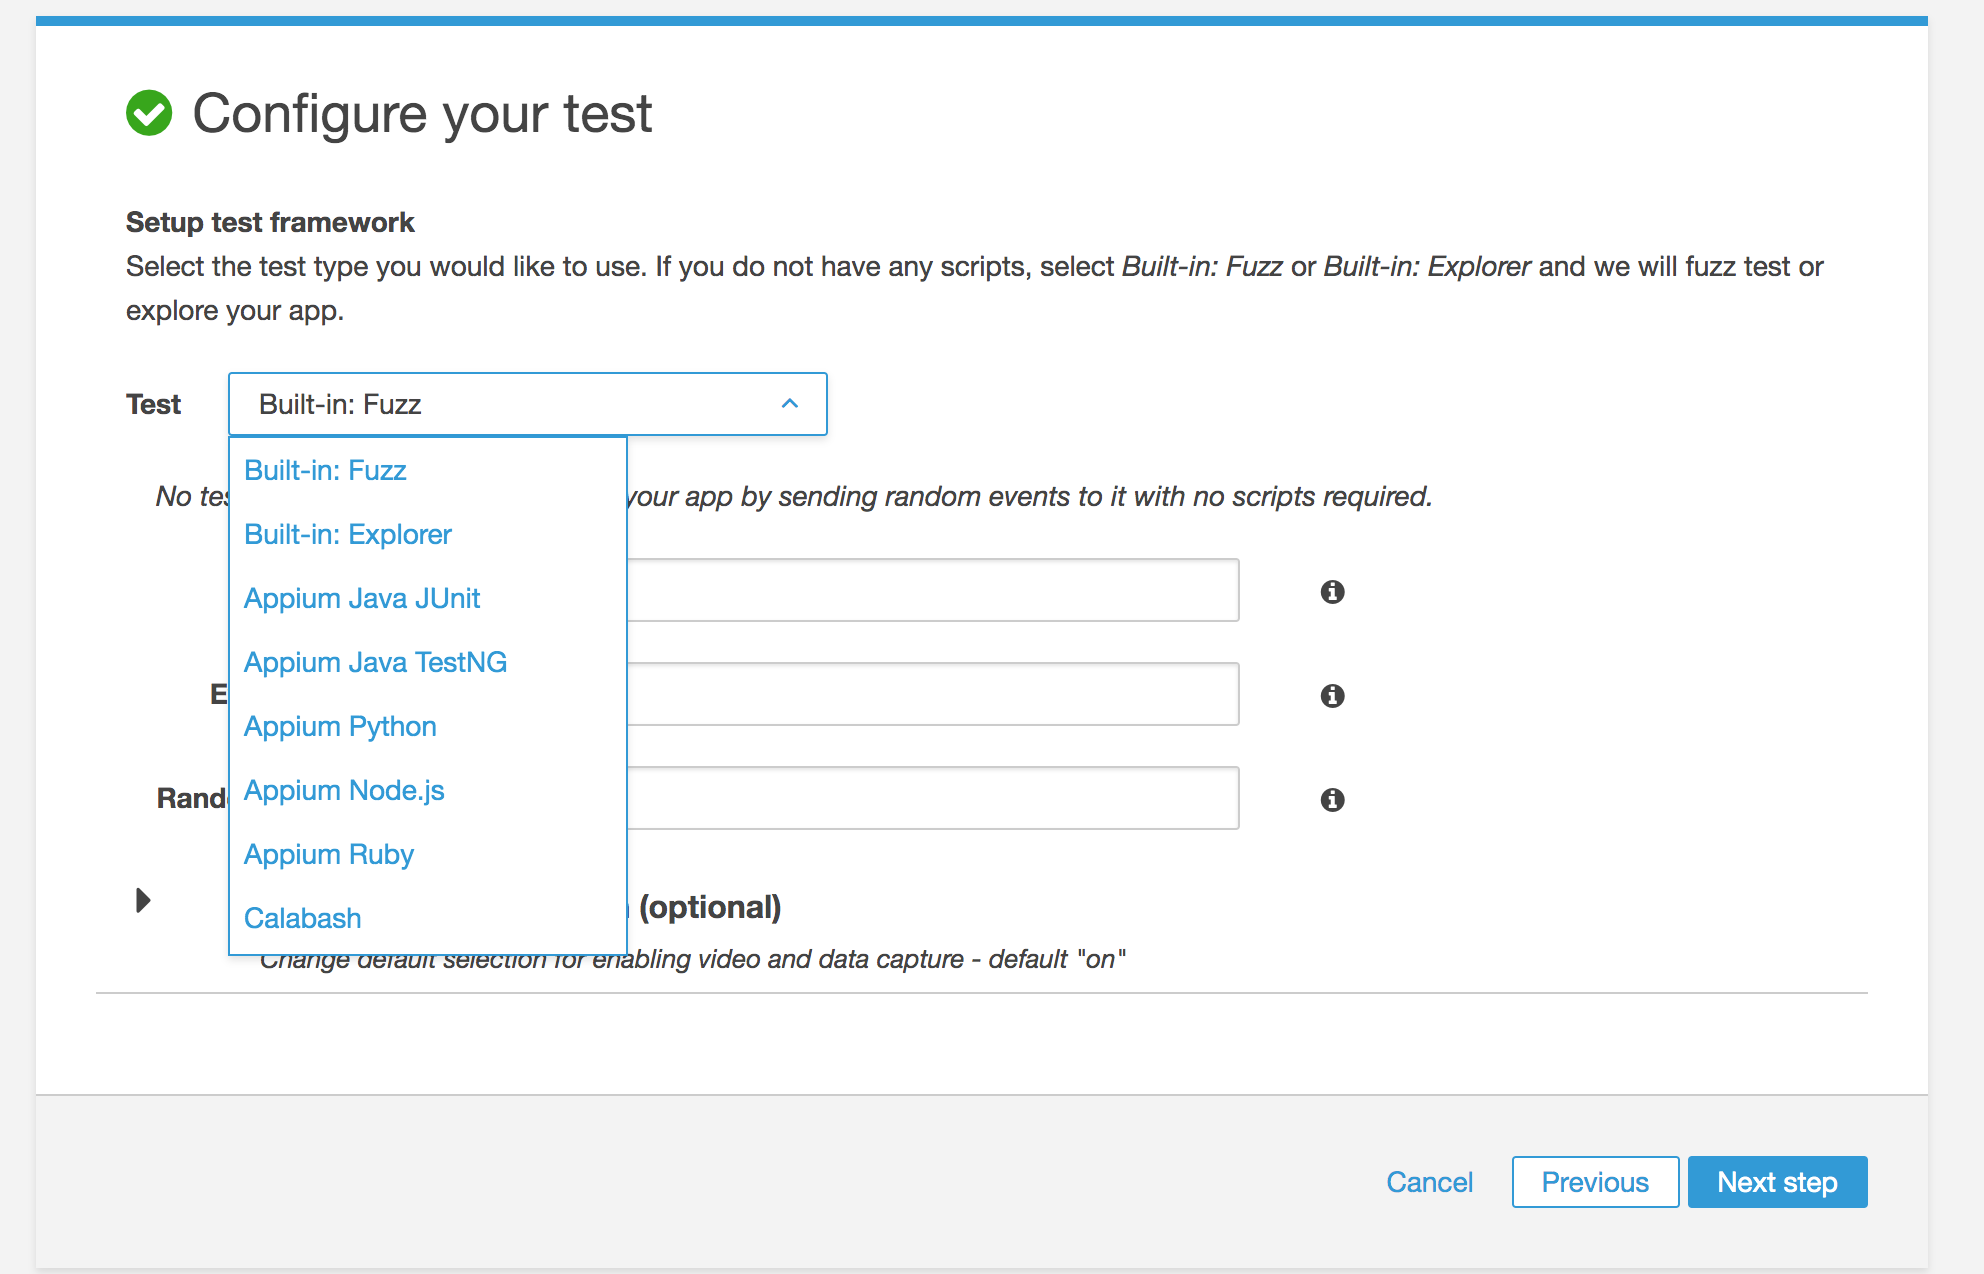
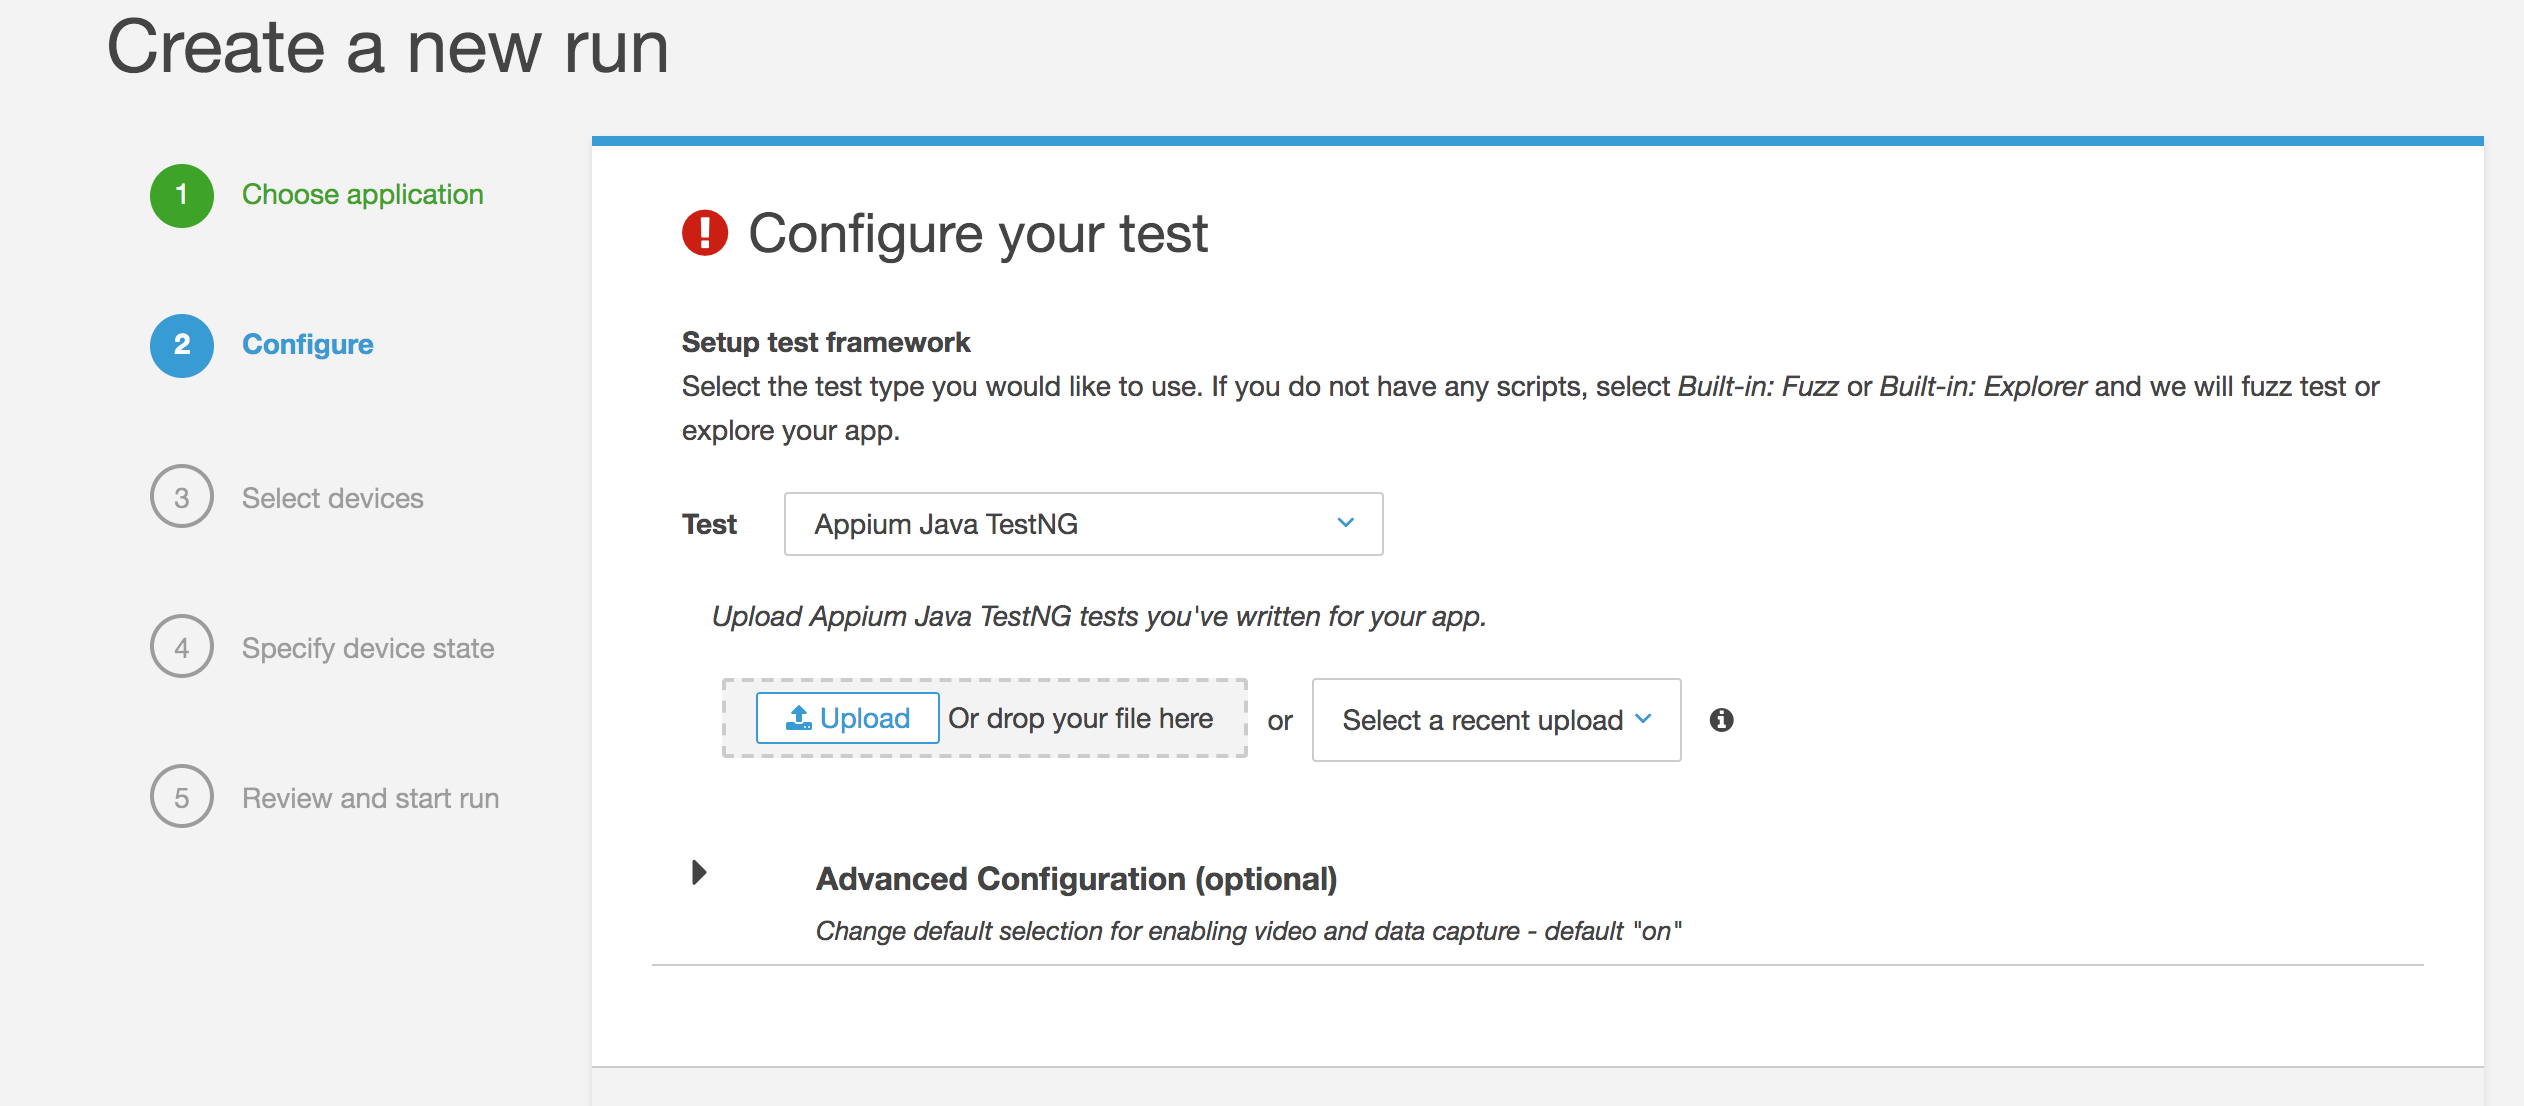
Once your zip file is uploaded, then you can select the execution environment you want to run your tests. Here we will select a custom environment and select the default test specification provided by AWS device farm. You can also modify it accordingly depending on your need.

We modified test specifications as below:
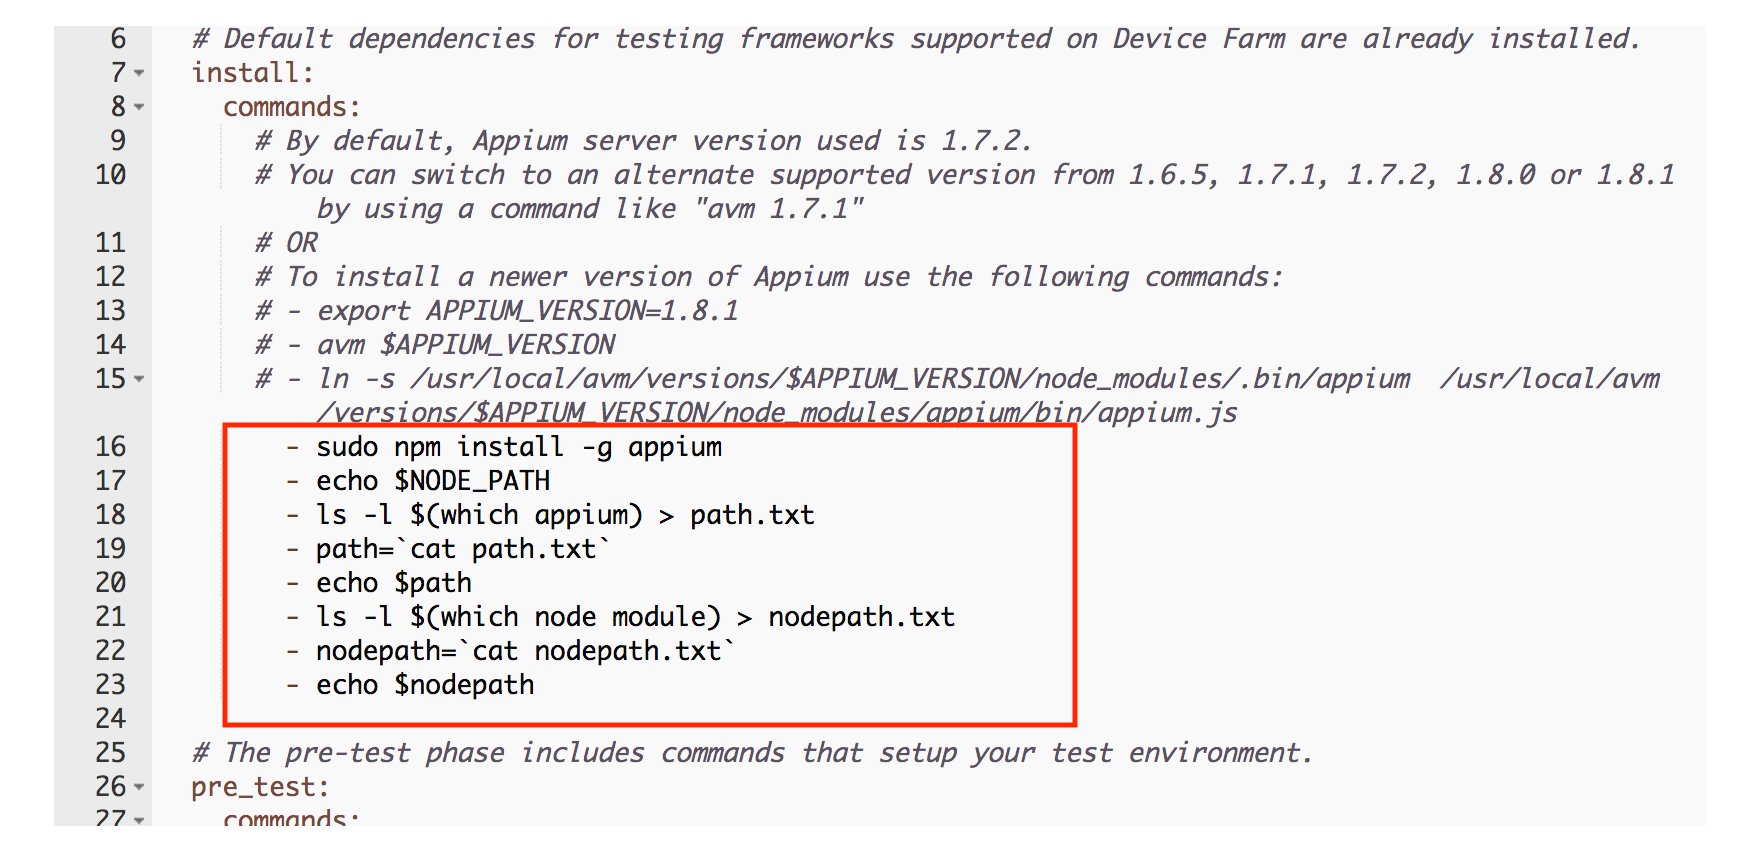
Note: The above modification is required only in case of error with installed nodes.
In the next step select devices that you would like to run your tests on. You can choose one or more devices as your test pool.
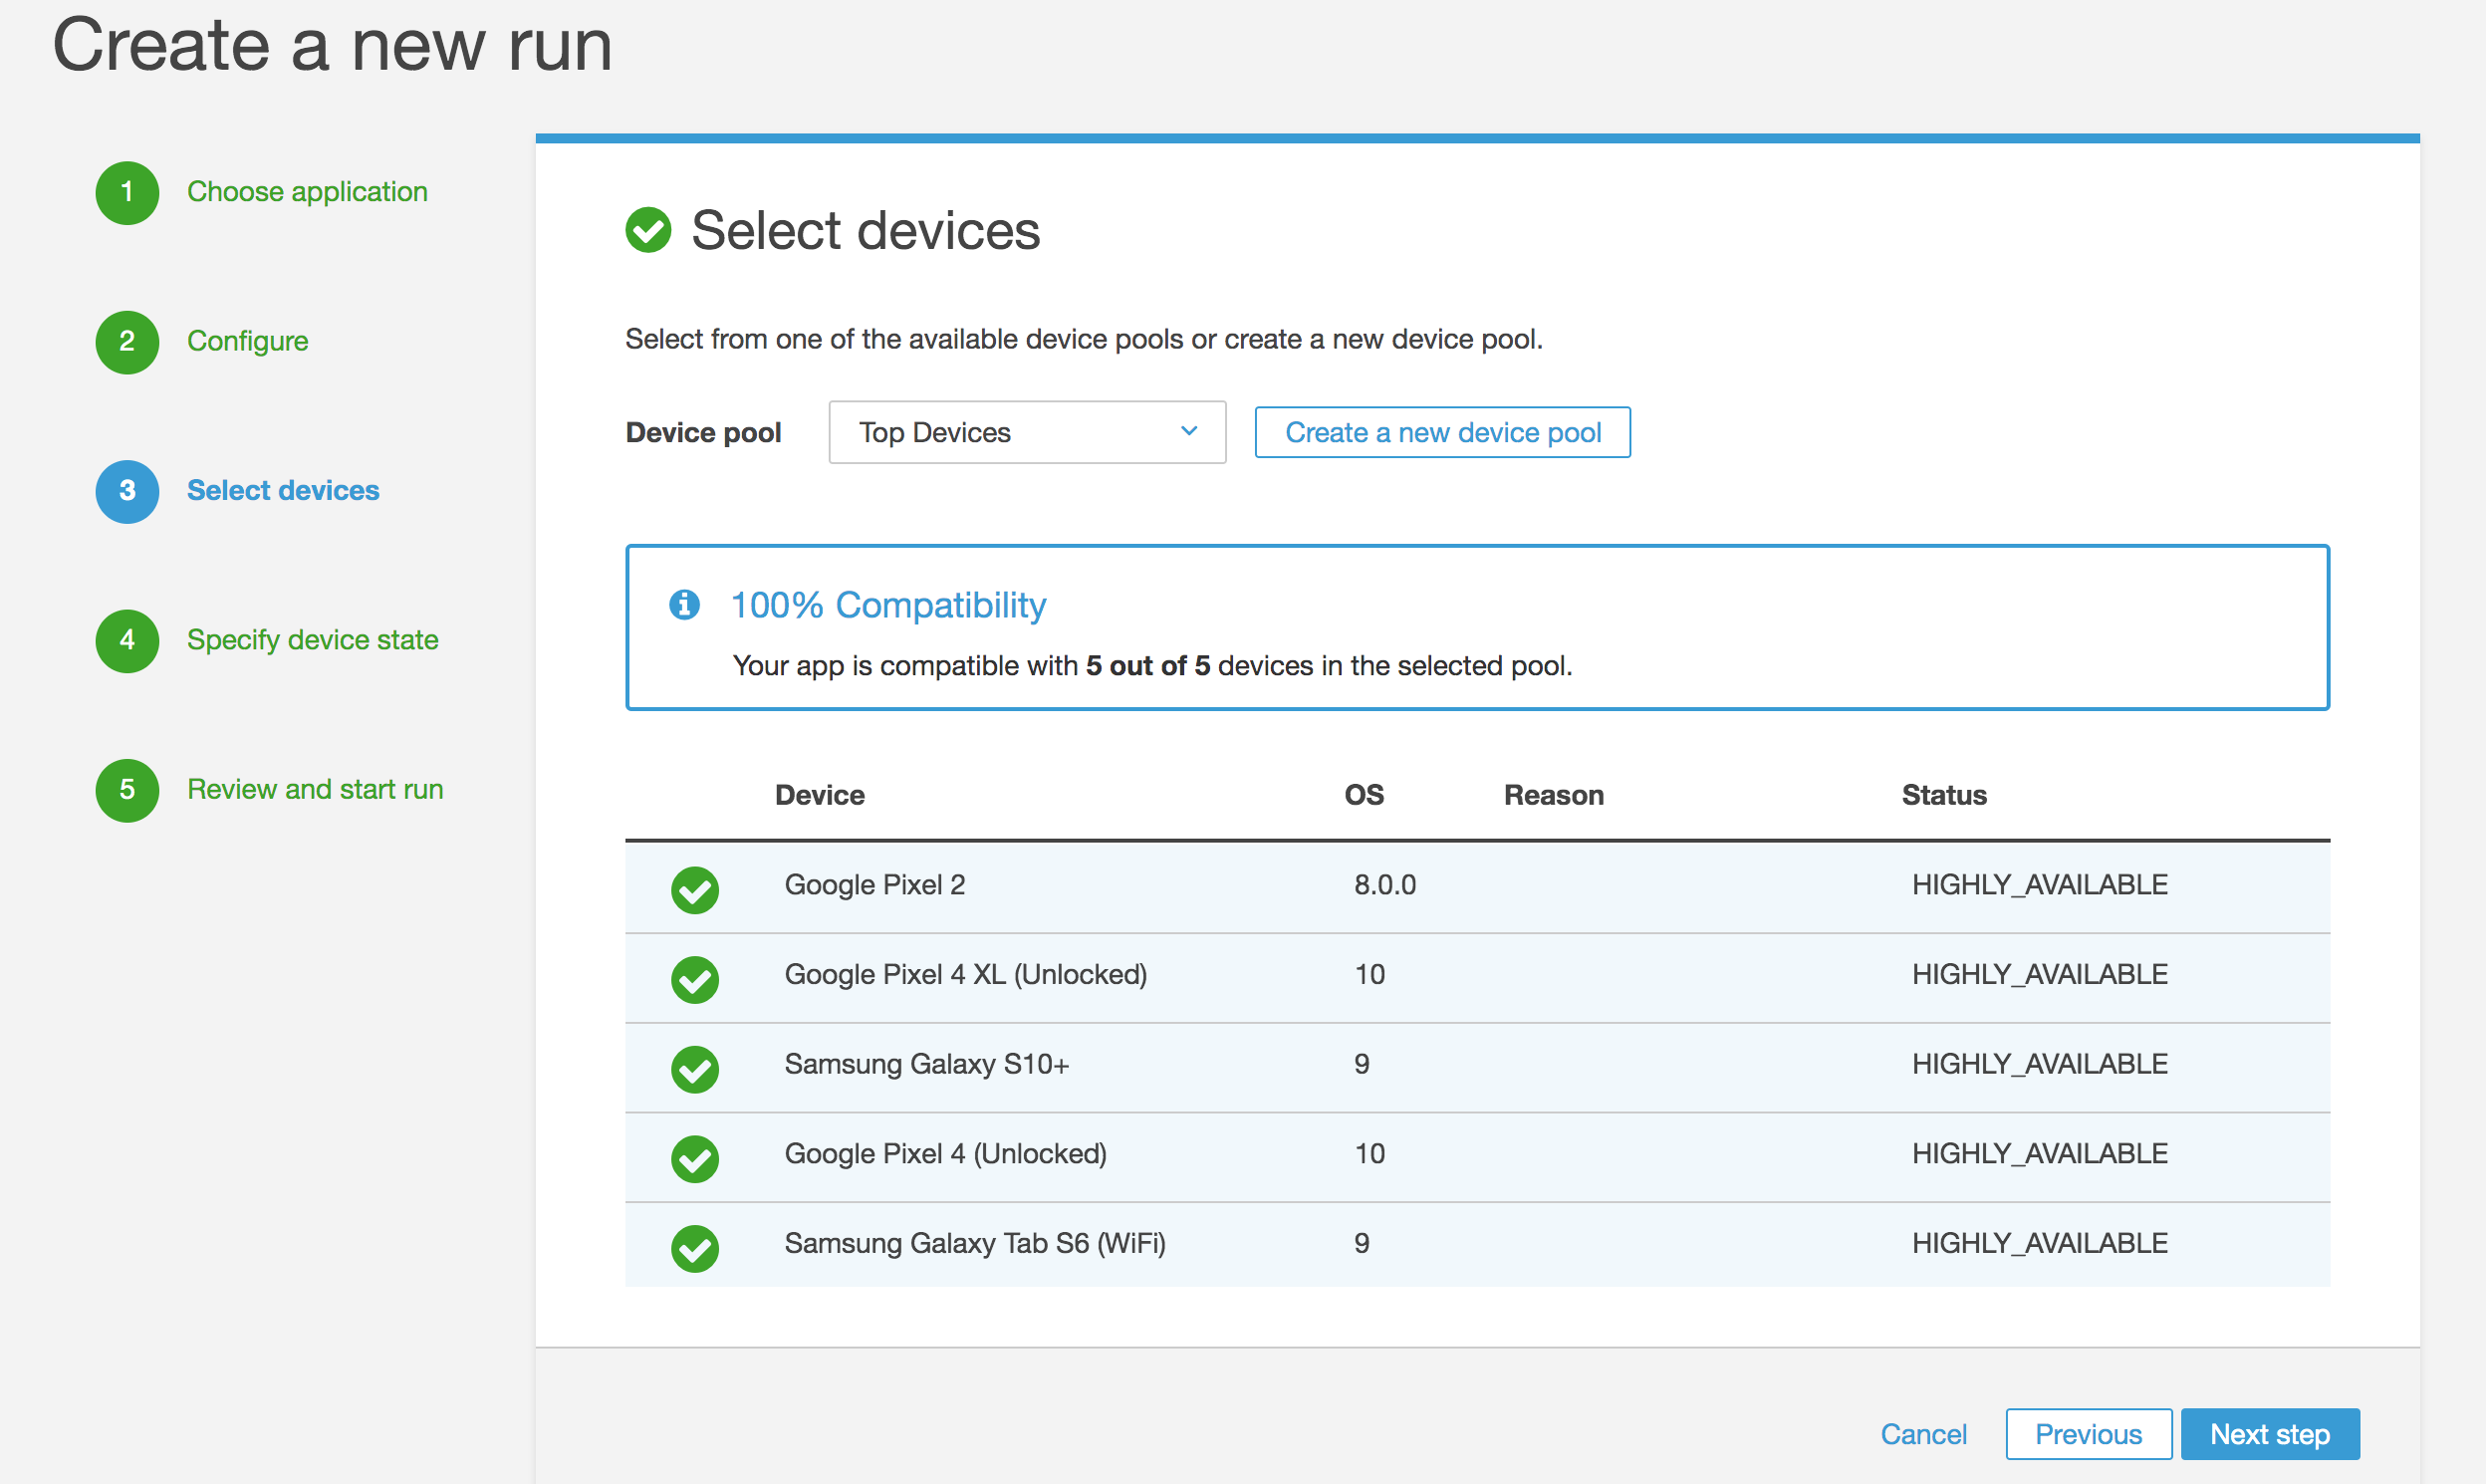
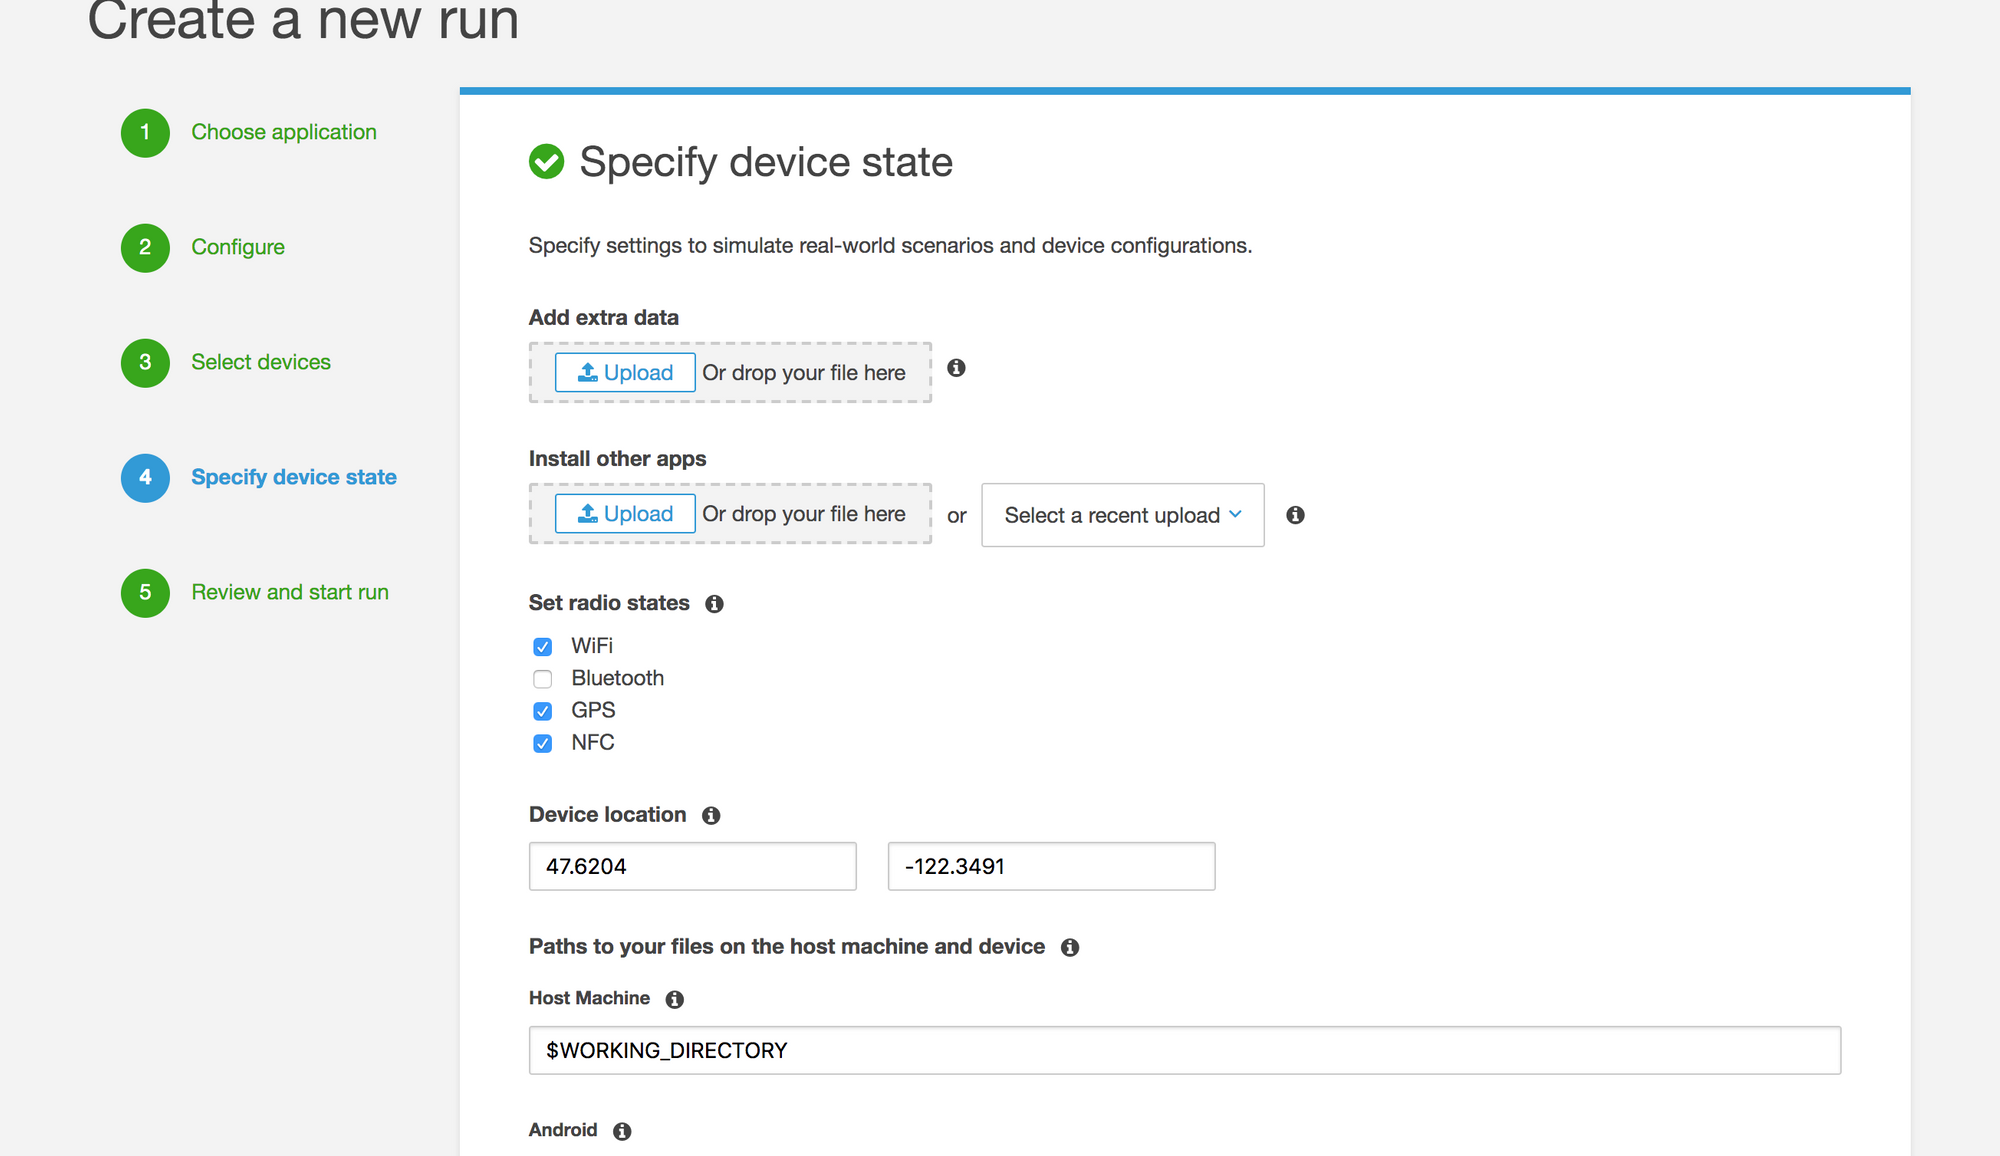
Select device state[choosing default here]
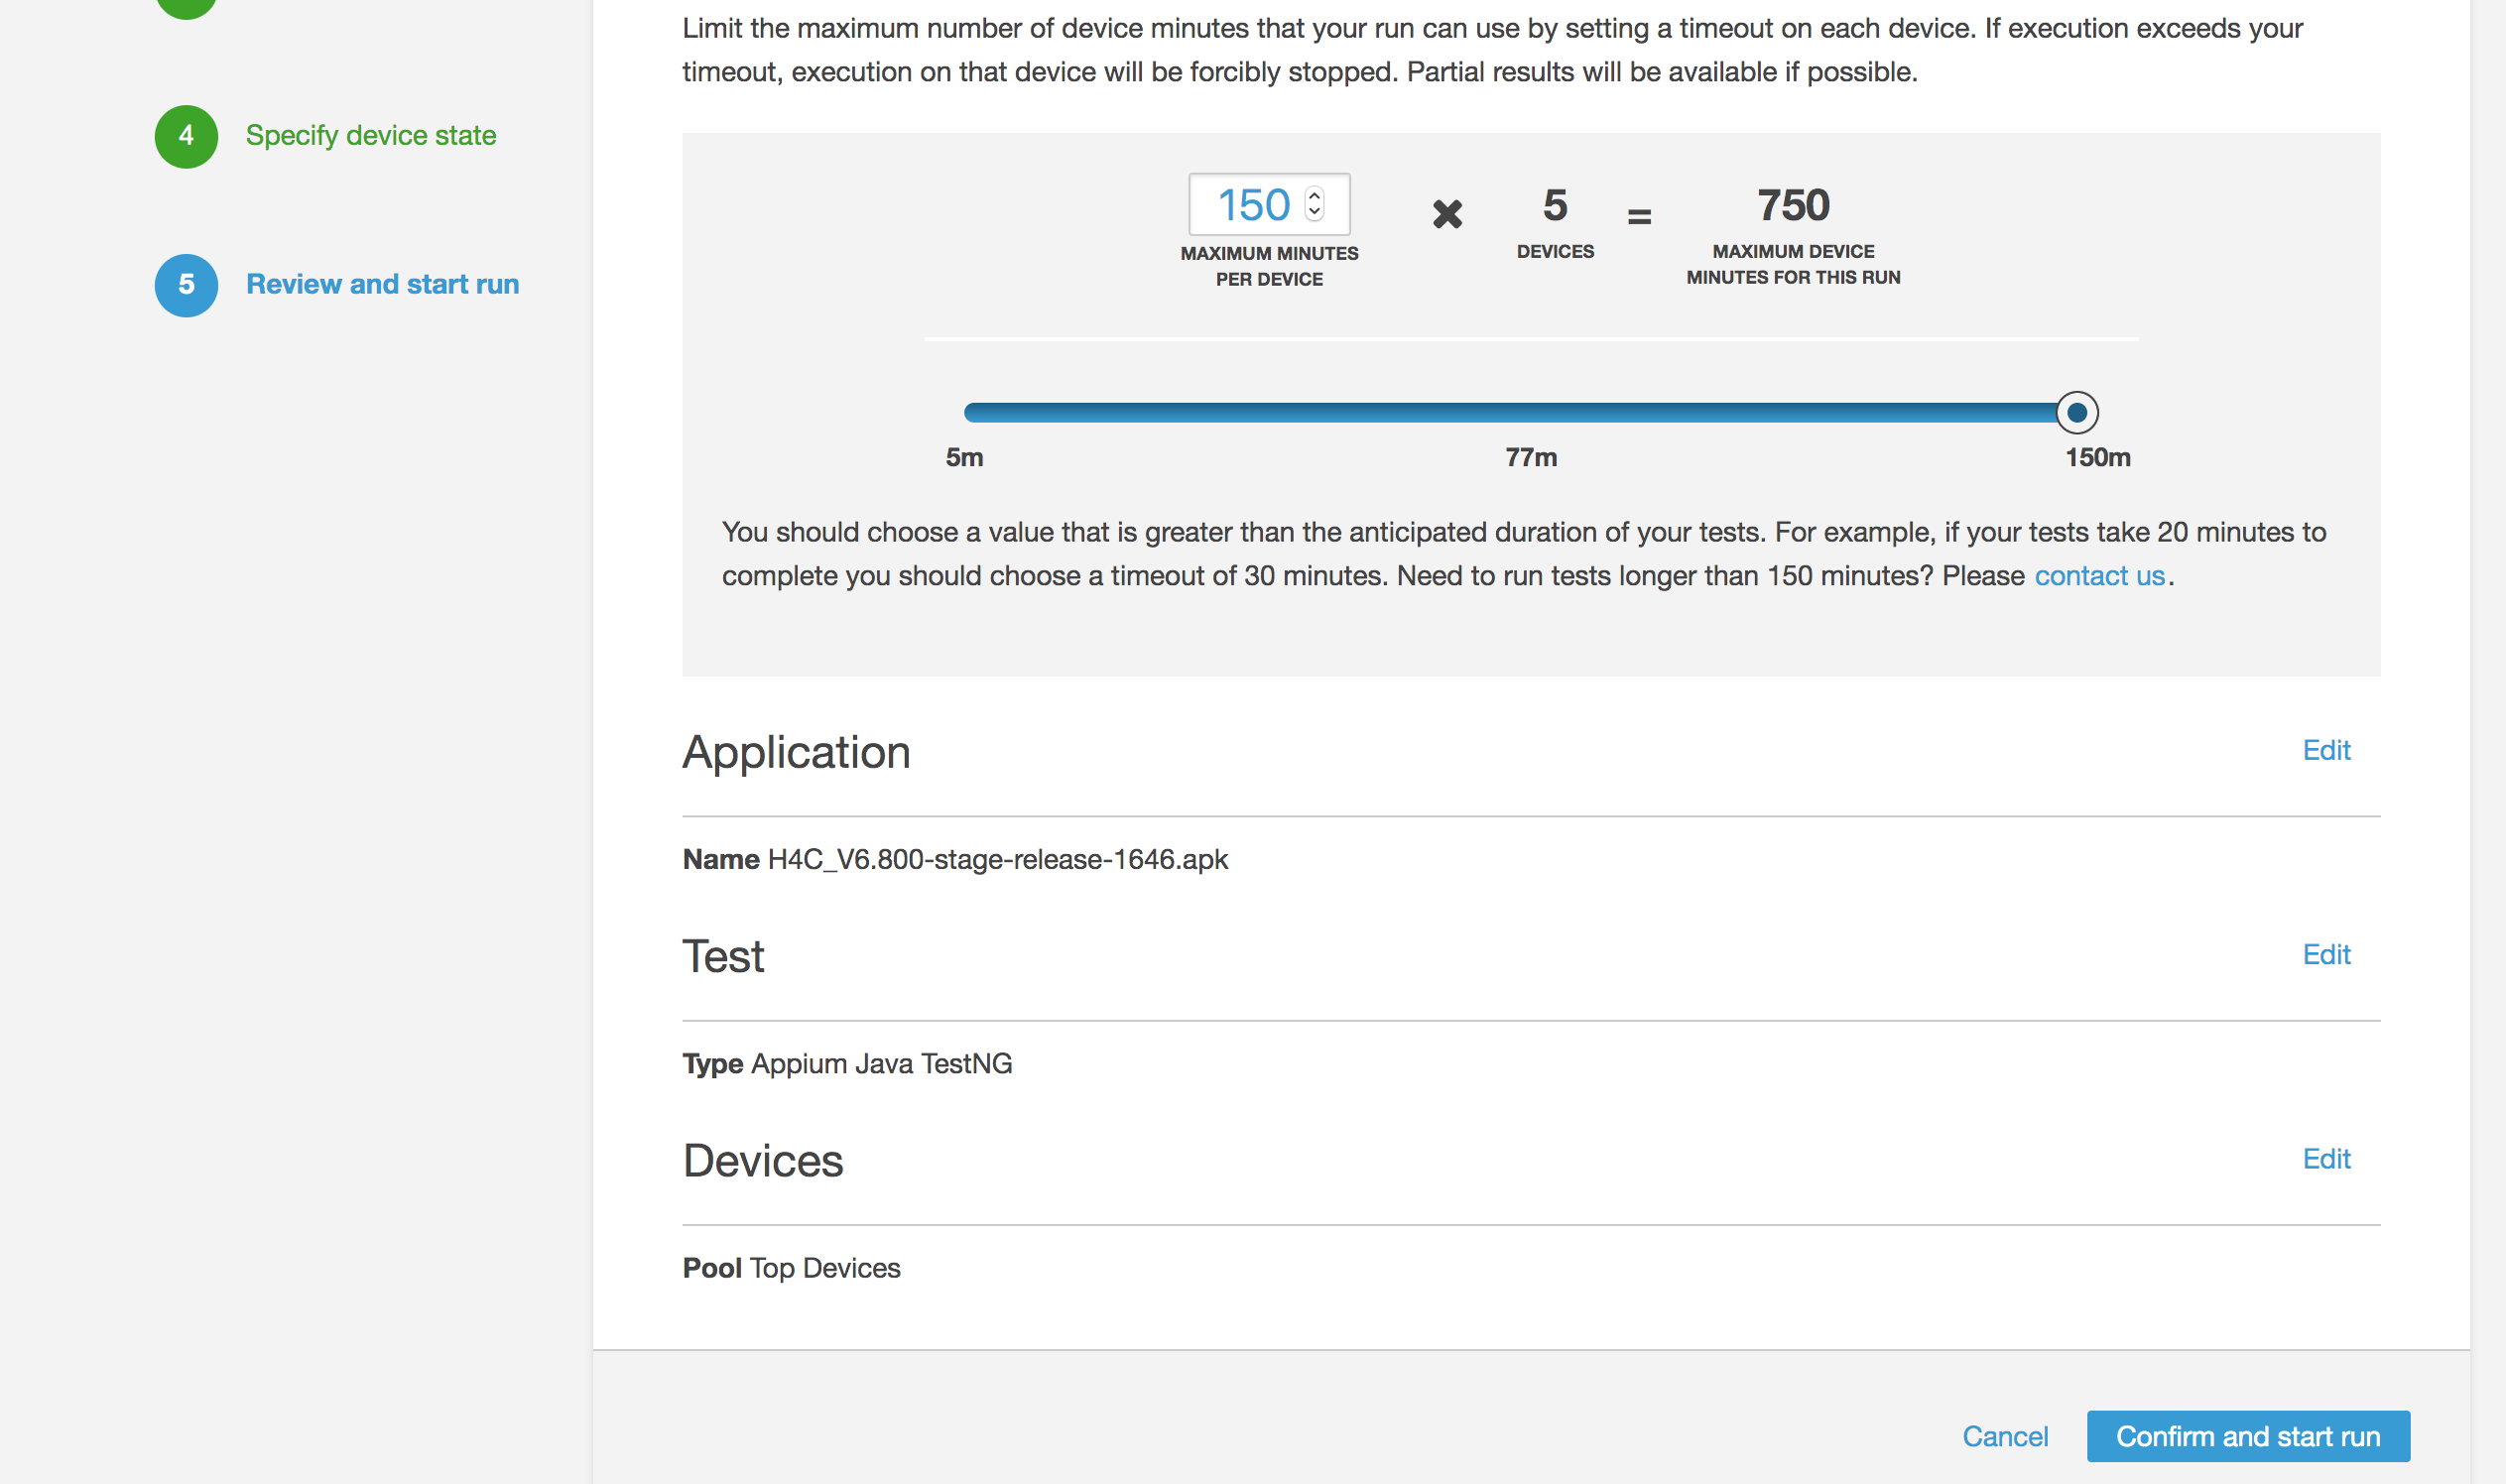
At last review your steps and start your run.
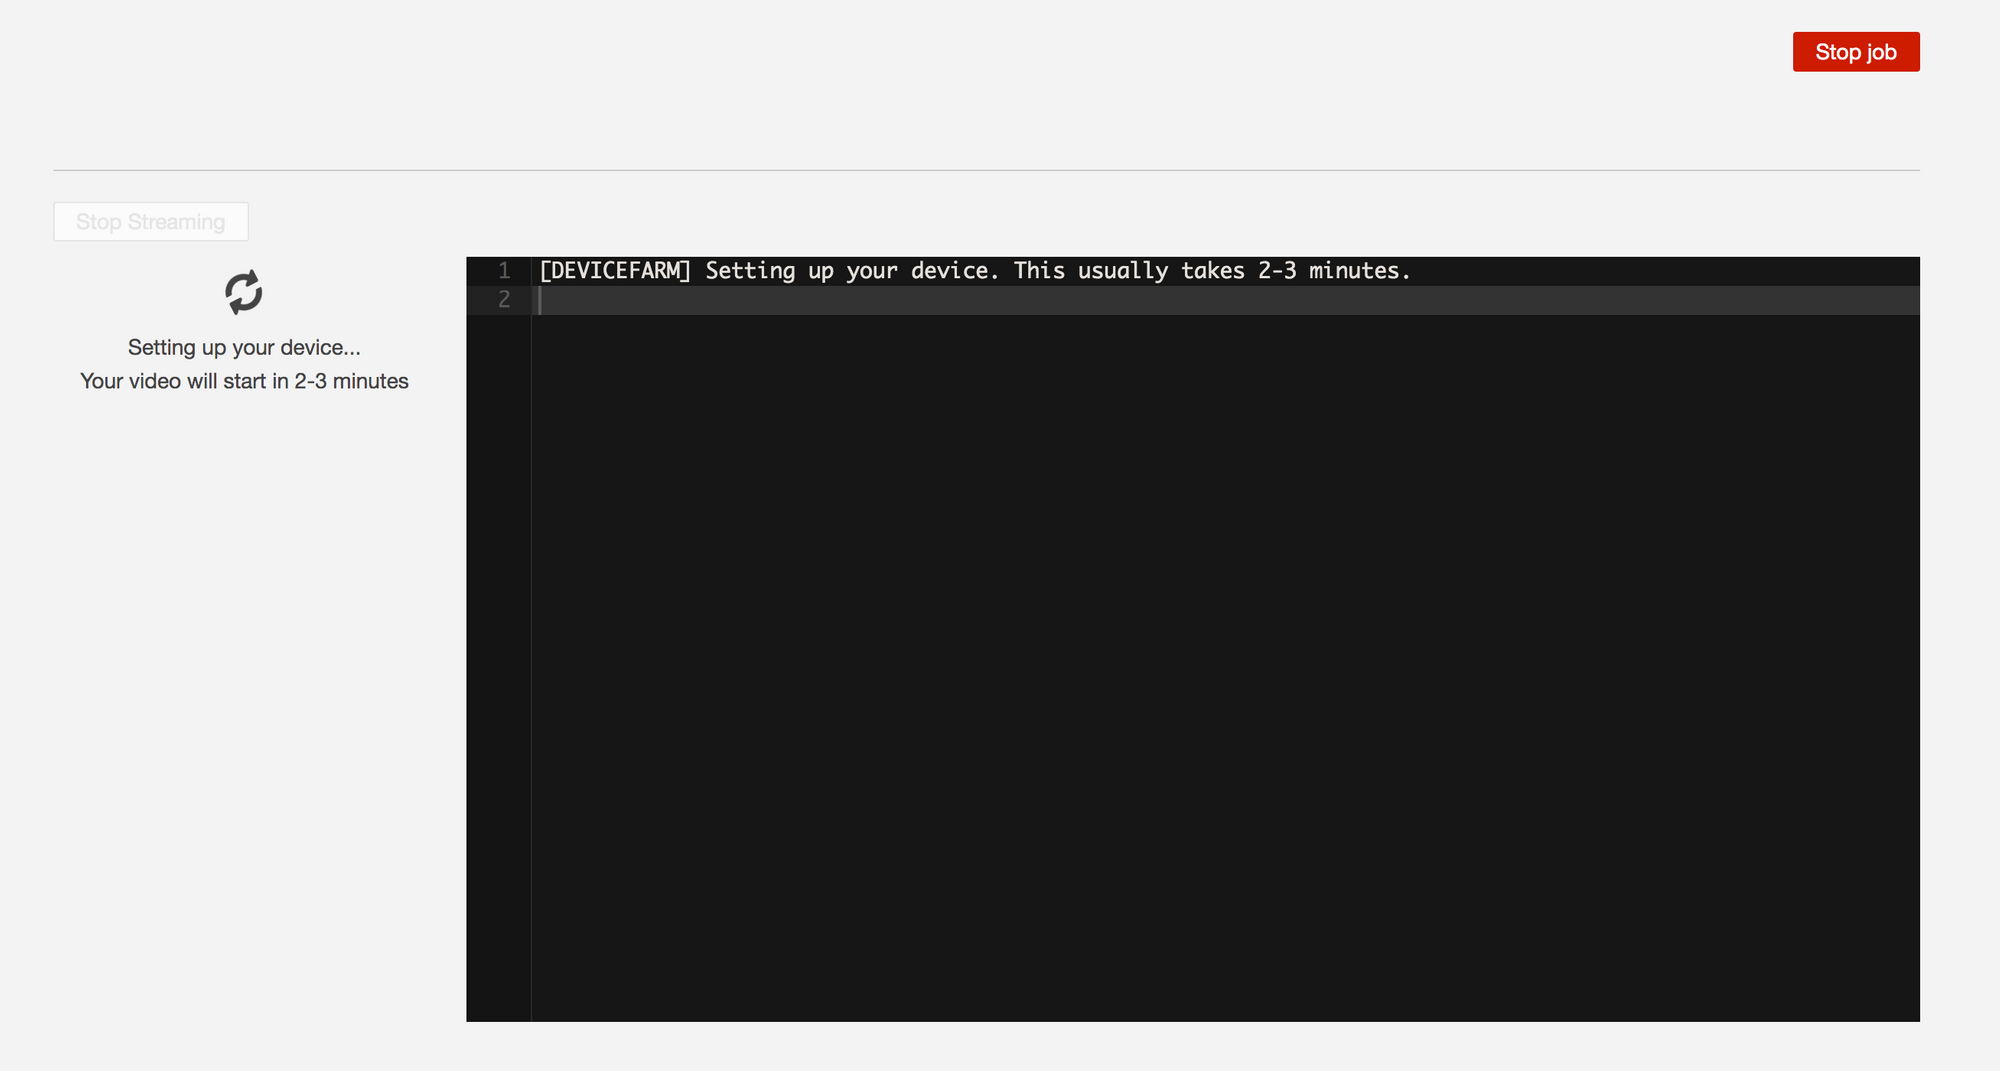
To view the live video of your run along with logs you can click on the run and the device which we used to run our tests.
After the run is completed you can view test results on the dashboard.

Benefits of real device testing on AWS Device Farm:
- Use the same devices your customers use
- Reproduce and fix issues faster
- Simulate real-world environments
- Choose the tests that work for you
- Set up your private device lab in the cloud
- Parallel execution of tests which saves time
Summary
This blog post describes AWS Device Farm usage for running an automated test suite for a wide variety of Android devices, helping us to achieve seamless functionality and user experience on the device the customer prefers.
We are always looking out to hire for all roles for our tech team. If challenging problems that drive big impact enthral you, do reach out to us at careers.india@halodoc.com
About Halodoc
Halodoc is the number 1 all around Healthcare application in Indonesia. Our mission is to simplify and bring quality healthcare across Indonesia, from Sabang to Merauke. We connect 20,000+ doctors with patients in need through our Tele-consultation service. We partner with 2500+ pharmacies in 100+ cities to bring medicine to your doorstep. We've also partnered with Indonesia's largest lab provider to provide lab home services, and to top it off we have recently launched a premium appointment service that partners with 500+ hospitals that allow patients to book a doctor appointment inside our application. We are extremely fortunate to be trusted by our investors, such as the Bill & Melinda Gates Foundation, Singtel, UOB Ventures, Allianz, Gojek and many more. We recently closed our Series B round and In total have raised USD$100million for our mission. Our team works tirelessly to make sure that we create the best healthcare solution personalized for all of our patient's needs, and are continuously on a path to simplify healthcare for Indonesia.