Implementation of Private Branch Exchange (PBX) system using FreePBX
Mar 20, 2023
Overview
Effectively managing the telephone directory system is crucial for business operations and connectivity of the organization because it acts as a primary means of communication within an organization. If the directory is not well-managed, employees may struggle to find the right contact information for colleagues, or third-parties, which can lead to delays or miscommunication.
Additionally, a well-managed telephone directory system can save time and increase efficiency by allowing employees to quickly locate the information they need and reach out to the persons they need to discuss in order to complete their tasks.
Why is this important?
The importance of having a well-structured telephone directory system ranges from various aspects, including proper communication, improved efficiency, stability, and flexibility. It is even more crucial during our hybrid working environment where people can work from various different locations. Accessibility and productivity are two important reasons because when employees are working from different locations, it's important that everyone has access to the telephone directory system and employees may be working independently more often.
Deployment of telephony directory systems using Free Private Branch Exchange (PBX)
In order to provide a robust infrastructure to achieve the mentioned objectives, we have implemented a System VoIP FreePBX, involving setting up a phone system using VoIP technology and the open-source PBX software called FreePBX. FreePBX is a popular PBX software that provides a range of features for organizations, including call routing, IVR (interactive voice response), and conference calling.
FreePBX is a web-based open-source graphical user interface (GUI) that manages Asterisk, a VoIP and telephony server. The deployment of FreePBX mainly covers several key areas, such as installation of FreePBX V15 (Asterisk 16), configuration of Basic Settings, Extensions, Trunk, as well as configuration on Outbound and Inbound Settings.
Benefits of FreePBX
There are several benefits of the deployment of FreePBX:
- Cost savings & Scalability: FreePBX is a free and open-source VoIP PBX software that allows businesses to make calls over the internet using VoIP technology. It can also handle multiple phone lines and extensions, making it suitable for businesses of all sizes.
- Flexibility & Integration: FreePBX offers a wide range of features and customization options that allow businesses to tailor their phone systems to their specific needs. This includes features such as call recording, voicemail-to-email, and IVR systems, which can integrate with other software and applications leading to an improved productivity and efficiency.
- Remote work: With FreePBX, businesses can enable remote work by allowing employees to access the phone system from anywhere with an internet connection. This can be especially useful for businesses that have employees working from home or in different locations.
- Security & Availability: Enhanced security & availability with IPtables, Call Dial Report (CDR), and backup recording.
Implementing a System VoIP FreePBX can provide cost savings, scalability, flexibility, and integration with other software, making it a valuable tool.
The basic requirement to create a telephony system is a dedicated ID number which will become the company’s caller identity (ID Number) and this number can also be published on their company website.
Steps for installation & configuration
Pre-requisites
FreePBX server requires the following specifications / prerequisites:
- CPU i5
- RAM 8Gb
- Storage 1Tb
- VGA Onboard
- Internet connection 20mbps
- SIP Trunk (Providers Telecom) with 1 ID Number telephone
- ISO file of Freepbx SNG7-PBX-64bit-2203-2.iso
- Ventoy Bootable application
To install FreePBX V15, the following are the steps that need to be executed:
A. Install FreePBX V15 (Asterisk 16)
- Load the ISO, We would be doing a full install via asterisk 16.

2. After the installation is complete, set up a root password to enter the FreePBX server with the terminal.

3. Click on reboot.

4. Adjust the network server to static IP Address here /etc/sysconfig/network-scripts/ifcfg-eth0/
B. Configuring Basic Settings FreePBX
- Open the Freepbx web-based application, create a user and password to access web based graphical user interface (GUI) applications.
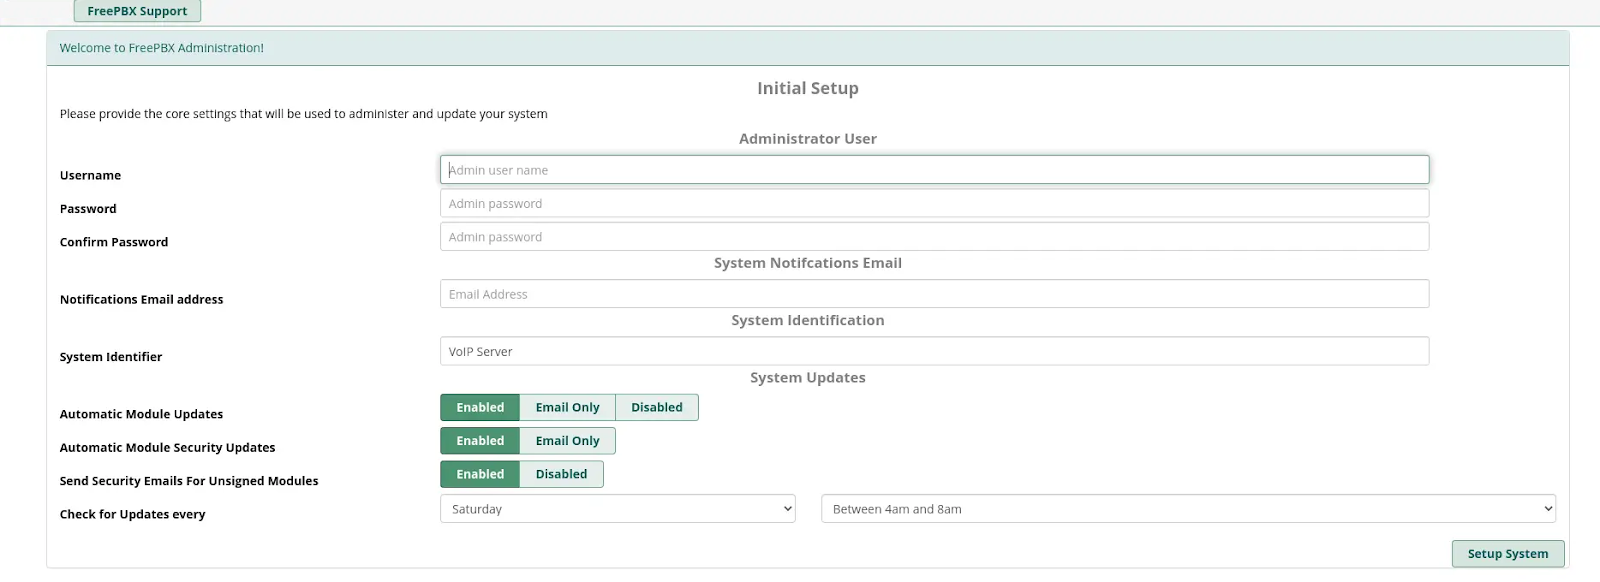
2. Follow the screens to activate FreePBX.

C. Configure Extensions FreePBX
- Create Extensions to make sure the extensions can communicate with each other, Go to menu Applications –> Extensions

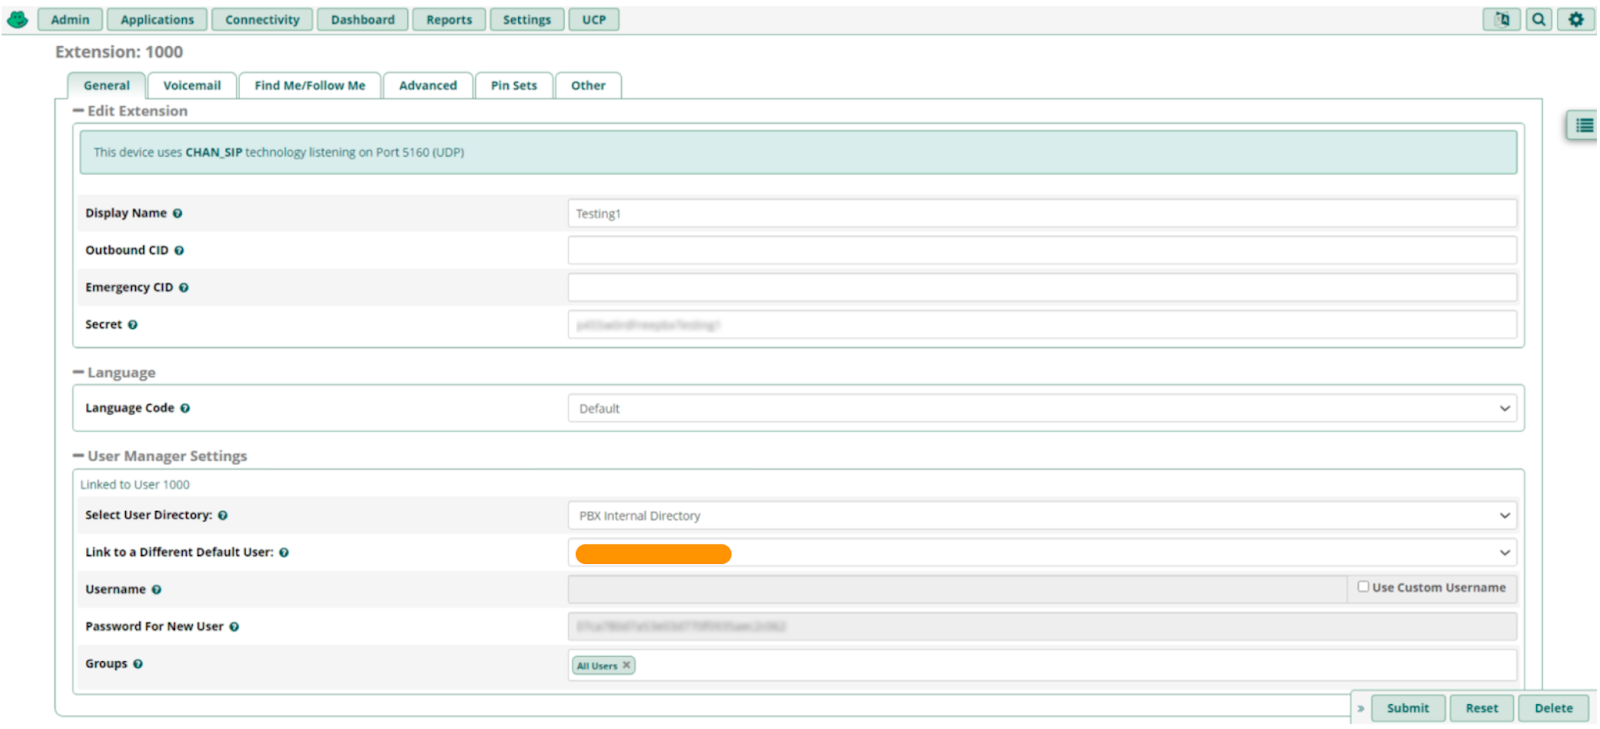
2. Click Submit → Apply Config.

D. Configure a Trunk FreePBX
- To communicate with a phone number, this requires subscribing to SIP Trunk service by telephony providers such as Telecom and other telephony providers. To add Trunk, go to menu Connectivity –> Trunks –> Add Trunk
- Set up the external call requires SIP chain_sip Trunk, after that define Trunk Name, and Outbound CallerID.
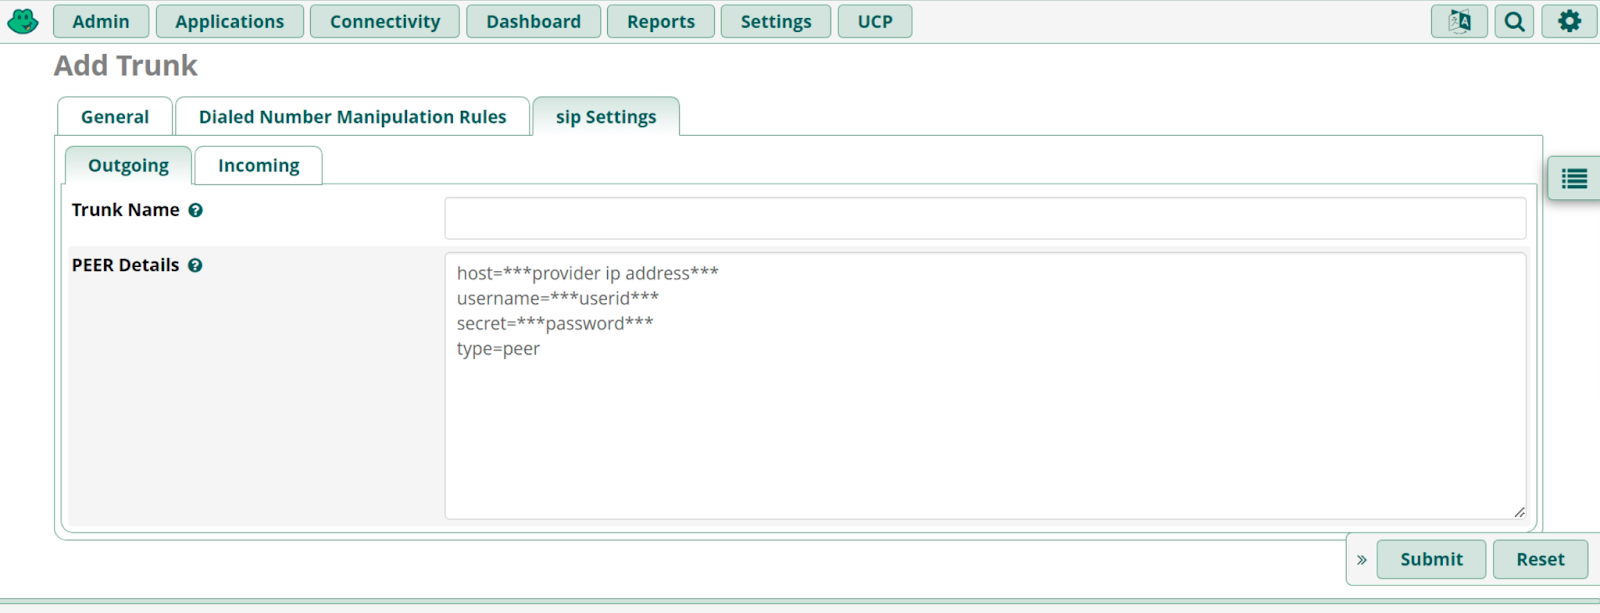
3. Then click sip settings, input the outgoing and incoming credentials according to what our providers have provided and this setting can collaborate with the providers.
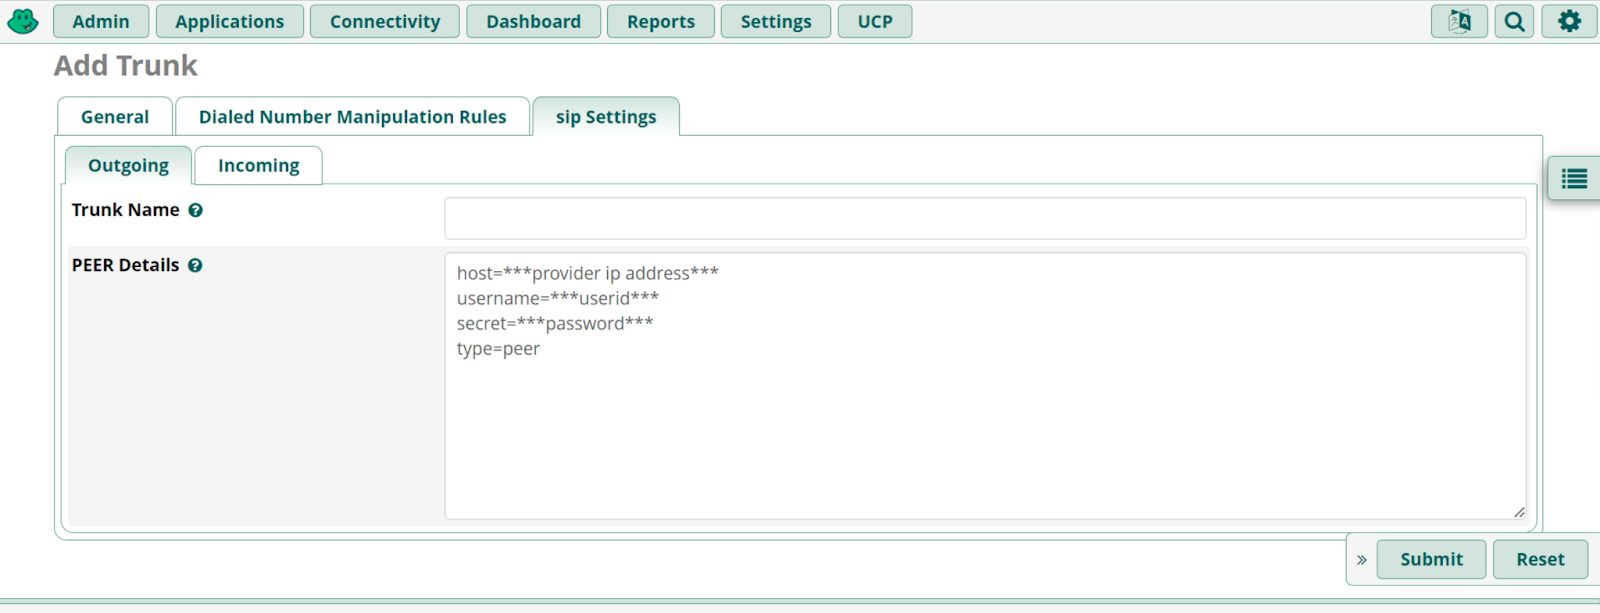
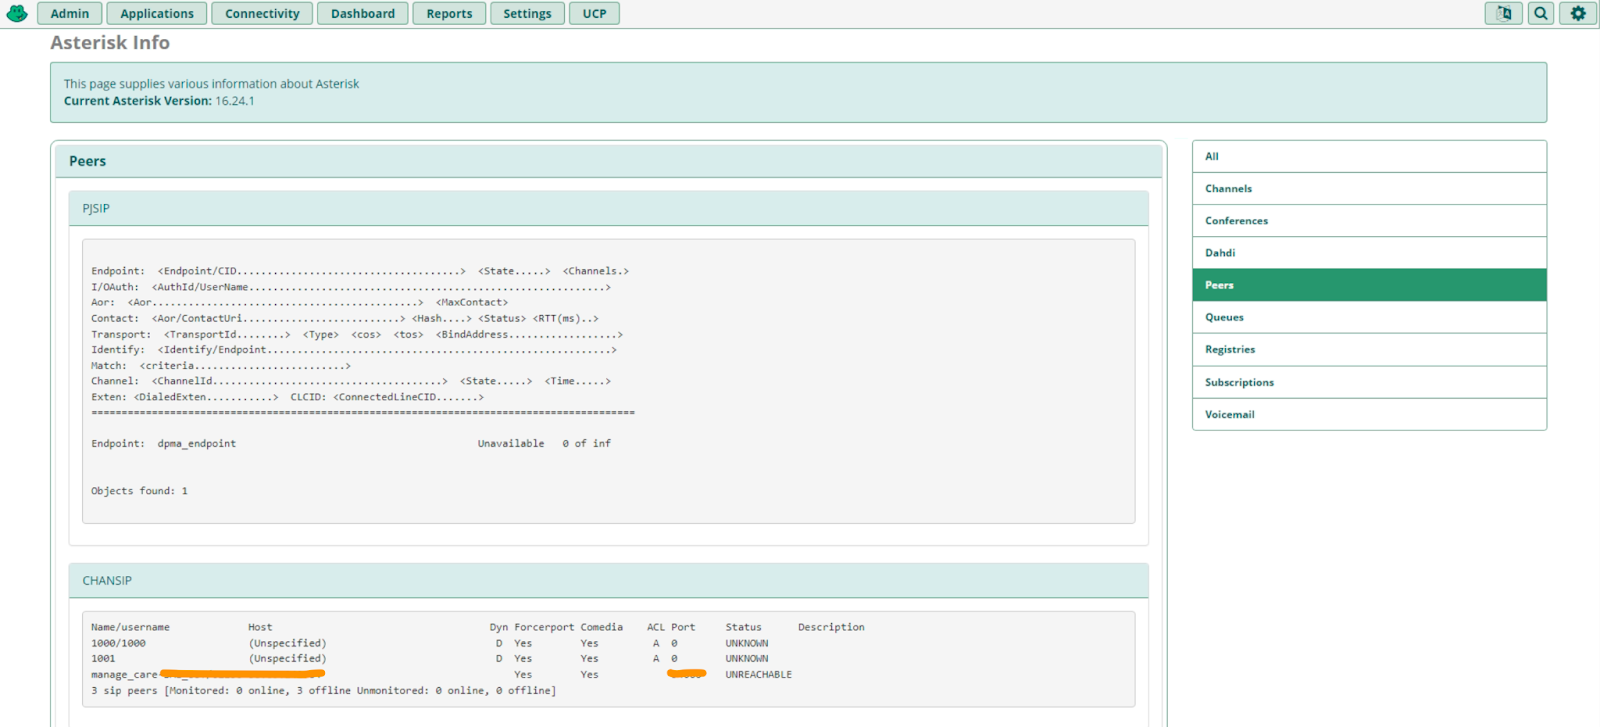
4. To make sure the sip trunk from the providers that we have set up is correct, refer to the Report - Asterisk Info - Peer info as shown below.
E. Configure Outbound and Inbound Settings
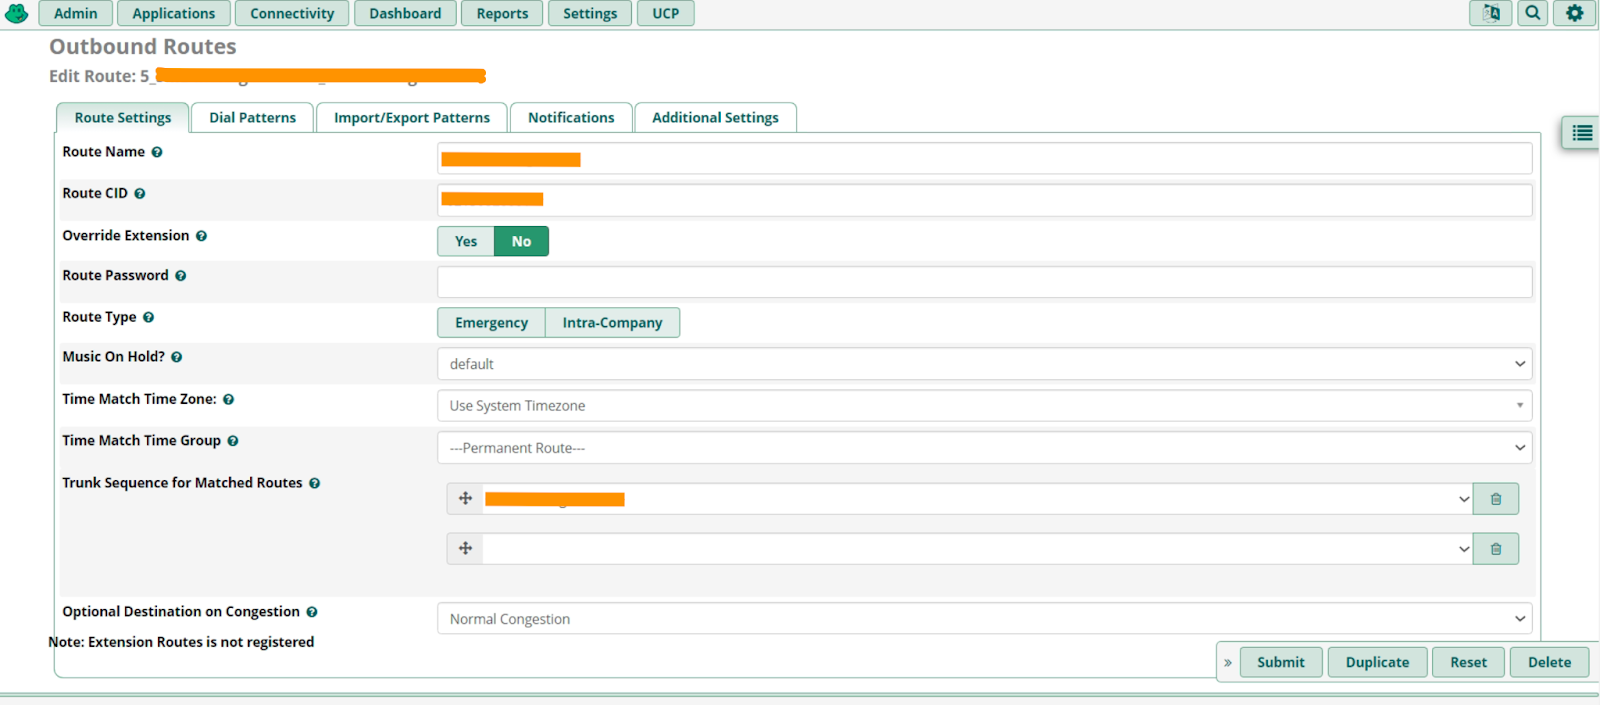
- Create an outbound route to test outgoing calls to external numbers via the menu Connectivity → Outbound Routes.
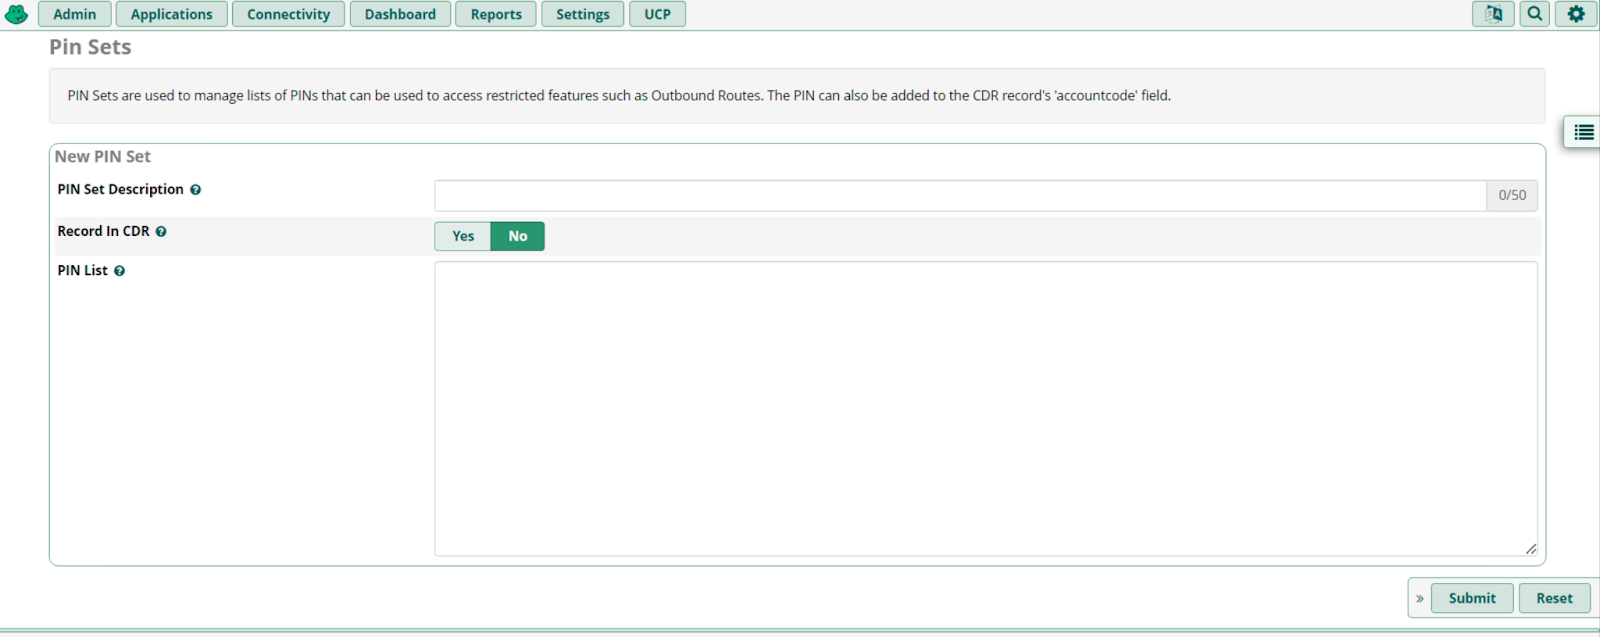
2. Create PIN authorization to secure from an authorized call to extension number by asking the user to input the PIN whenever a call is made, go to menu Settings → PIN Sets
Note: Make sure the outbound configuration is running well by dialing the destination number and waiting to confirm input PIN from IVR
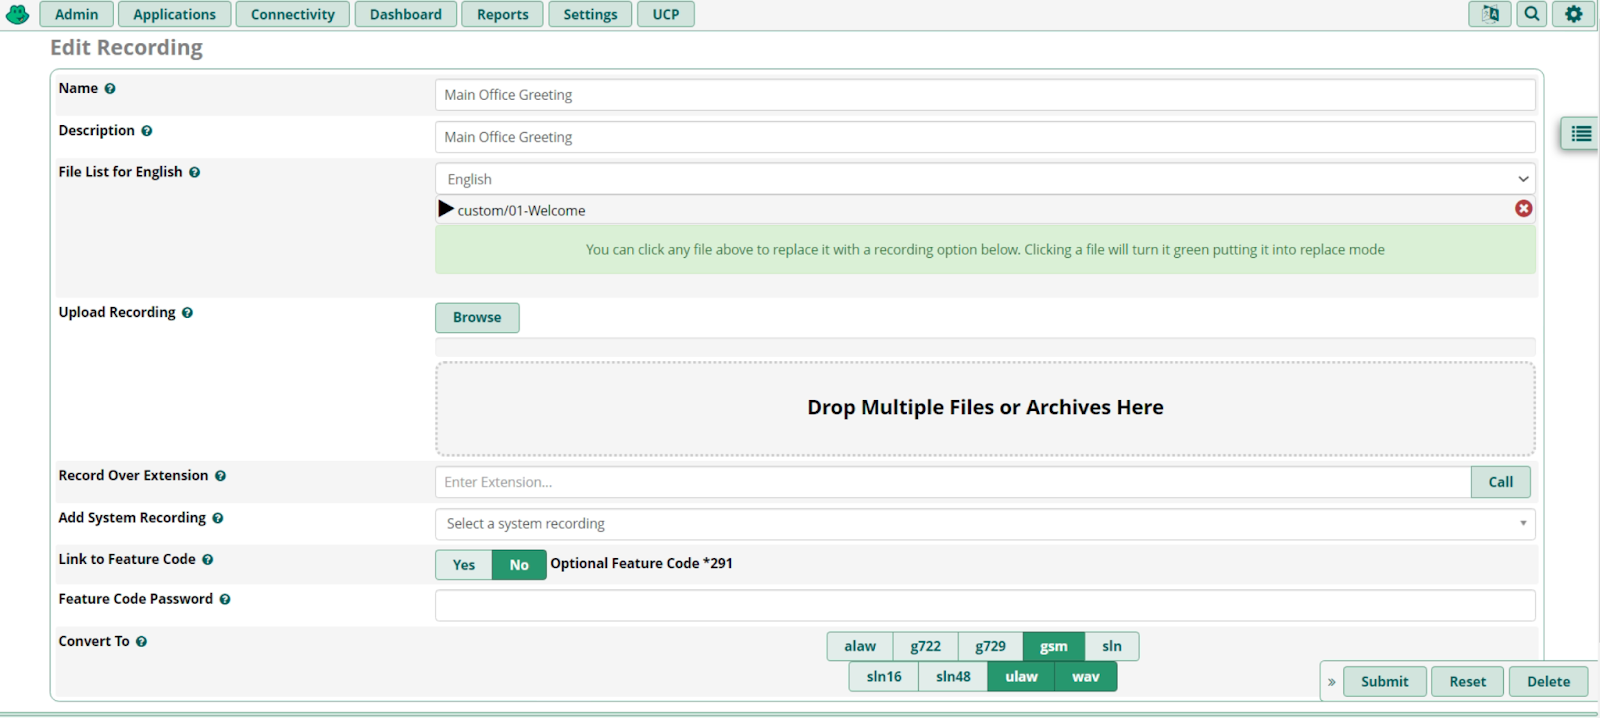
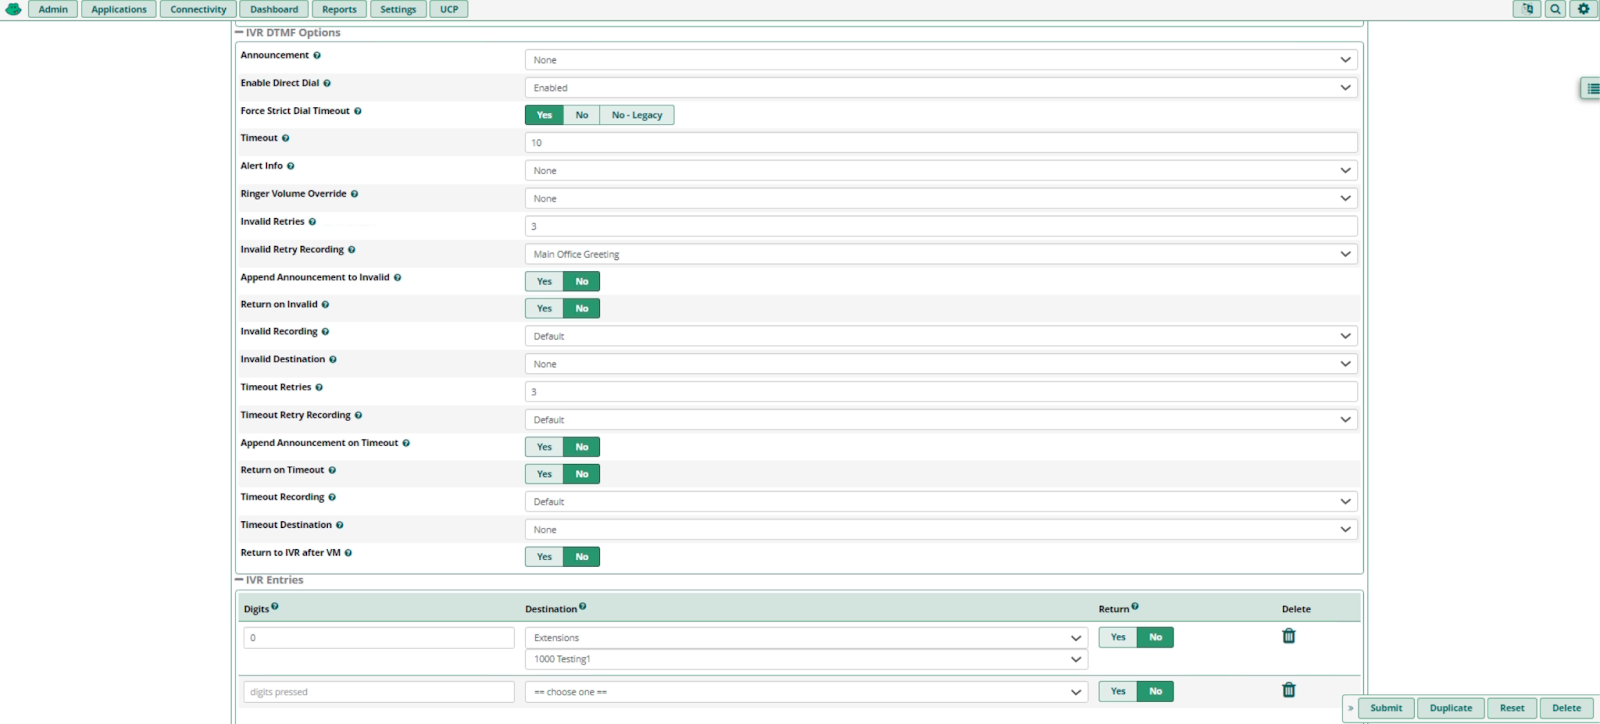
3. Setup Inbound Routes using IVR, create a voice recording for the announcement. Save as a wav file extension.
Go to Menu Admin → System Recordings → Add Recording.
4. Create IVR, Go to Applications → IVR
5. Create the announcement, Go to menu Application → Announcements.
F. Configure Inbound Routes Settings
- Create an Inbound Routes by adding the DID number and set destination to IVR. Go to menu Connectivity → Inbound Routes → Add Inbound Routes

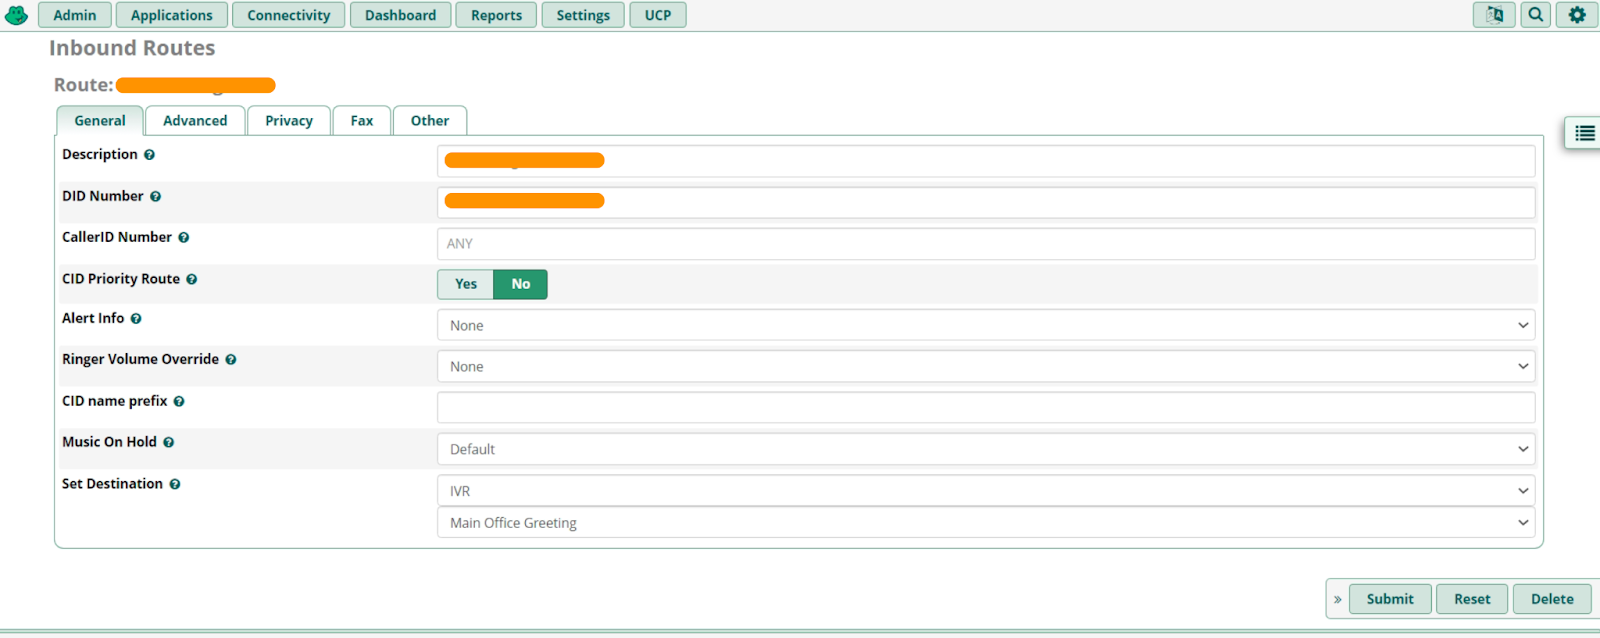
At this stage we have completed the configuration of FreePBX V15 IP Trunk, we can set up the softphone application to make some test calls with Zoiper application to ensure that all configurations are running properly and smoothly.
Error Handling
When working with FreePBX, It is important to handle errors properly. There are several steps you can take to troubleshoot issues and resolve them:
- Check your logs: FreePBX logs contain valuable information that can help you identify the root cause of an error. You can access your logs by logging into your FreePBX server and navigating to the Logs section.
- Check your network configuration: VoIP traffic is sensitive to network conditions. Make sure your network is configured properly, with adequate bandwidth and Quality of Service (QoS) settings. You should also check your firewall settings to ensure that they are not blocking any VoIP traffic.
- Check your extensions: Make sure that your extensions are properly configured and registered. Check that the extension is registered on the correct device, and that it is not conflicting with other extensions or devices.
- Check your trunk settings: If you are experiencing issues with outbound calls, make sure that your trunk settings are configured properly. Check your authentication settings, outbound routes, and dial patterns.
- Update your system: Keep your FreePBX system up-to-date with the latest updates and patches. This can help resolve known issues and improve system stability.
Conclusion
FreePBX is a powerful and flexible open-source IP PBX system that offers a wide range of features for managing communication systems. It is based on the Asterisk communication engine and provides a web-based interface for easy management and configuration. With FreePBX, administrators can easily configure extensions, create call queues, and manage IVR using a simple web interface. Overall, FreePBX simplifies the management of VoIP systems, a reliable and cost-effective solution to improve communication systems.
Join us
Scalability, reliability and maintainability are the three pillars that govern what we build at Halodoc Tech. We are actively looking for engineers at all levels and if solving hard problems with challenging requirements is your forte, please reach out to us with your resume at careers.india@halodoc.com.
About Halodoc
Halodoc is the number 1 all around Healthcare application in Indonesia. Our mission is to simplify and bring quality healthcare across Indonesia, from Sabang to Merauke. We connect 20,000+ doctors with patients in need through our Tele-consultation service. We partner with 3500+ pharmacies in 100+ cities to bring medicine to your doorstep. We've also partnered with Indonesia's largest lab provider to provide lab home services, and to top it off we have recently launched a premium appointment service that partners with 500+ hospitals that allow patients to book a doctor appointment inside our application. We are extremely fortunate to be trusted by our investors, such as the Bill & Melinda Gates Foundation, Singtel, UOB Ventures, Allianz, GoJek, Astra, Temasek and many more. We recently closed our Series C round and In total have raised around USD$180 million for our mission. Our team works tirelessly to make sure that we create the best healthcare solution personalized for all of our patient's needs, and are continuously on a path to simplify healthcare for Indonesia.


