
Improving the Login Experience and Reducing Cost: Passkeys Integration in iOS Apps
With the introduction of Passkeys, Apple has revolutionized authentication on iOS devices. Starting from iOS 16, Swift offers the AuthenticationServices library, which manages most of the Passkeys flow, simplifying the implementation of this advanced authentication method for developers.
In this blog, we'll guide you through integrating passkeys into your iOS app seamlessly. You'll learn how to incorporate them into your code, ensuring smooth and secure registration and authentication processes. If you're curious about passkeys and their significance, be sure to check out this blog.
Passkeys Integration
To integrate passkeys into our iOS apps, there are a few key points to address:
1. Add Associated Domain to XCode
This step ensures that our app’s Xcode project includes the necessary Associated Domains entitlement. It involves adding the appropriate domain information in our app's capabilities settings to link our app with our website. To do so, follow these steps:
- Open your project settings, select your target and go to the
Signing & Capabilitiestab - Add
Associated Domainsand enter your associated domain

2. Configure Apple App Site Association
This file allows iOS to recognize that our app is associated with our website, enabling features like Universal Links and passkey authentication. To do so, follow these steps:
- Create an
apple-app-site-associationfile and host it athttps://yourdomain.com/.well-known/apple-app-site-association. - *Note: Ensure that the domain used in these steps matches the one specified in Xcode.
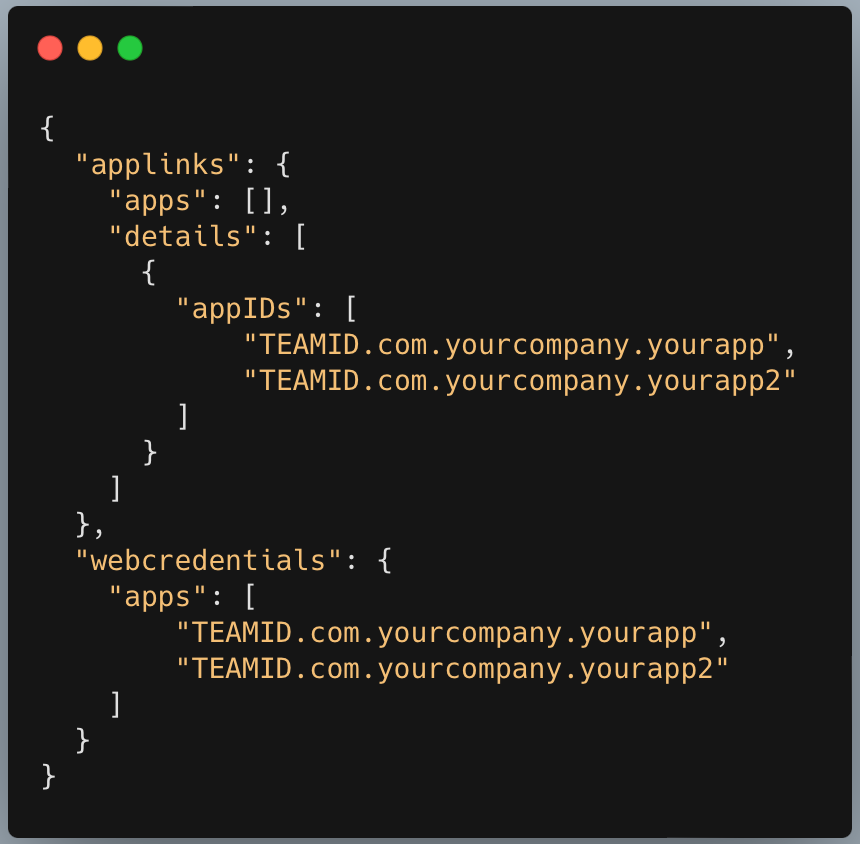
- Replace
TEAMIDwith your Team ID andcom.yourcompany.yourappwith your app’s bundle identifier.
Now that we have completed the domain setup, we can move on to implementing the passkeys functionality within our app.
3. Passkeys Important Functionalities
With the configuration settings complete, we're ready to begin the code implementation. This process can be divided into two main parts:
- Register
- Authentication
Let's dive into each part in detail!
Register
From the user's point of view, when they choose to register the Passkey, they will see this registration prompt.
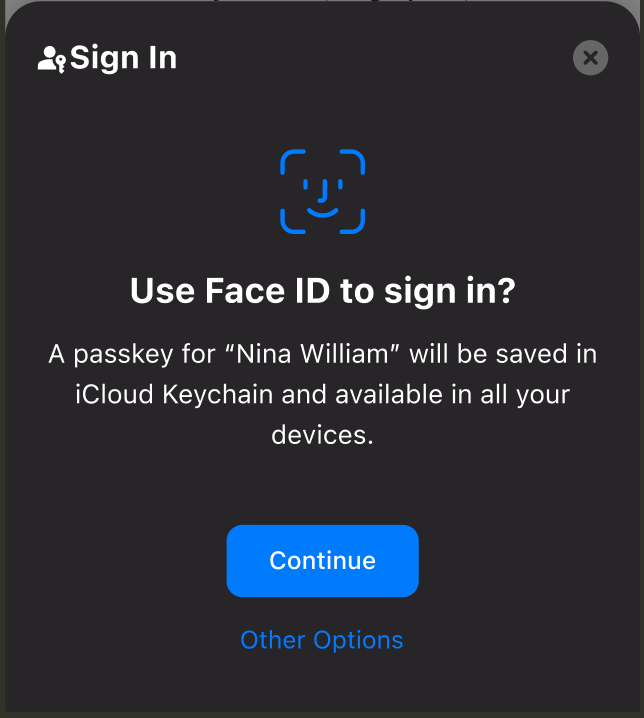
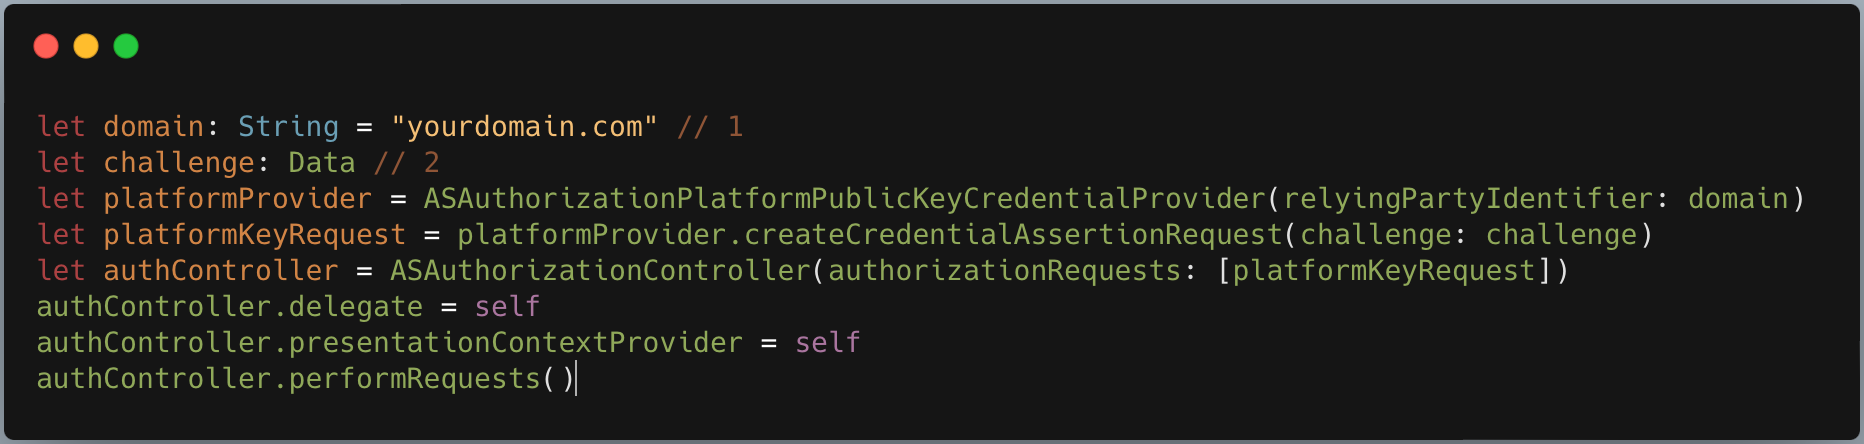
To display this prompt, we will need to use the AuthenticationServices library. This library allows us to show the registration prompt directly with the following code:
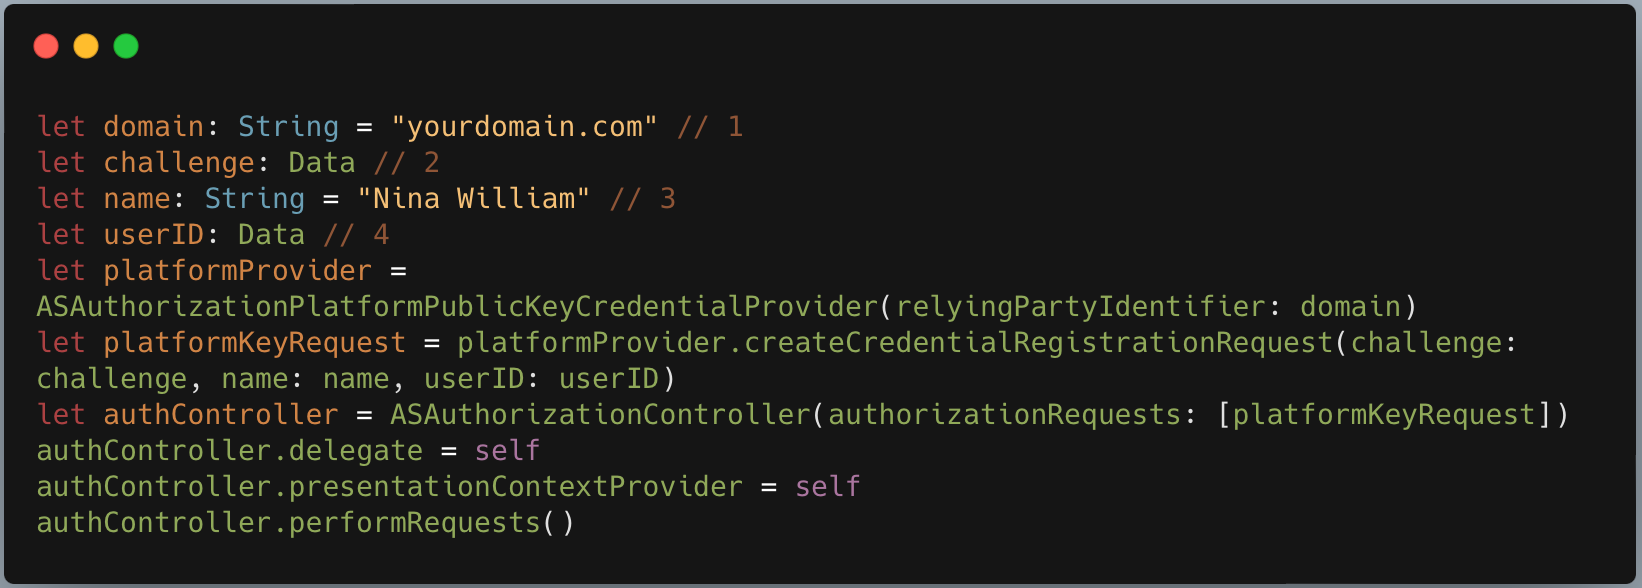
There are four key parameters to consider when registering for a passkey:
- Domain
Remember our initial step of configuring a passkey? The domain we entered in our Xcode Associated Domain and the one where we uploaded the associated file will be used here. You can opt to retrieve this domain from your backend, providing you the flexibility to avoid hardcoding it.
- Challenge
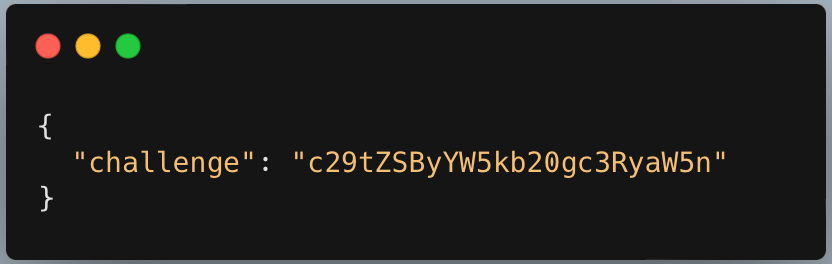
Challenge is a randomly generated string provided by your backend. It can be in the form of a base64String or base64URL, depending on how you plan to use it, especially if you're supporting cross-platform functionality. This string will be signed by the client and sent back to be utilized by your backend to verify the authenticity of your request.
- Name
Name represents your username, which will be displayed in the registration prompt

Also during the authentication flow for your user to select. This we will talk about in the next section.
- UserID
UserID refers to your app's user ID or any unique identifier used to validate the user during the authentication process.
Now that we've shown the user registration prompt, the library will handle the registration process. But we're not quite finished yet —almost there! After the user interacts with the prompt using Face ID or by entering their passcode, we'll need to capture the result. But rest assured, the library also includes a handler for this.
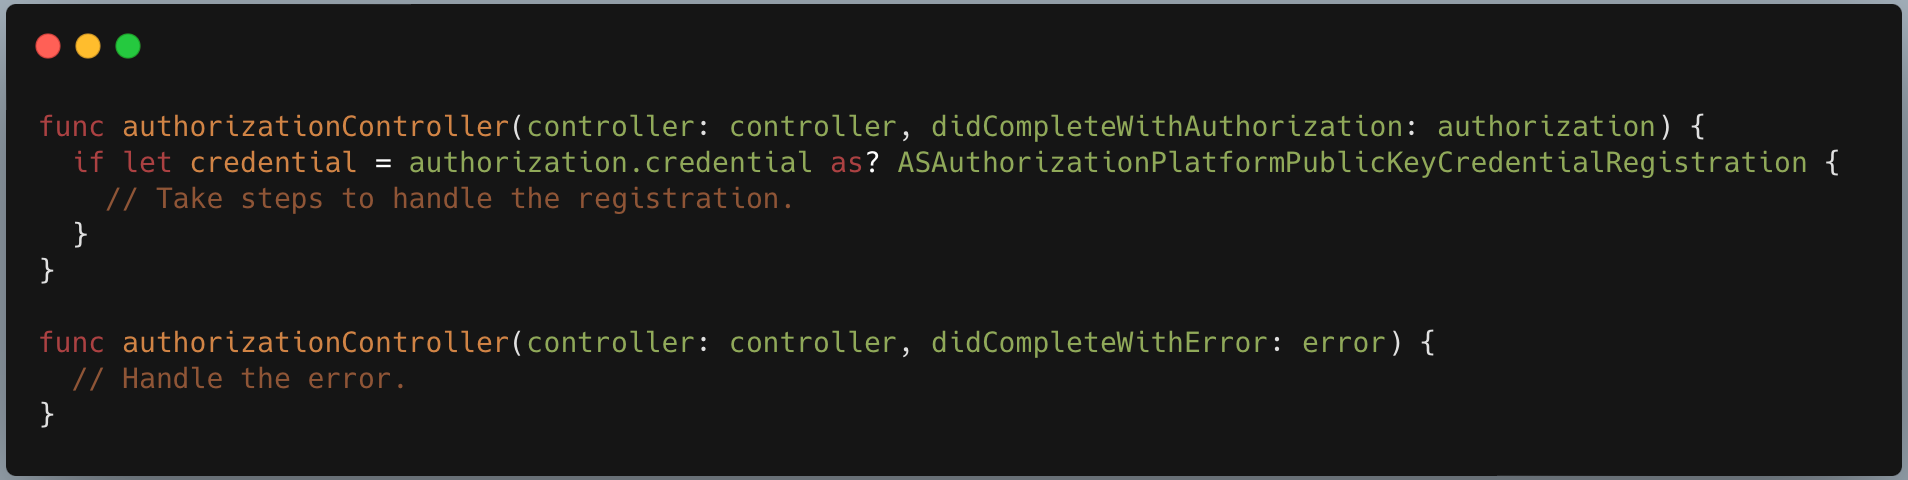
Once the user completes their registration process (by using Face ID or entering a passcode), the authorizationController will be triggered. Following that, you can carry out any required processes in your app, such as displaying a toast message or redirecting the user to a different screen, based on your preferences. This concludes the registration process.
Authentication
When a user initiates authentication, the app prompts them with options to select the account they wish to log in to.
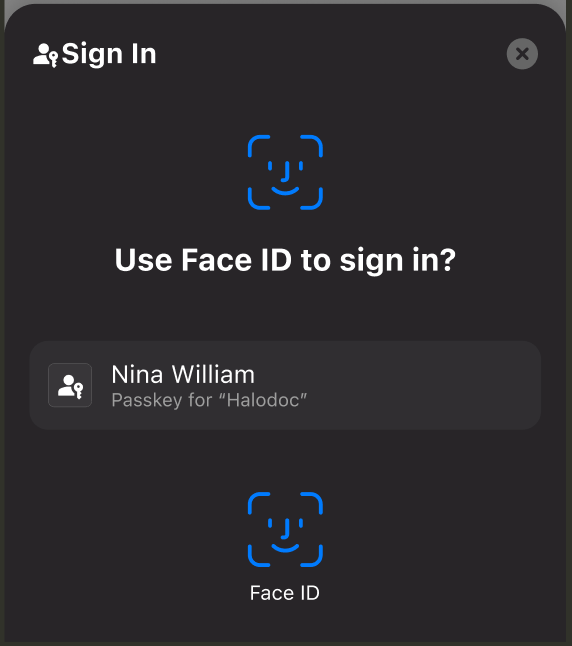
As mentioned earlier in the registration process, the name provided during registration will be displayed in this prompt. Furthermore, users may encounter multiple passkeys to choose from. To display this prompt in our app using code, we can utilize the Swift Library once again.
The format of the domain and challenge remains the same as during registration. However, it's important to note that each request for registration and authentication should have a unique challenge every time.
After the user completes the biometric authentication flow, we'll once again utilize the handler. We'll be using the same function authorizationController, and it will appear like this:
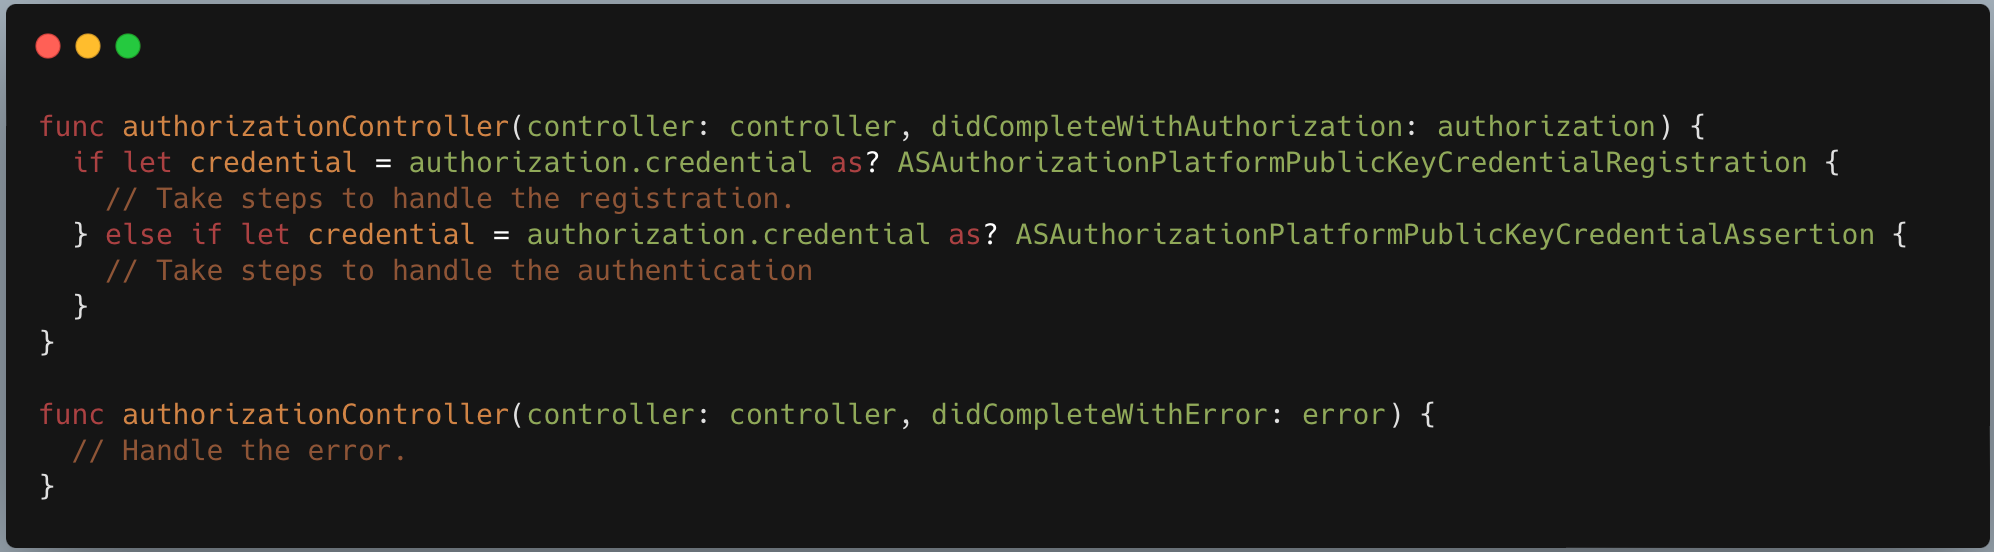
And that wraps up our authentication flow.
Conclusion
In summary, we've taken a deep dive into the step-by-step process of integrating passkeys authentication into your iOS app. From understanding how registration flows to navigating the authentication journey, each stage plays a crucial role in ensuring a seamless and secure user experience. Passkeys authentication isn't just about enhancing security, it's also about simplifying the login process, offering users a seamless and efficient way to access their accounts. By embracing passkeys, developers not only fortify the security of their apps but also enhance user-friendliness, paving the way for heightened user trust and satisfaction.
If you're interested in learning more about development, especially about passkeys, don't forget to explore our other blog posts. Thanks for reading this one!
References

 Kevin Josal
 Mayur Hebbar
Join us
Scalability, reliability, and maintainability are the three pillars that govern what we build at Halodoc Tech. We are actively looking for engineers at all levels, and if solving hard problems with challenging requirements is your forte, please reach out to us with your resume at careers.india@halodoc.com.
About Halodoc
Halodoc is the number 1 Healthcare application in Indonesia. Our mission is to simplify and bring quality healthcare across Indonesia, from Sabang to Merauke. We connect 20,000+ doctors with patients in need through our Tele-consultation service. We partner with 3500+ pharmacies in 100+ cities to bring medicine to your doorstep. We've also partnered with Indonesia's largest lab provider to provide lab home services, and to top it off we have recently launched a premium appointment service that partners with 500+ hospitals that allow patients to book a doctor appointment inside our application. We are extremely fortunate to be trusted by our investors, such as the Bill & Melinda Gates Foundation, Singtel, UOB Ventures, Allianz, GoJek, Astra, Temasek, and many more. We recently closed our Series D round and in total have raised around USD$100+ million for our mission. Our team works tirelessly to make sure that we create the best healthcare solution personalized for all of our patient's needs, and are continuously on a path to simplify healthcare for Indonesia.