Modernizing Web App Authentication: How Passkeys Improve UX and Reduce Costs
In the ever-evolving landscape of web security, safeguarding user data has always been paramount. Traditional methods like passwords and two-factor authentication have long served as the standard, but they are increasingly proving cumbersome and vulnerable to breaches. Enter passkeys—a groundbreaking technology poised to revolutionize how we secure web applications.
In this blog, we'll explore how to robustly integrate passkeys into your web application, enhancing your authentication system and significantly reducing the associated costs, just as we did at Halodoc. But before that, it's essential to have a solid understanding of passkeys and their significance. So please check out our blog on Improving the Login Experience and Reducing Cost: The Complete Guide to Passkeys Integration at Halodoc.
Passkey Implementation
There are the most important things when implementing a passkey on the web:
1. Web Authentication API
The Web Authentication API is an extension of the Credential Management API, used to create, store, and retrieve credentials. It handles various types of credentials such as passwords, OTPs, and public key credentials (passkeys). The Web Authentication API acts as an interface facilitating communication between the user-agent (devices like laptops and mobiles) and authenticators (such as security keys, Google Password Manager, iCloud Keychain, Windows Hello, etc.). You can access the Web Authentication API through the navigator object inside the window object: window.navigator.credentials.
You can either directly use this via the window object or leverage a third-party library such as @simplewebauthn/browser, which acts as a wrapper around the Web Authentication API to help you get started quickly. However, because passkeys are a relatively new technology, they may evolve rapidly, and relying on a third party could delay adoption of updates. At Halodoc, we opted to create our own internal wrapper to handle operations such as checking device capability, registration, and authentication.
2. Feature Detection/Browser Support
It’s important to note that not all devices and browsers are compatible with passkeys. For instance, Windows 9 and earlier versions, macOS Ventura (13) and earlier, Android WebView browsers, and Firefox versions 121 and earlier do not support passkeys. Because of these limitations, it’s best to add a check before triggering the passkey registration or authentication flow. You can do so with the following code:
// Check if the browser supports the WebAuthn API
if (window.PublicKeyCredential) {

  // Check if the device supports user verification using Face ID, Touch ID, PIN, Pattern, Fingerprints, etc.
  const isUserVerifyingPlatformAuthenticatorAvailable = PublicKeyCredential.isUserVerifyingPlatformAuthenticatorAvailable;

  if (!isUserVerifyingPlatformAuthenticatorAvailable) {
    return false;
  }

  return await isUserVerifyingPlatformAuthenticatorAvailable();
} else {
  return false;
}
3. Registration (Attestation Phase)
This is one of the two ceremonies involved in passkey authentication. In this step, a new public-private key pair is generated by the authenticator. The public key is stored on the backend server, while the private key remains securely in the authenticator (either on the device or in the cloud).
First, request a challenge and other metadata from the backend server. Here’s an example of how the response might look:
{
    "challenge": "N9_IhxGKB8e5x4Rs5e36ZvY7R6mJyjIWETDz2mOsjR0",
    "rp": {
        "name": "Sample Site",
        "id": "www.sample-site.com"
    },
    "user": {
        "id": "OTQwMmY5ODQtZTI4Yv00NGViHWJhNTQtYjUxZmFhZTA4MWY3",
        "name": "passkey_test_user",
        "display_name": "Passkey Test User"
    },
    "pub_key_cred_params": [
        {
            "type": "public-key",
            "alg": -257
        },
        {
            "type": "public-key",
            "alg": -259
        },
        {
            "type": "public-key",
            "alg": -7
        }
    ],
    "timeout": 300000,
    "attestation": "none",
    "exclude_credentials": [
        {
            "type": "public-key",
            "id": "ardB0oEdaA18BxAn3wNMOxC_itK"
        }
    ],
    "authenticator_selection": {
        "authenticator_attachment": "platform",
        "require_resident_key": true,
        "resident_key": "required",
        "user_verification": "required"
    }
}
For details on each individual option, refer to this MDN Web Doc.
Next, call the Web Authentication API’s create function using these options. Note that the authenticator requires the challenge, user.id, and excluded credential IDs to be base64url encoded.
// get the challenge & registration options from the server

const createCredentialOptions = await getPasskeyRegistrationOptions();

await navigator.credentials.create({
    publicKey: createCredentialOptions,
})
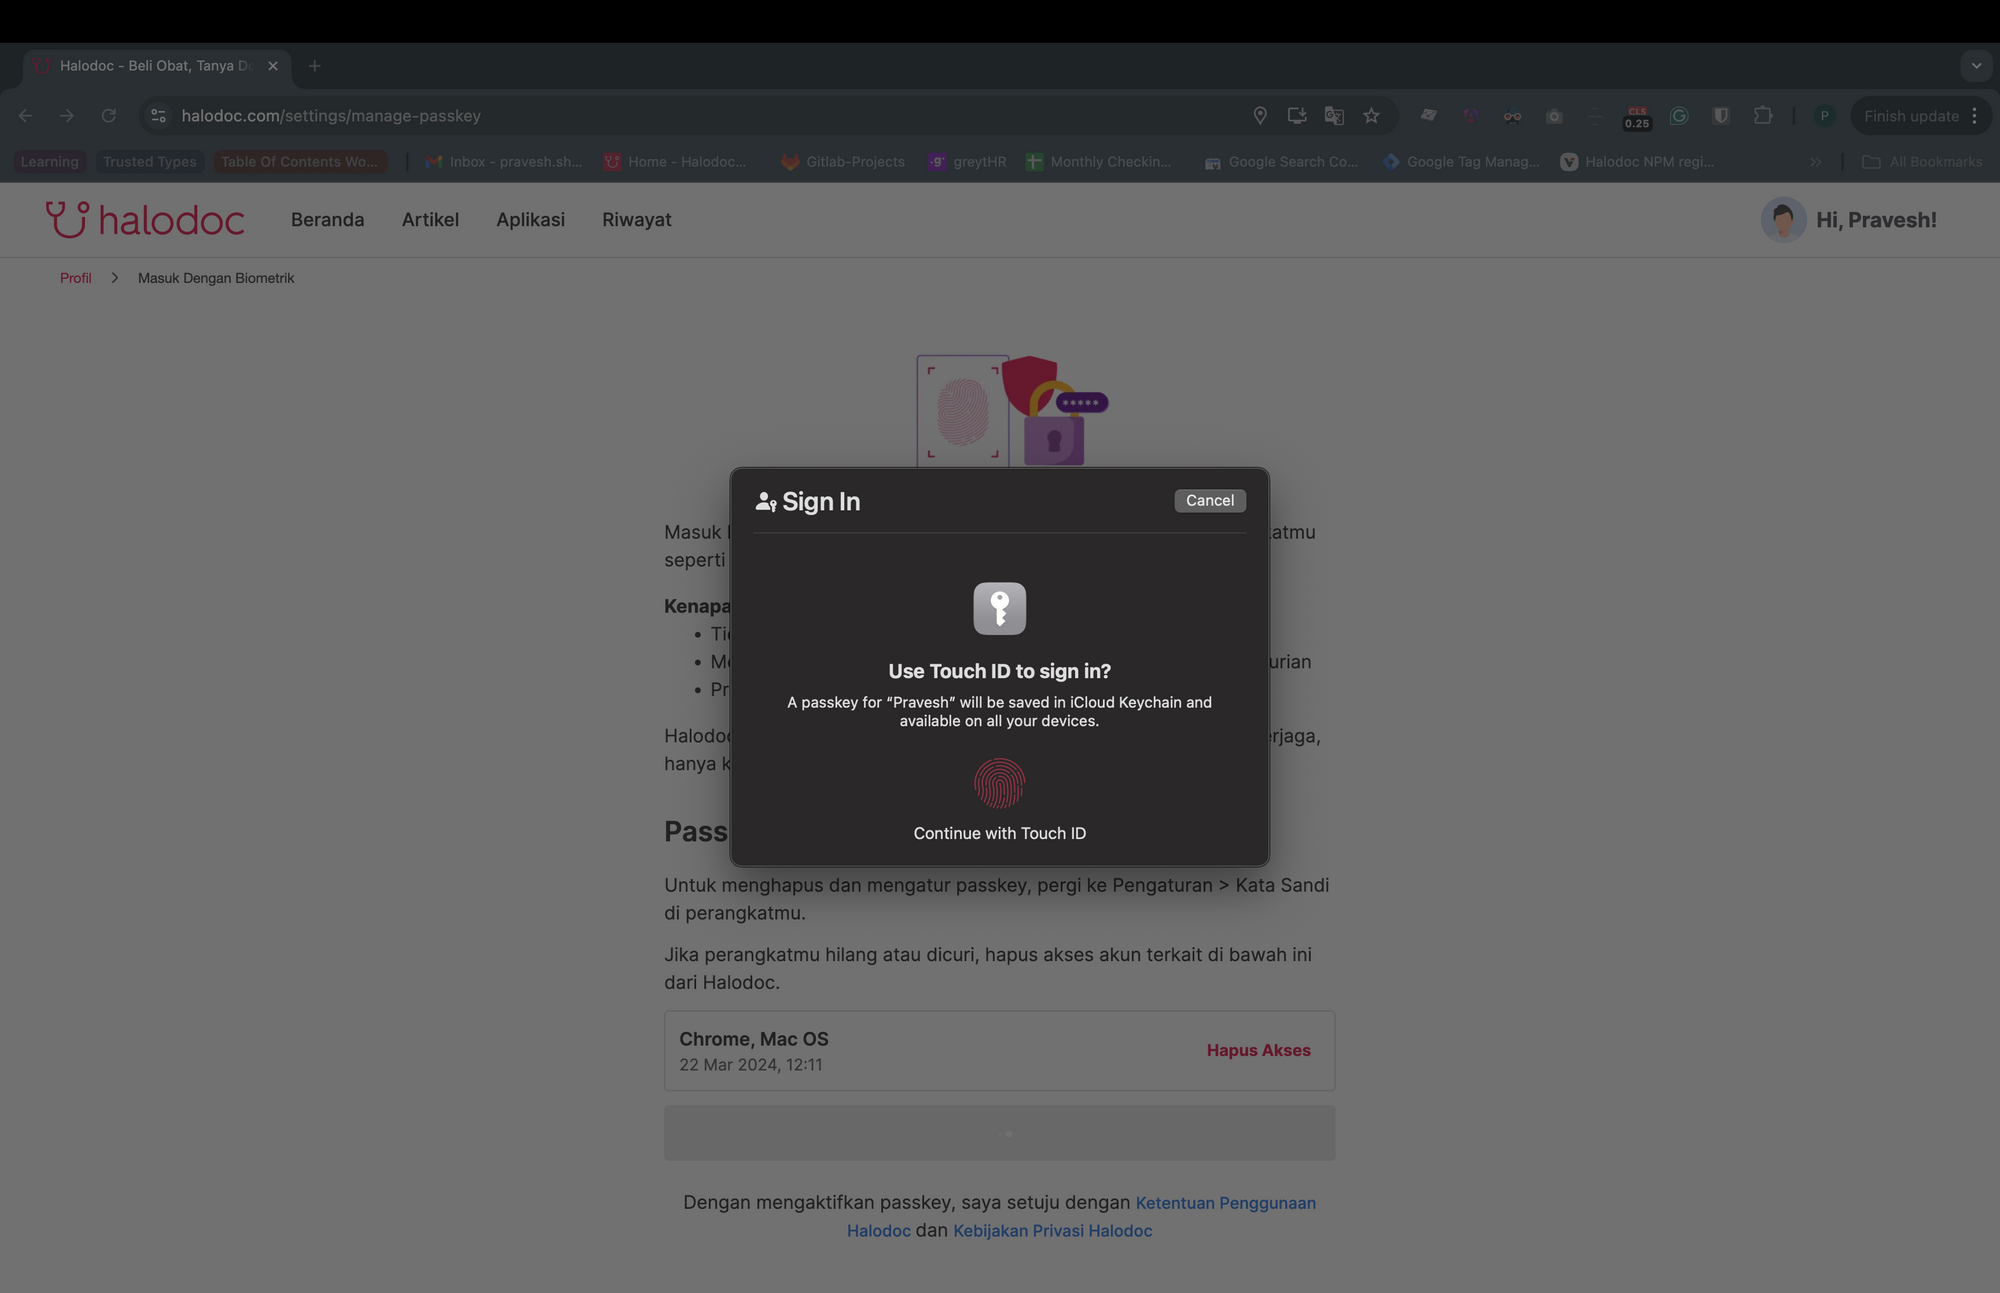
This will prompt user verification through biometrics, PIN, or password. Biometric verification on a Mac looks something like this:

The appearance may vary across iOS, Android, and Windows devices, depending on the authenticator. The create function returns a promise that resolves only once the user verifies their identity. The resolved promise returns a public key, which should then be sent to the backend server to be stored in the database.
4. Login ( Assertion Phase )
This is the second ceremony or process in passkey authentication. The initial part of this phase is very similar to the registration process.
First, request a challenge and metadata from the backend server. The data will look something like this:
{
  "challenge": "WdQqHL8bVP5-d2Nj1ymfEttawcAfGnZLa8seWhWJf5L",
  "rp_id": "www.sample-site.com",
  "user_verification": "required",
  "timeout": 300000,
  "allow_credentials": []
}
Then, invoke the Credential Management API’s get method using these options to trigger the authentication process.
const requestCredentialOptions = getPasskeyAuthenticationOptions();

await navigator.credentials.get({
  publicKey: requestCredentialOptions,
})
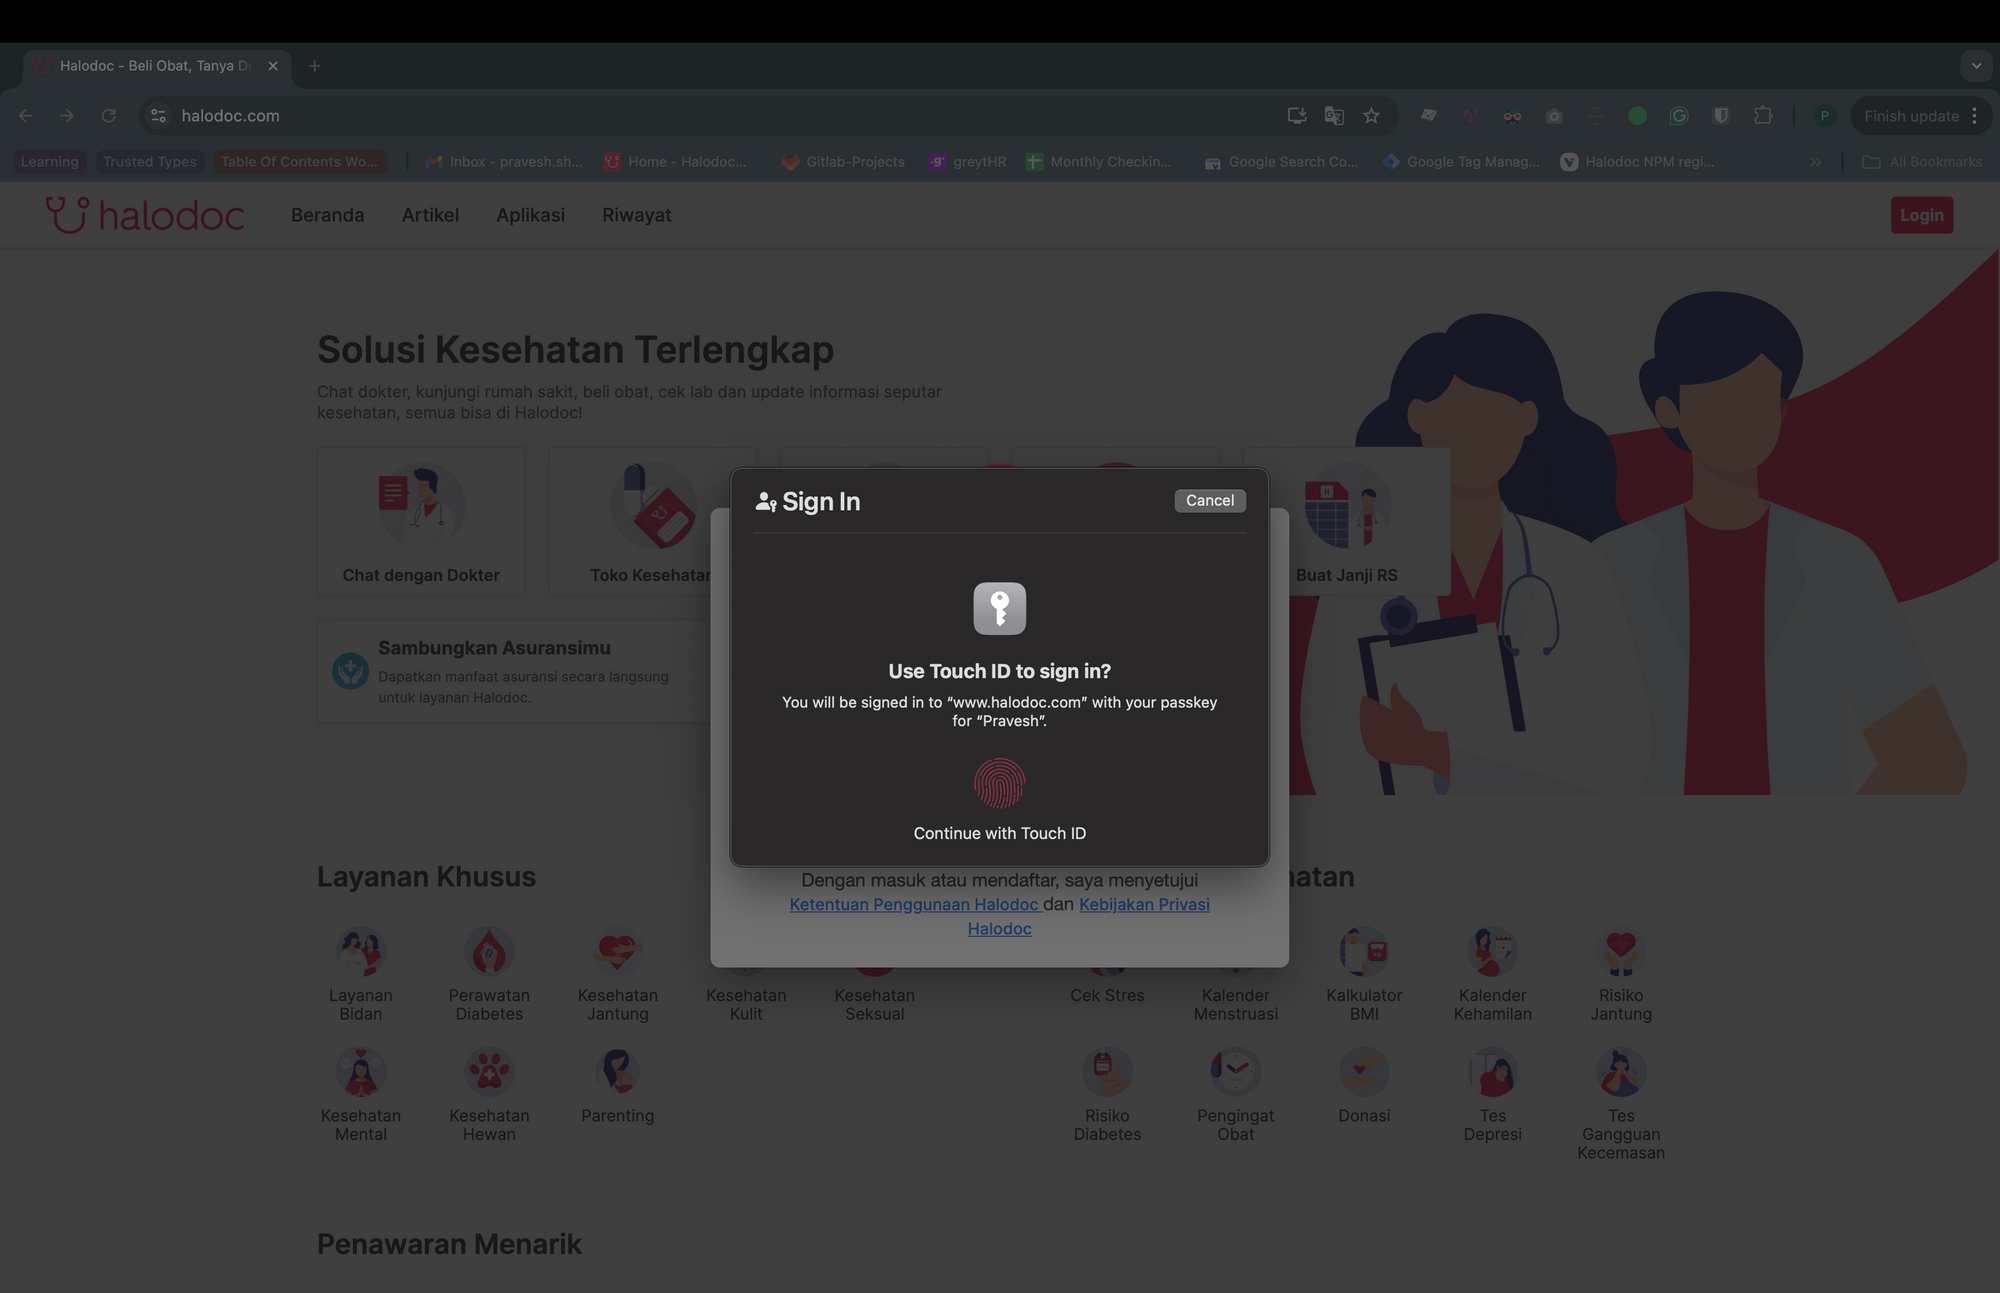
As in the registration phase, the get function returns a promise that resolves once the user verifies their identity using biometrics or a PIN. If the user has multiple passkeys then he/she will be prompted with an option to select any one and then verify their identity.

Once the promise resolves and the function returns the public key credential object containing the assertion signature, and sends it to the backend server. The server will then verify the signature against the public key stored during the registration phase. If the verification is successful, the server sends a user access token to the client, which is used to create a session.
It's also important to attach an AbortController to these get calls. Due to security reasons, only one active request is allowed at a time. If the previous request is not closed correctly, the Web Authentication API will throw an error. Here’s how to use the AbortController:
this.abortController = new AbortController();

await navigator.credentials.get({
  publicKey: requestCredentialOptions,
  signal: abortController.signal
})
Before making a new request, use:
this.abortController.abort();
5. Conditional UI
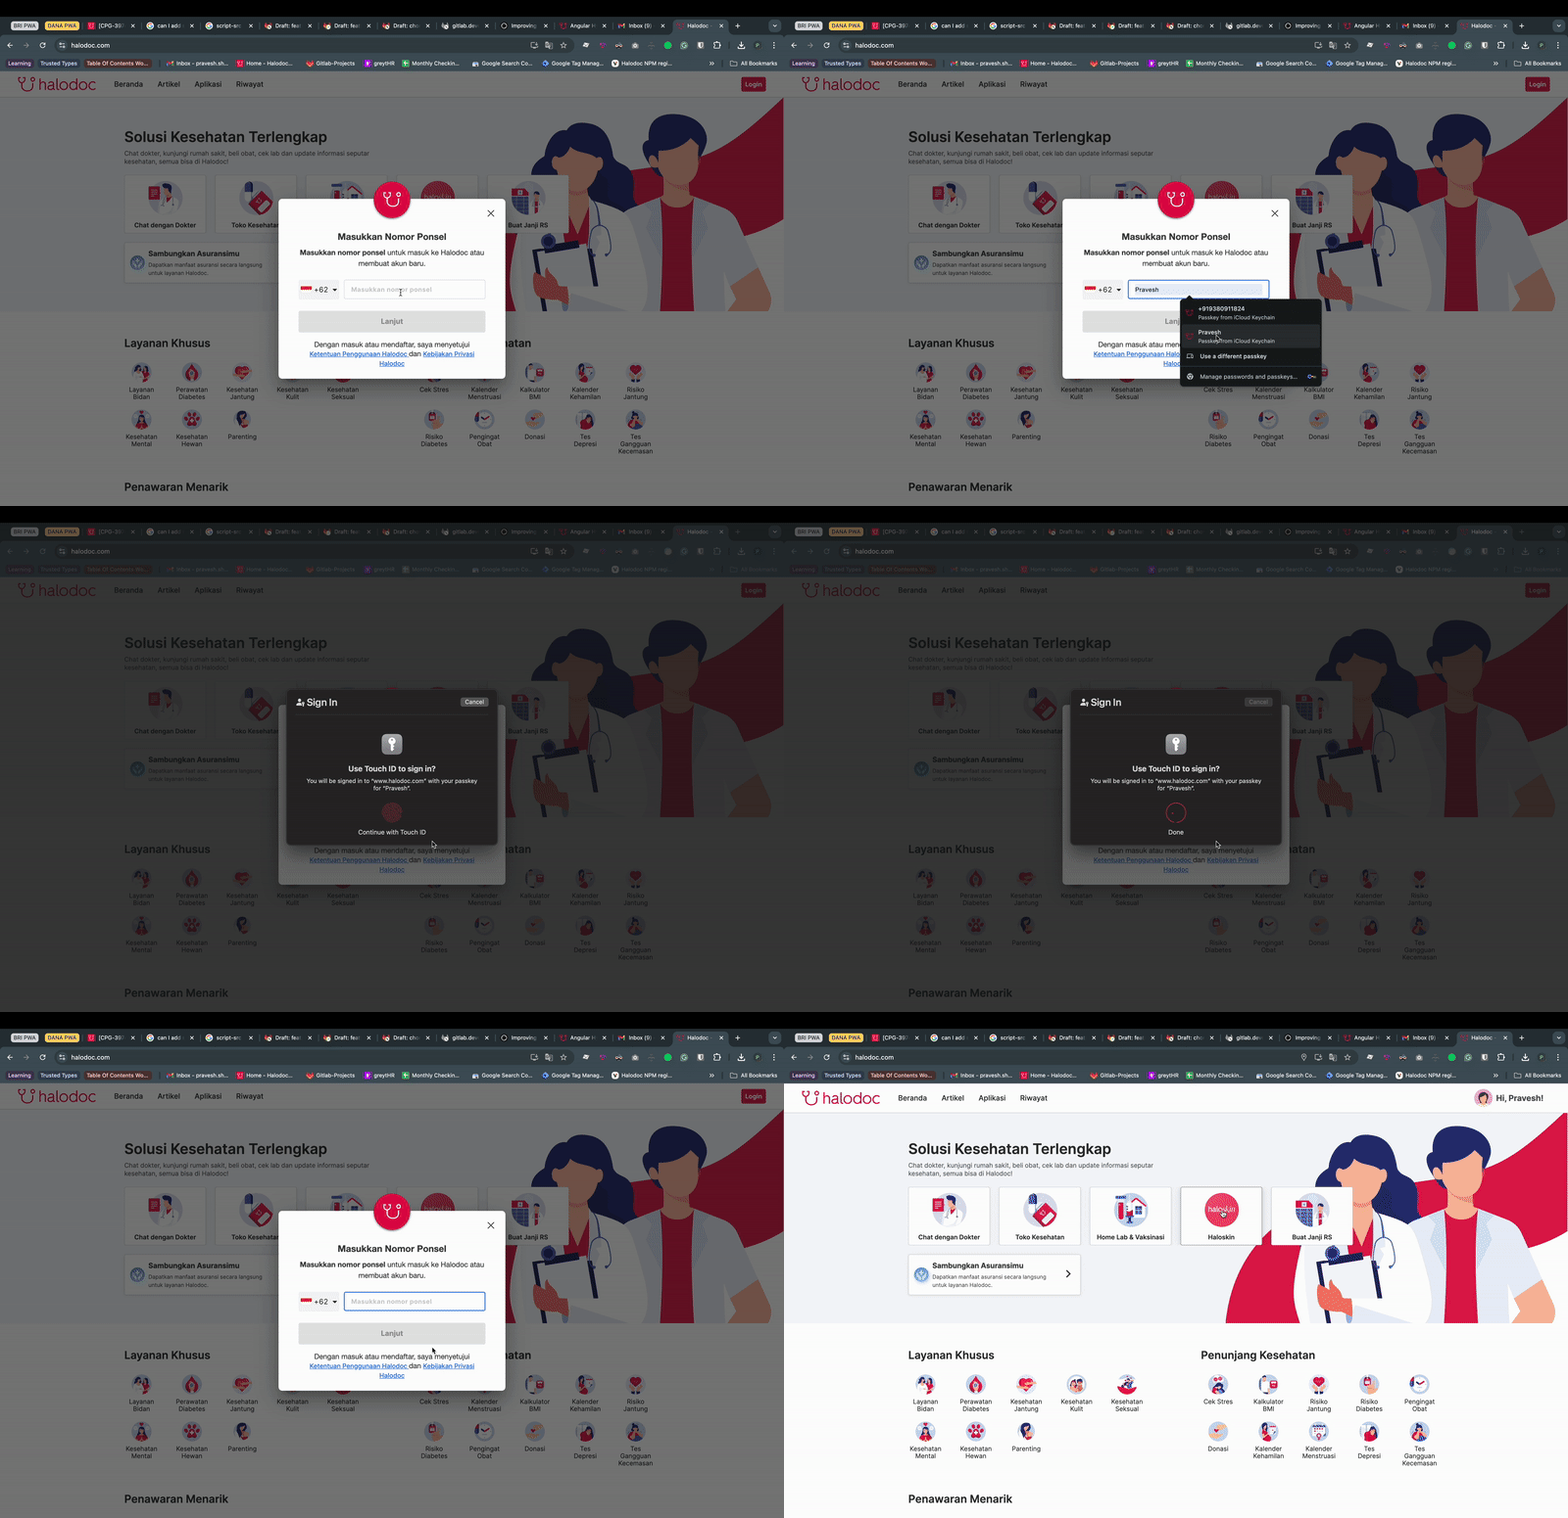
To provide a seamless user experience and encourage adoption, it’s essential to offer passkeys as an intuitive and non-intrusive option. We can do so by offering passkey as an autofill suggestion along with the user login form itself.

As you can see, when the user clicks on the phone number field, a passkey autofill suggestion is shown. If the user has multiple passkeys associated with their cloud account, all of them will be shown, allowing the user to select an account and verify to log in. We also need to ensure that Conditional UI is supported by the browser. To enable Conditional UI, make the following changes:
- Add
autocompleteattribute to the input field
<input name="phone-number" autocomplete="username webauthn">
- Check for WebAuthn API ( Refer Feature Detection/Browser Support ) and Condition UI support and then call the Web Authentication API’s
getmethod with themediationproperty set toconditional:
if(PublicKeyCredential.isConditionalMediationAvailable){
    const isConditionalUIAvailable = await PublicKeyCredential.isConditionalMediationAvailable();

    if(!isConditionalUIAvailable){
        return;
    }

    this.abortController = new AbortController();
    const requestCredentialOptions = getPasskeyAuthenticationOptions();

    await navigator.credentials.get({
      publicKey: requestCredentialOptions,
      signal: abortController.signal,
      mediation: 'conditional'
    })
}
Conclusion
Passkeys represent a significant leap forward in web authentication, offering both enhanced security and a more seamless user experience. By integrating passkeys into your web application, you can drastically reduce the risks associated with traditional authentication methods while also cutting down on the costs related to managing passwords and two-factor authentication systems. As we’ve seen with our implementation at Halodoc, embracing this modern approach not only strengthens security but also simplifies the login process, leading to happier users and a more secure platform. As the adoption of passkeys grows, now is the perfect time to integrate this innovative technology and future-proof your authentication system.
References


Join us
Scalability, reliability and maintainability are the three pillars that govern what we build at Halodoc Tech. We are actively looking for engineers at all levels and if solving hard problems with challenging requirements is your forte, please reach out to us with your resume at careers.india@halodoc.com.
About Halodoc
Halodoc is the number 1 Healthcare application in Indonesia. Our mission is to simplify and bring quality healthcare across Indonesia, from Sabang to Merauke. We connect 20,000+ doctors with patients in need through our Tele-consultation service. We partner with 3500+ pharmacies in 100+ cities to bring medicine to your doorstep. We've also partnered with Indonesia's largest lab provider to provide lab home services, and to top it off we have recently launched a premium appointment service that partners with 500+ hospitals that allow patients to book a doctor appointment inside our application. We are extremely fortunate to be trusted by our investors, such as the Bill & Melinda Gates Foundation, Singtel, UOB Ventures, Allianz, GoJek, Astra, Temasek, and many more. We recently closed our Series D round and in total have raised around USD$100+ million for our mission. Our team works tirelessly to make sure that we create the best healthcare solution personalized for all of our patient's needs, and are continuously on a path to simplify healthcare for Indonesia.


