
Best practices for Git branching
Overview
GIT provides a great documentation and storage space for our codebase, but we need to use this space efficiently without creating a mess with our branches and commits. We will explore this in detail.
What is Git
Git is a software for tracking changes in any set of files, usually used for coordinating work among programmers collaboratively developing source code during software development. It helps us in the following ways.
- A clone of our production website can be easily created, which is known as branching.
- We can make our changes in local and deploy them for testing in another branch meant for it.
- In the form of commits, Git contains all the documentation regarding the changes and the developer who made them.
- We can simply merge our branch with the added changes into the main or production branch. In development, it is termed the master branch.
- During merging, the merge tool only adds the changes to the origin branch and does not create a new branch. This allows it to employ all the changes with minimal data.
- Our changes can be stored in the cloud and can also be fetched locally, where we can do development.
Git flow at Halodoc
Here at Halodoc we use Gitlab to maintain the codebase on the cloud. Each repository has two important branches.
- master
- Stage-release
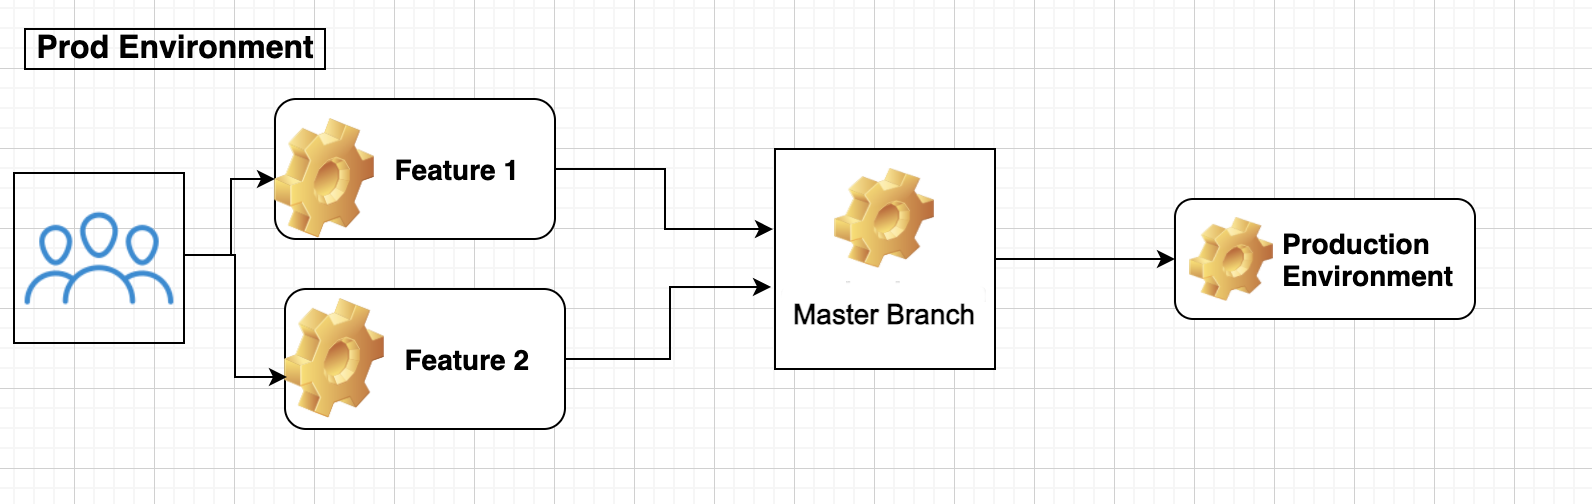
Master is the main branch whose code is running live in production. If there is any feature change or any bug fix is scheduled, then we need to always create our local branch from master.
Then we make the necessary changes and merge it back, simple. But hold on, this is not the right way. We need to test the changes made by a developer. If we merge it directly to master then the wrong code can create too many bugs in our production website and then it will generate frustration among our users.
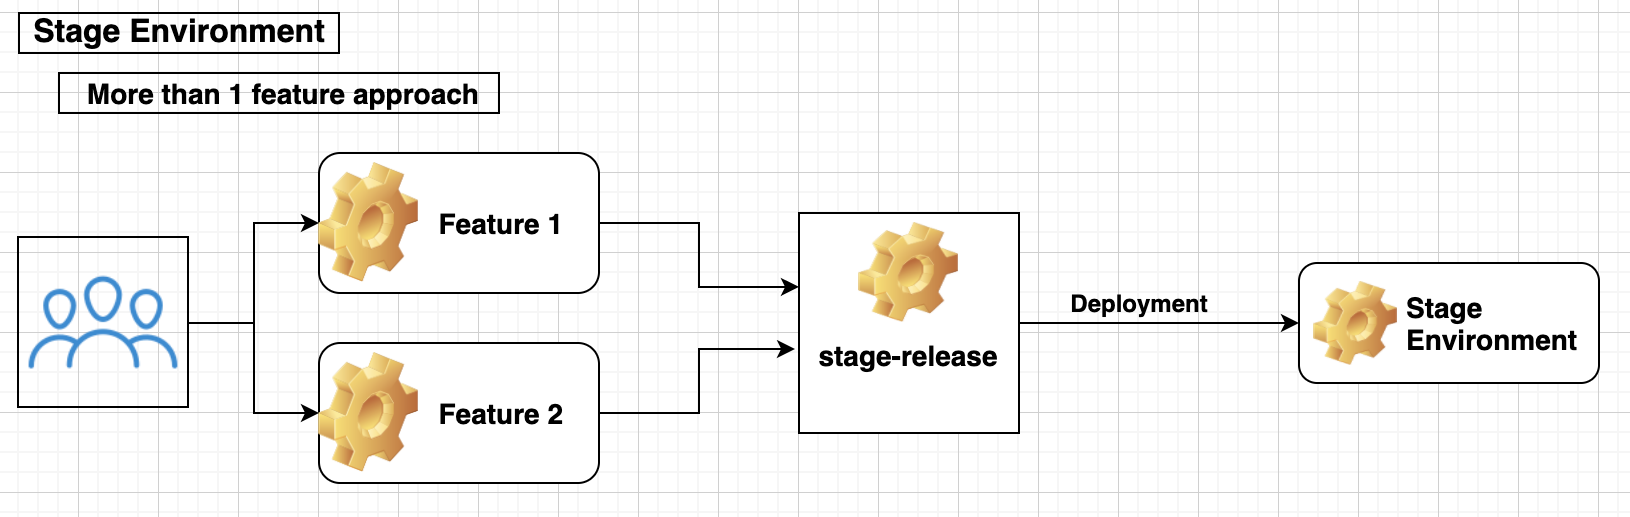
Here comes the use of the second branch i.e. stage-release. We also have a staged website which is a reduced version of our main website, and it is run by code from the stage-release branch, so initially, every developer has to merge into it, then it gets tested, and if there are any bugs, tickets are issued to developers, and after resolving all the bugs the new branch is approved to merge with master.
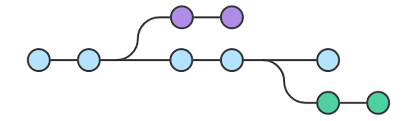
We will understand it better with the help of the following illustration.
This is a basic diagram to show the flow of code while working on any front-end project. There are many complexities we may have to handle while merging our code to it's origin branch.
In any organisation, there are a lot of developers working on the same repo for different changes. So the commits which may be present in master may not be present in stage-release or vice-versa. To resolve this problem we need to rebase our feature branch with the branch where we are going to merge it.
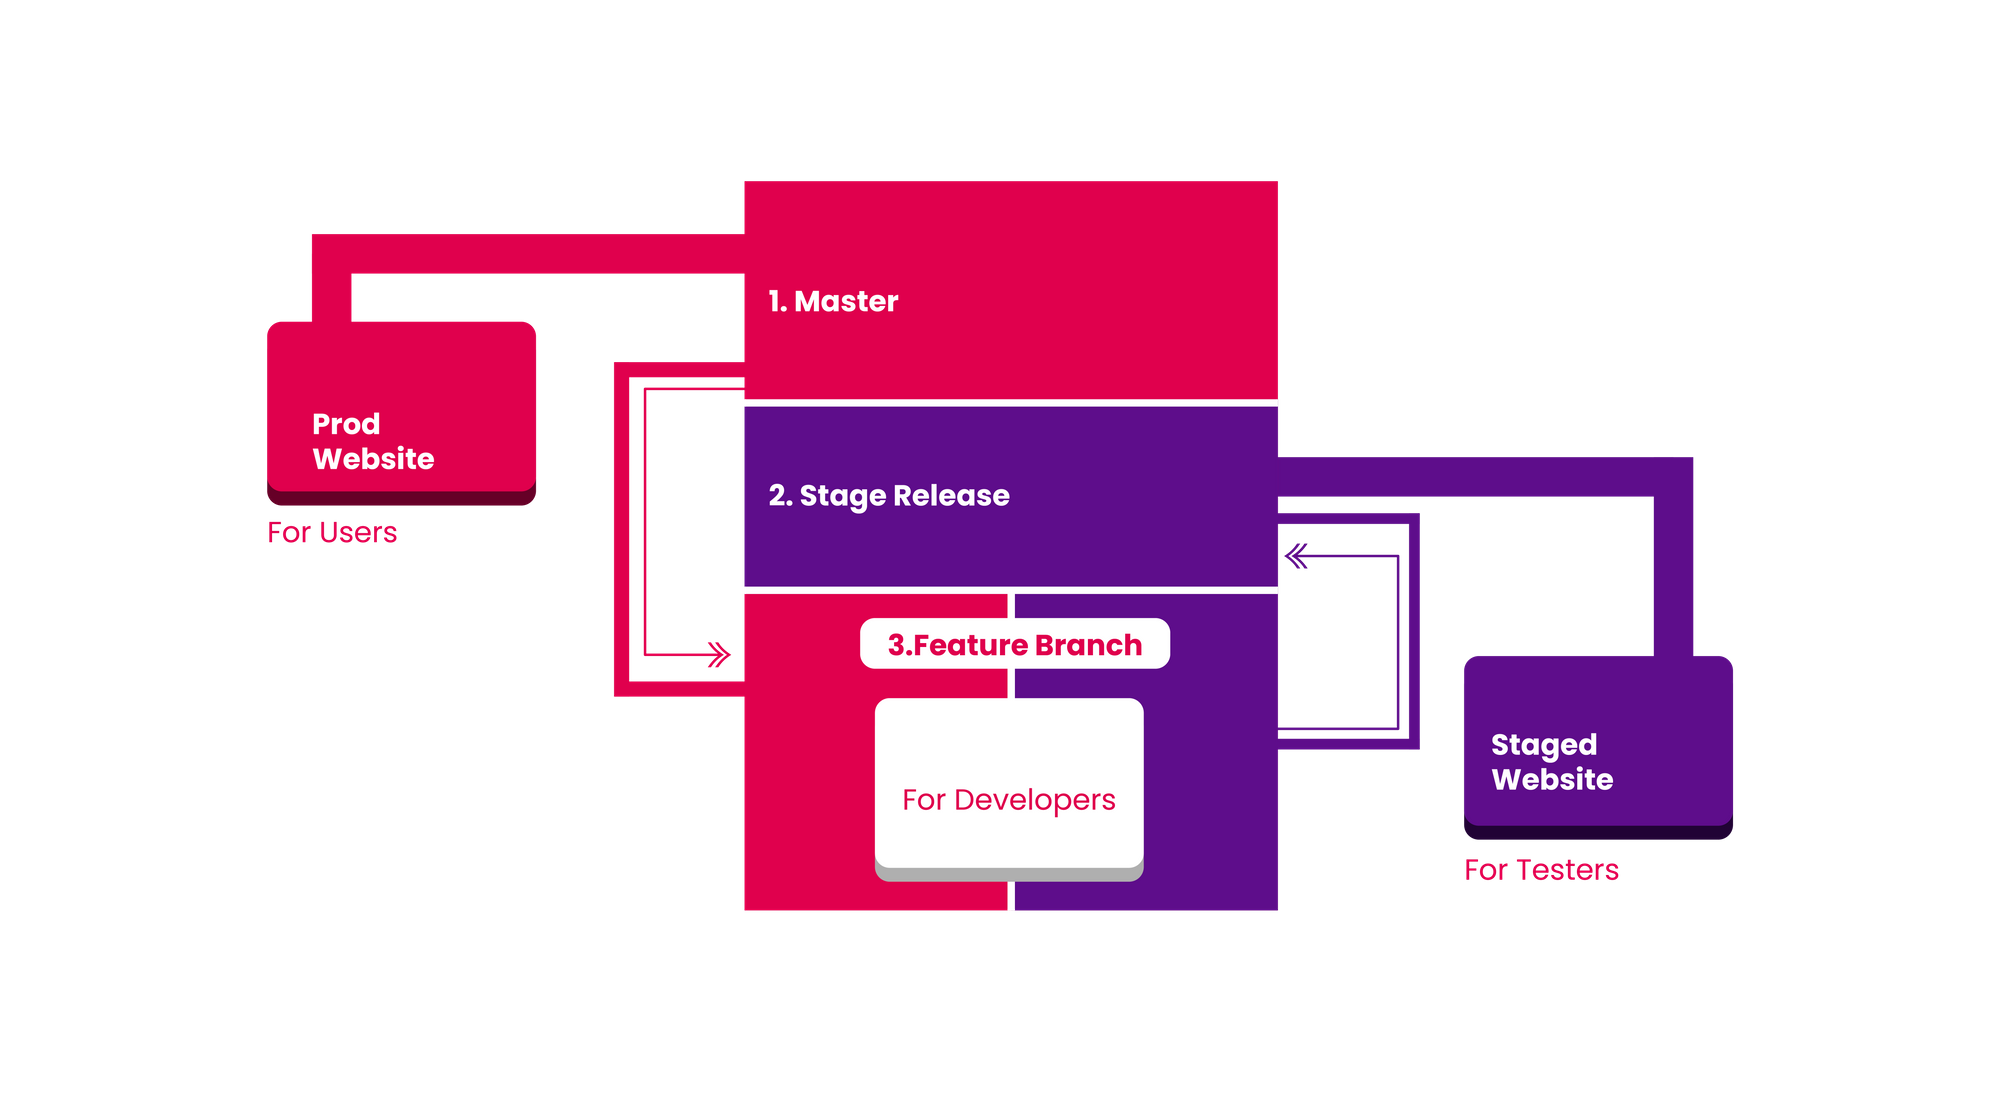
At Halodoc we follow this git branching strategy:
As shown above, for stage environment we use stage-release branch and after getting the sign-off from tester the respective feature branch is merged to master branch to add the feature in our production website.
How to rebase the code with stage-release
The best way to rebase our code with stage-release is cherry-picking our commits to a new branch. We can simply do it using the following steps.
- Create a local branch from stage-release.
- Go to git lab and copy your commit id.
- Return to VS code and type the following command
git cherry-pick <commit-id>Suppose we have made more than one commits our previous branch, then it may take a lot of time in cherry-picking all the commits one by one. But here is one command using which we can cherry- pick all the commits at one.
git cherry-pick <first-commit-id>..<last-commit-id>Just keep in mind that all the commits between these two are required changes.
These three steps will automatically add our commits to the newly created branch from stage.
Now we only need to push this branch to GitLab and raise an MR regarding only our changes and then we will see that now there are only our commits in the raised MR.
Merge Conflicts
Merge conflicts are one of the tedious tasks we get to resolve while merging our branch to stage or master. First, we will understand this with a below example.
When two developers create two separate branches from the same repo and while development they edit the same line and one developer merges it back before another. Then Git easily accepts the changes made by the first developer. But after some time when the second developer tries to merge his local branch to stage/master then Git raises the merge conflicts as now it has two options on the same line and now it is on the user to decide which change will be taken further and which change will be erased.
To resolve it we need to create a branch from the origin and then we have to merge our feature branch in our local system. For example, if we are getting the conflicts while raising the MR to the stage-release branch then we will have to follow the following steps.
1. First need to create a new branch from stage-release using the following command.
git checkout -b <branch-name> upstream/stage-release2. Then we need to merge our feature branch to the newly created branch from the stage in the local system using the next command.
git merge <feature-branch-name>3. Then we will get the merge changes in our local in the files where conflicts are present with three options.
- Accept current changes (changes added by another developer)
- Accept incoming changes ( changes added by us)
- Accept both changes
4. We cannot directly accept incoming changes as it will remove the changes made by another developer. First, we need to ask another developer regarding the changes he made in the same line.
5. It is always better to come to a common solution after discussion and add it there. And don't forget to save the file.
6. Now the last step is to commit the changes and raise the MR from the newly created branch to the stage-release branch.
How to name branches
The naming of branches has great importance when we are working with git. It is essential that we name our branch in such a way that it won't be confusing as well as give us an idea of the job for which we are creating that specific branch.
We mostly create a branch for the following purpose.
- To add a feature in our web app.
- To fix a bug in our running website.
- To refactor our code for issues or better readability.
- To resolve the merge conflicts.
- To raise an MR to stage release if it is not properly rebased with develop.
We will discuss all of these, one by one.
To add a feature
Introducing any new feature adds new code or files to our codebase, and it is very important for a developer to provide the changes with a unique identity. It is a good practice to start these branch names with feat word.
Consider we are adding a feature in the insurance section where now the user can edit his date of birth, which was not accessible earlier.
We can name this branch as feat-insurance-dob.
We can use either hyphen or underscore for spacing but we need to be consistent with it. The above name makes it clear that the purpose of this branch is to add a new feature to the insurance section in regards to the date of birth changes.
To fix a bug
For branch related to fixing a bug. It is always better to start the name of the branch with fix word. there is an issue with the rendering of an image on the consultation page. So we can name it as fix-consultation-image
To refactor our code
Occasionally, we need to re-edit our code to correct its errors, such as fixing sonarqube issues or fixing code smells. Here we only have to rewrite our old code in a better way. We can start by naming these branches with re word and it can be named as re-sonar-codesmells
Conclusion
The above article is written in order to help with git branching flow and techniques to keep the codebase documentation in a better way. By doing this, we will eliminate the chaos generated by creating and merging branches without examining the naming convention and flow of the branches.
Join us
We are always looking out for top engineering talent across all roles for our tech team. If challenging problems that drive a big impact enthrall you, do reach out to us at careers.india@halodoc.com
About Halodoc
Halodoc is the number 1 all-around Healthcare application in Indonesia. Our mission is to simplify and bring quality healthcare across Indonesia, from Sabang to Merauke. We connect 20,000+ doctors with patients in need through our Tele-consultation service. We partner with 3500+ pharmacies in 100+ cities to bring medicine to your doorstep. We've also partnered with Indonesia's largest lab provider to provide lab home services, and to top it off we have recently launched a premium appointment service that partners with 500+ hospitals that allow patients to book a doctor appointment inside our application. We are extremely fortunate to be trusted by our investors, such as the Bill & Melinda Gates Foundation, Singtel, UOB Ventures, Allianz, GoJek, and many more. We recently closed our Series B round and In total have raised USD$100million for our mission. Our team works tirelessly to make sure that we create the best healthcare solution personalized for all of our patient's needs, and are continuously on a path to simplifying healthcare for Indonesia.