
Angular Unit Testing - Why and How to unit test angular applications
In Web Development, unit testing is largely neglected yet significant for quality delivery of products. One of the main reasons being, lack of development time and sometimes due to lack of awareness about its importance. Unit testing, a testing technique using which individual modules are self-tested by the developer to determine if there are any issues with his/her code. We at Halodoc rely on unit test for a quality and quicker delivery of our products.
The objective of this blog is to provide a complete understanding of why unit testing is important, how to set up your Angular project for unit testing, and then we will discuss unit testing with examples of services and components.
Why Unit Test?
Comparison of Unit testing with those of others like regression testing, integration testing is depicted in the form of Software Testing Ice-Cream Cone.
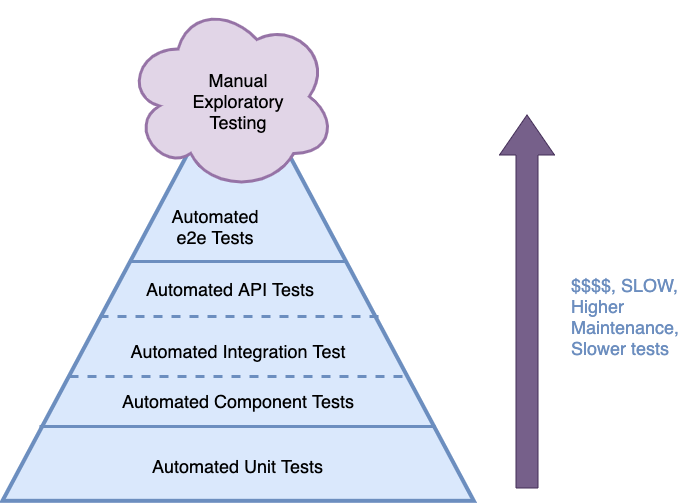
From the above diagram, we see the tests that are at the top of the pyramid like E2E testing, integration testing takes more time to execute, have higher cost of maintenance, hard to test corner cases, hard to reproduce failures and also tests will be flaky.
Unit Testing has the following advantages over E2E tests:
- Test individual classes in isolation
- Can simulate all error conditions
- Developers can run these after each file modification
- Very fast and no flakiness
Key points to keep in mind while writing unit tests
1. Isolation (Single responsibility)
Test cases we write shall follow the single responsibility principle
- Single test case shall not depend on other test cases to be run / or on their results.
- Initialise and clean global states between test runs.
Helps in identifying the bugs in code much quicker!.
2. Deterministic
Non-deterministic cases are the ones which passes sometimes! Will have NO idea if the test failed due to a bug or for non-determinism.
They are essentially useless, and shall be avoided.
We usually use Thread.sleep(500) which results in non-determinism, and hence should be avoided. Using polling/callback of the mocks instead is recommended!
3. Test results not Implementation
Implementation of a behaviour might change frequently, results wont. We should always be validating results.
Setting Up Your Test Environment
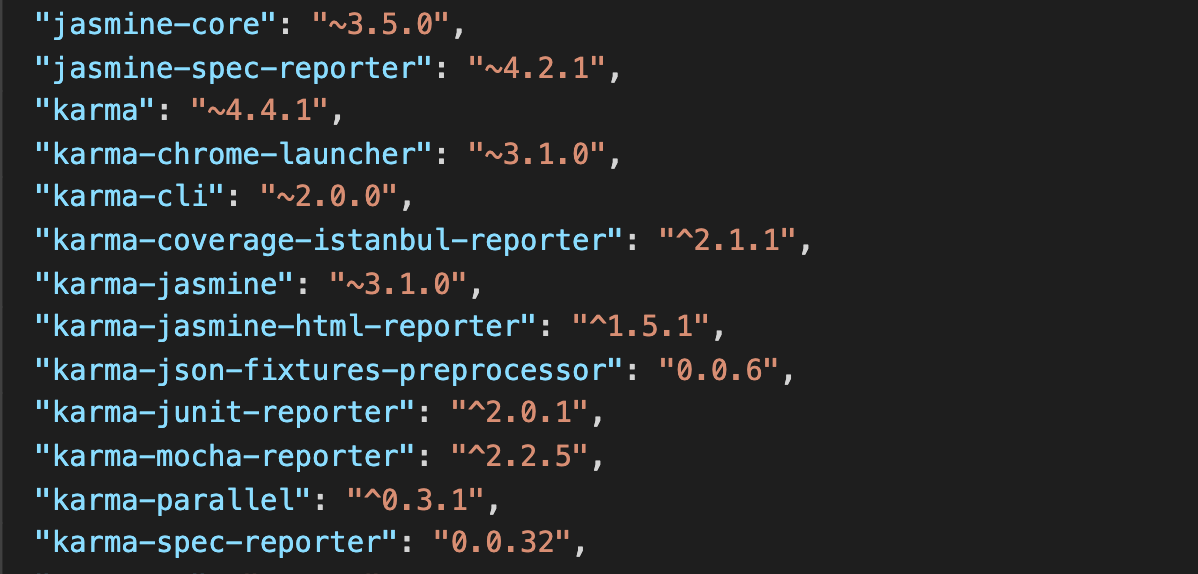
Angular CLI sets up the test environment and installs all the dependencies (Karma and Jasmine) for the test; when you create your Angular project. To run the test, you will only need to run the command ng test. This command will also open Chrome and run the test in watch mode, which means your test will get automatically compiled whenever you save your file.
How does the Test run
In your Angular project, you create a component with the command ng generate component doctor. When you do so, you can see that along with your component's doctor.component.ts file, an additional test file i.e doctor.component.spec.ts will also be created, this is the test file for that component.

The flow of how the test run is shown below
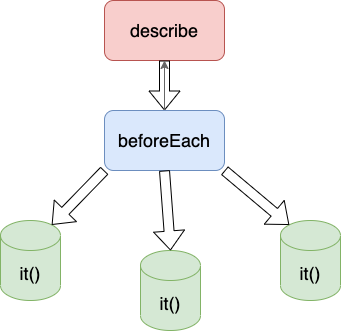
There will be multiple things you will notice from the above code snippet, What each of this does is explained below:
- We use a “describe” to start our test and we give the name of component that we are testing inside it.
- The beforeEach tells the Karma test runner to run this code before every test in the test suit, i.e it().
- Inside the beforeEach, we have
TestBed.ConfigureTestingModule. What TestBed does is, It sets up the configurations and initialises the environment suitable for our test. ConfigureTestingModulesets up the module that allows us to test our component. We can say that it creates a module for our test environment and have Declarations, Imports, and Providers inside it.- We declare the component that we test inside the Declarations array. We have to include those of other components If our component of interest has a dependency on them.
- In the Provider array, we override the actual service with our spy that we created using Jasmine. Other services that are injected into our component through the constructor are provided directly in this array if we don’t want to spy on them.
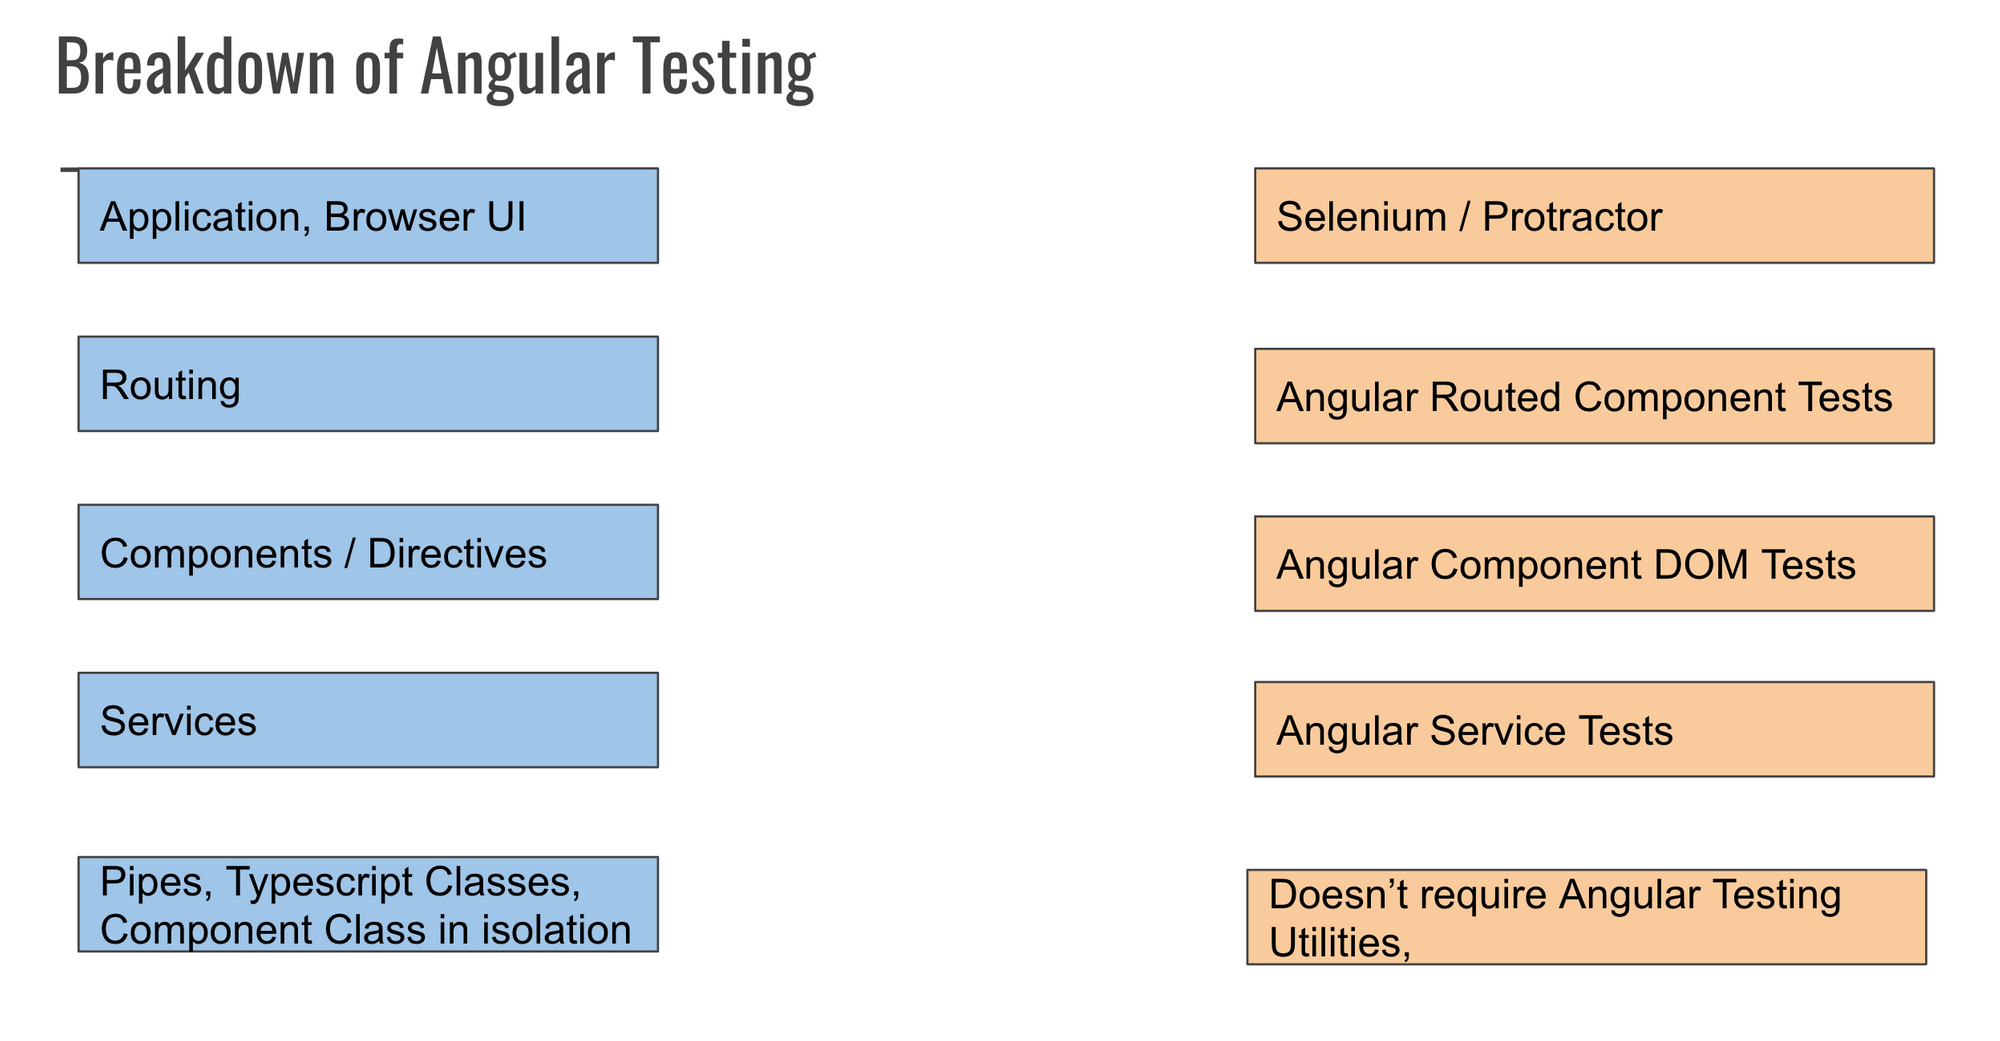
Different areas of Angular testing and the utilities used to test them are as shown below. However, we will go through unit testing only services and components in this blog: as they are pretty straightforward, takes less time to get started with and the majority of the logics in your project are contained within components and service.
Testing a simple class
Unit Testing a class is the simplest of all. To begin with, let me take an example of a class having a method involving conditional statements.
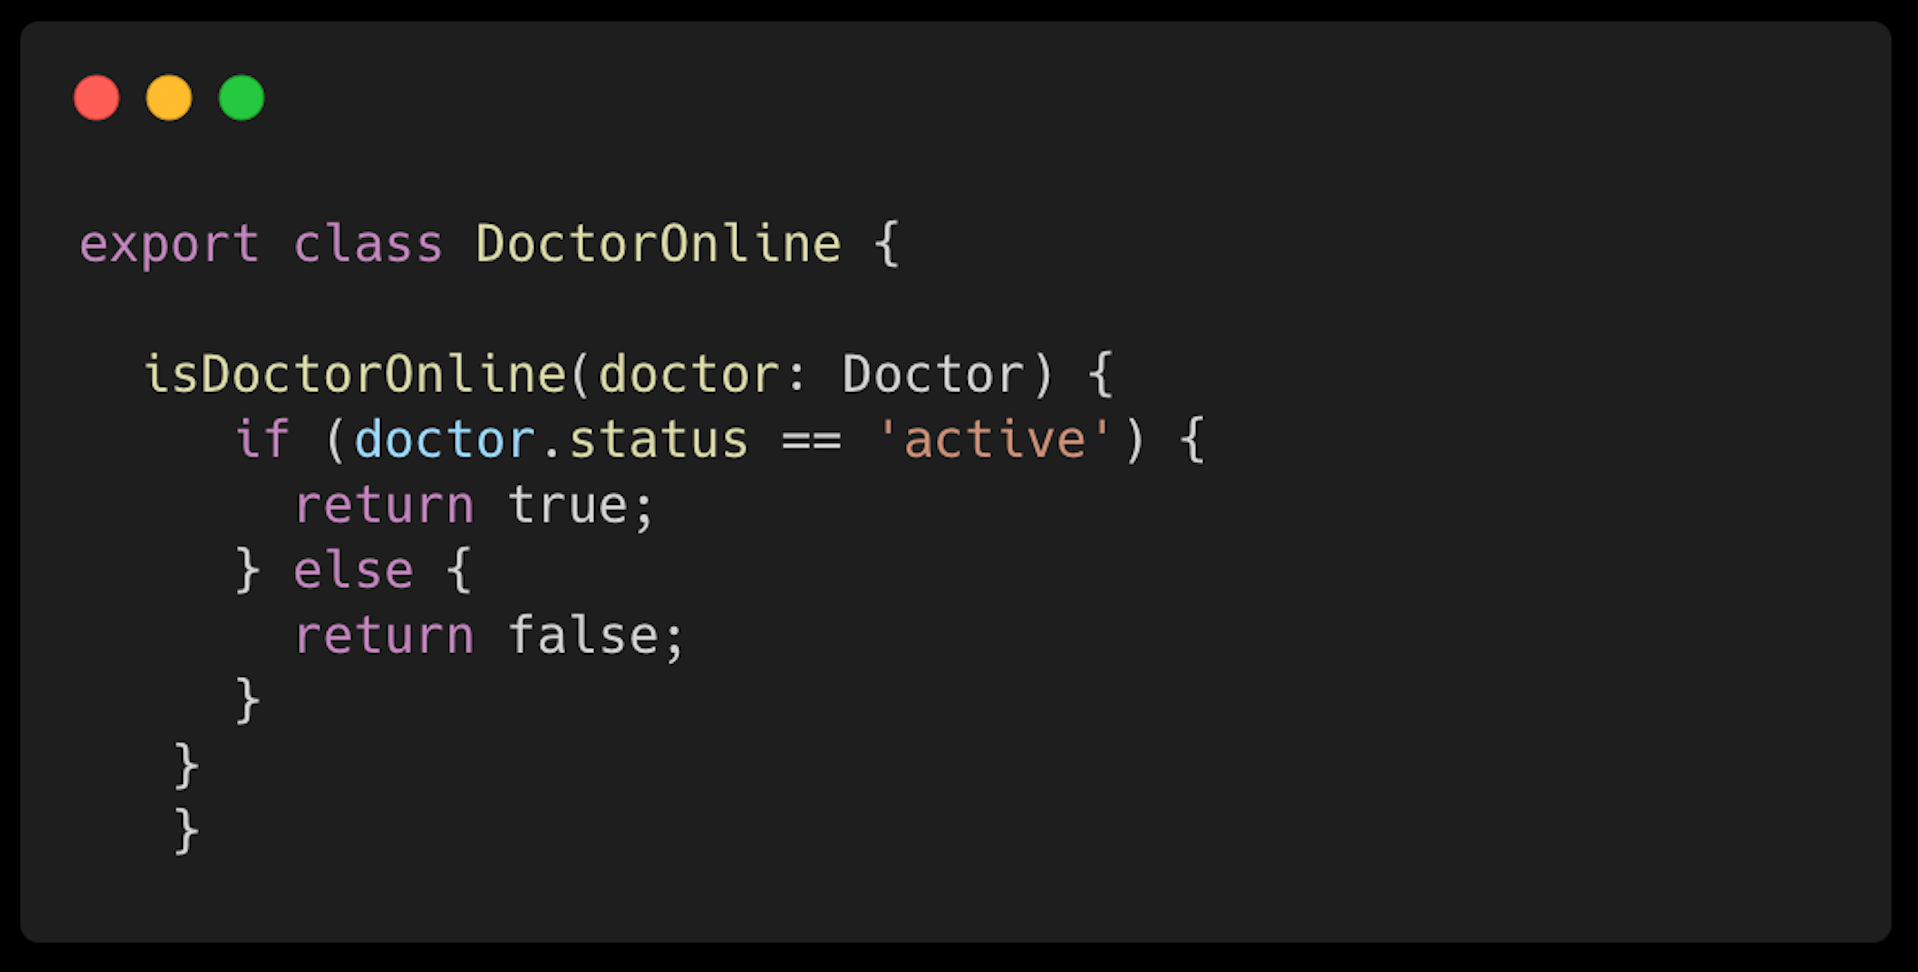
For this the Unit Test Will be
Here we have taken an example of a class which has as a method that returns a boolean value based on the doctor input.
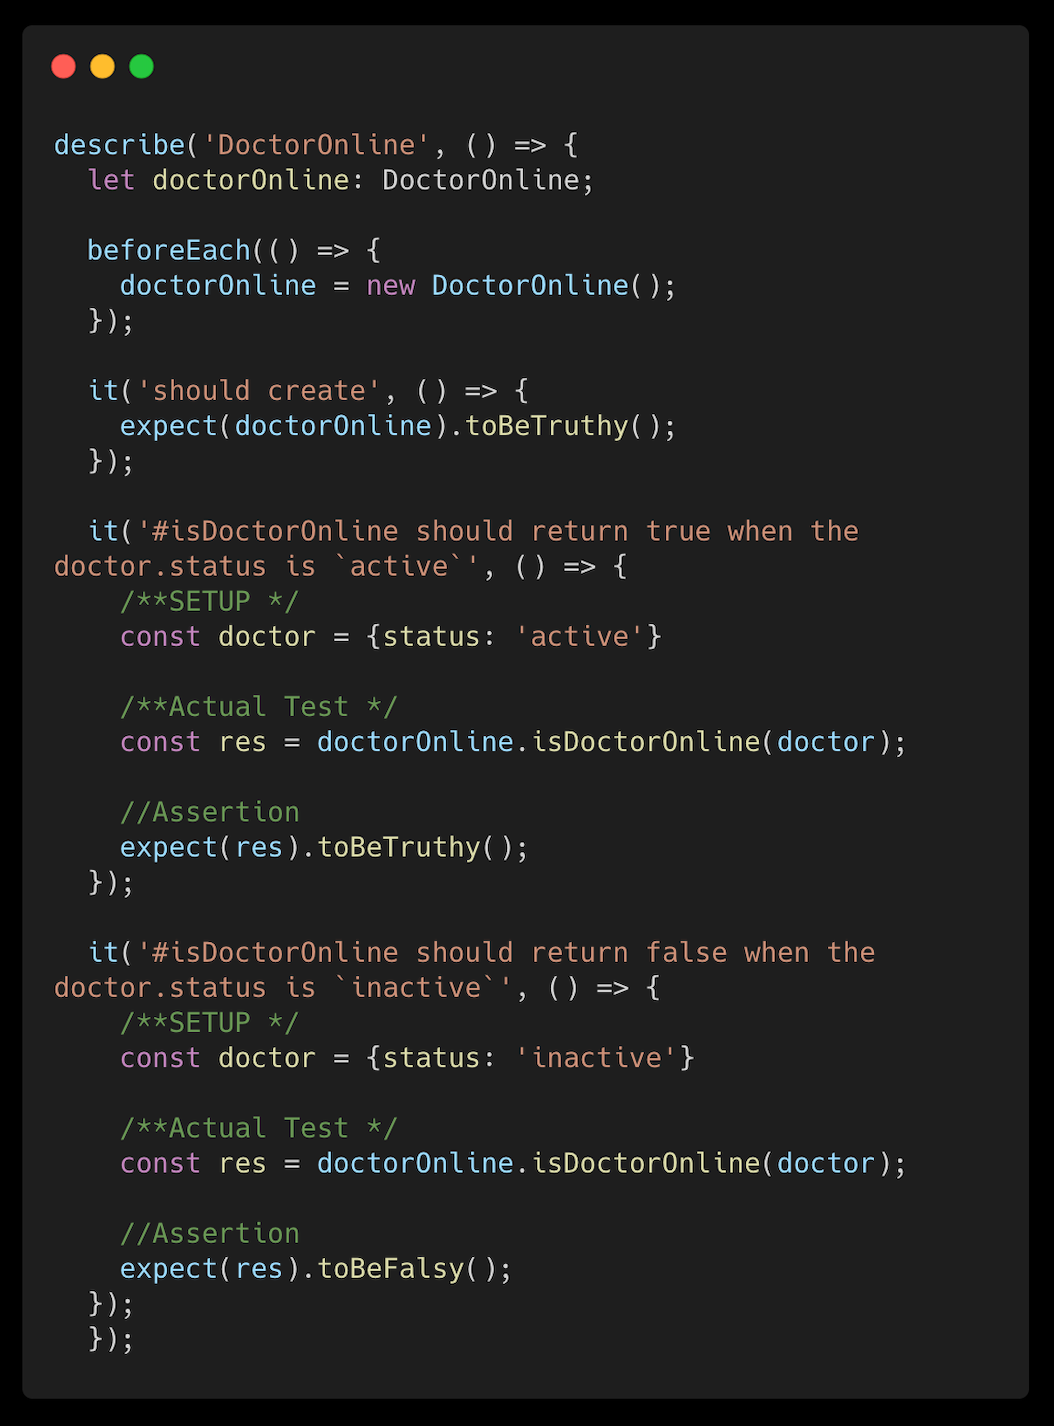
To test this in the describe block
- Inside the beforeEach, we take a test scoped variable where we store a reference to our class with
let doctorOnline: DoctorOnline; - Then we create a new instance of our class to that variable with
doctorOnline: new DoctorOnline();
The it() function will create a new test with title 'should be created' , this essentially tests whether our class is correctly been instantiated or not i.e it checks our doctorOnline variable to be Truthy.
Now that we have successfully tested our instantiated variable, we move forward to test our isDoctorOnline() method. For this, we create a test with it() method. Then we give the title of what exactly we are going to test in this particular test inside it() method, this will help the third person who is viewing your test to better understand the goal of your test. Then we hypothetically divide our test into three areas namely,
- setup: where we provide a suitable test Environment and conditions for which we are going to test our method.
- Actual Test: where we call the method.
- Assertion: where we assert or expect the desired result.
In the first test, we have defined an object doctor and have given the necessary conditions so that the function returns true, in the next test we have given the conditions for the false output. With this, we are able to test the two possible outcomes of the method and assert it in the assertion area.
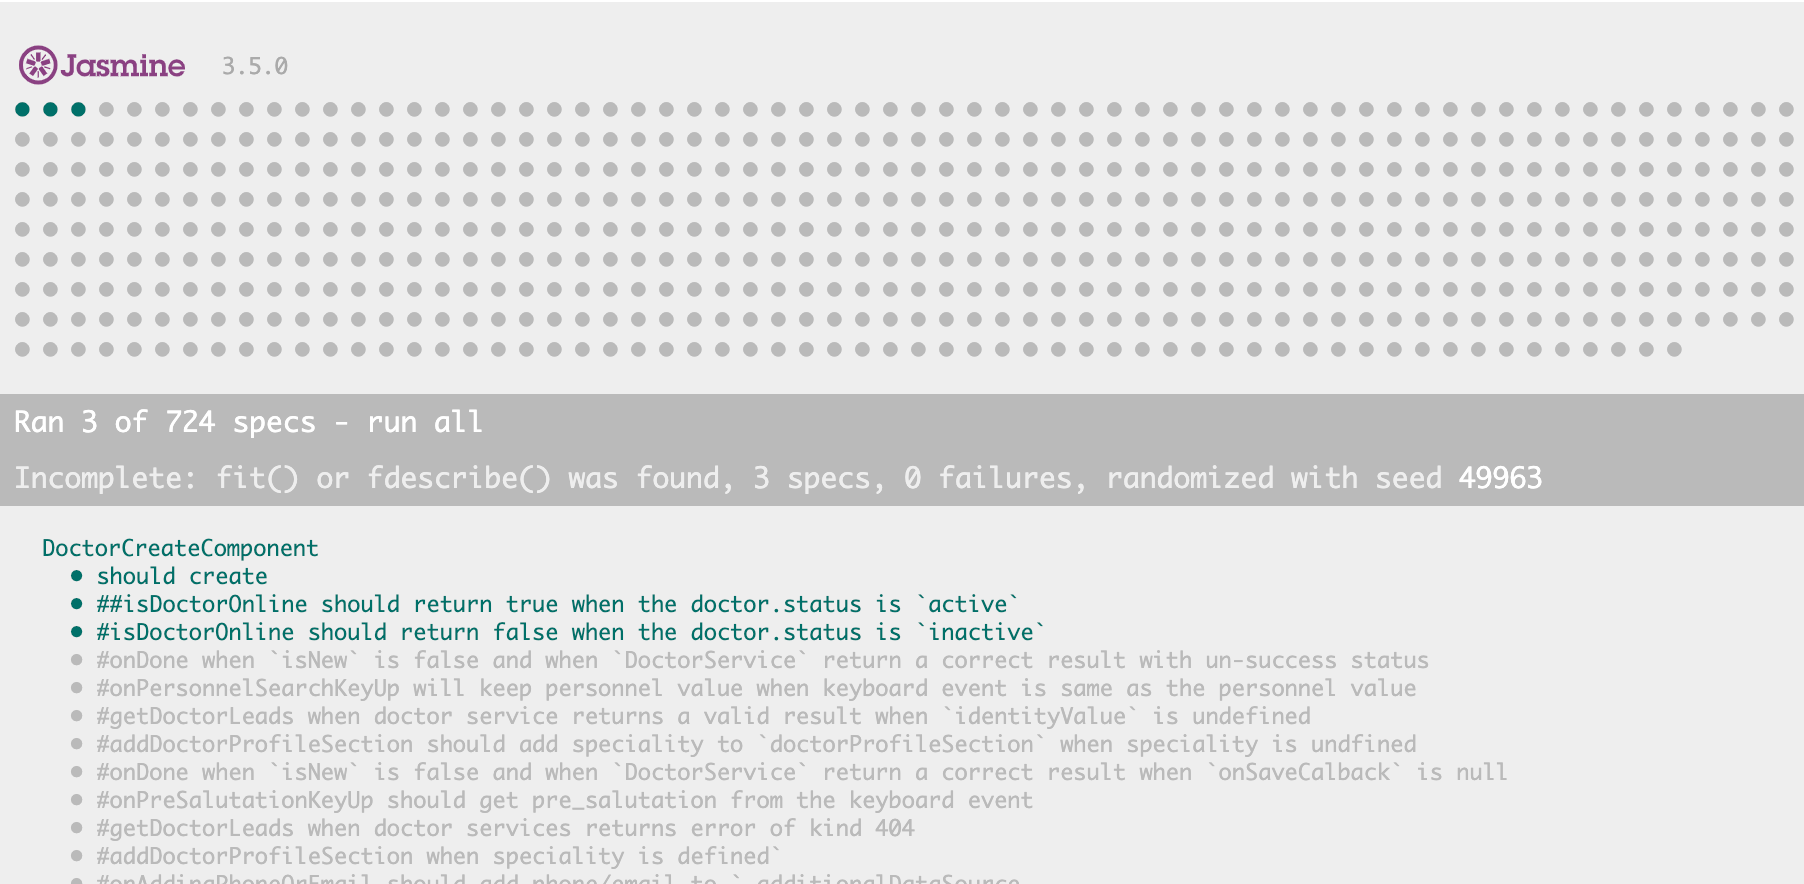
After you run your test using ng test command you will see the results in your browser like
Testing a service
Again we go by taking an example of a service with http PUT request.
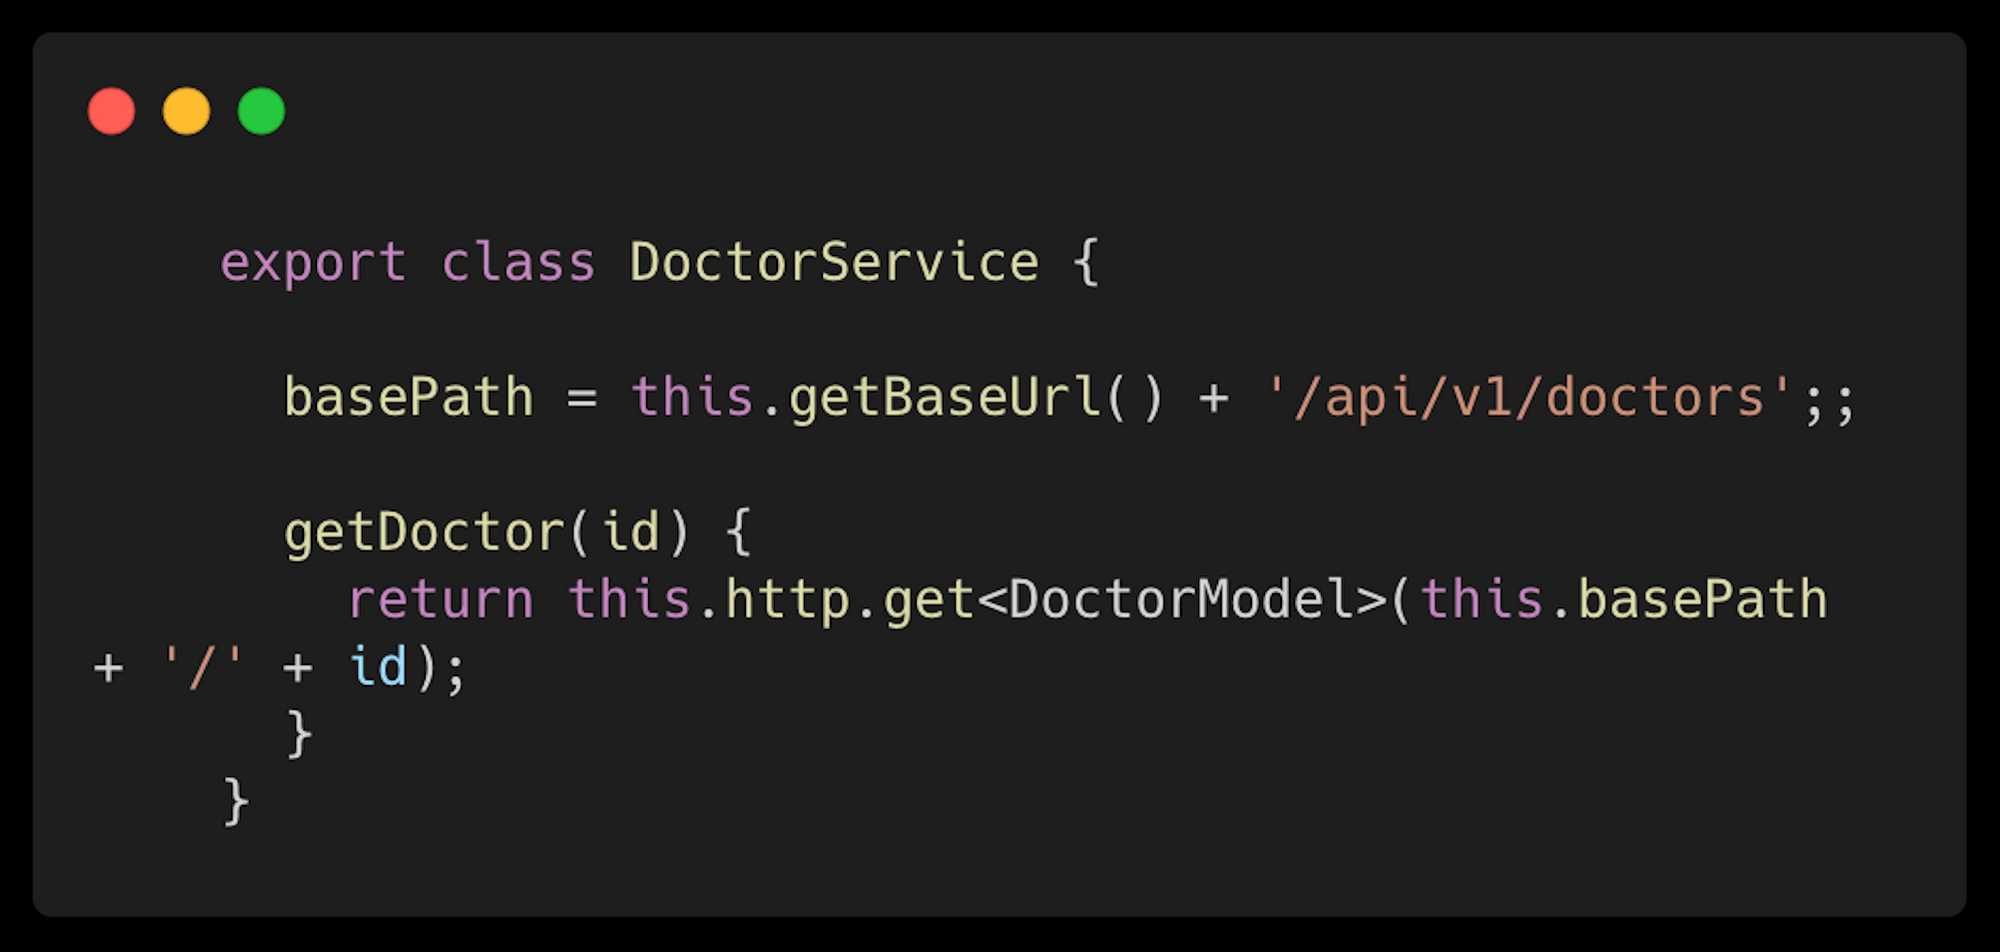
Here I have taken a service that has a method called getDoctor() which makes an HTTP get request.
For this service, the unit test will be:
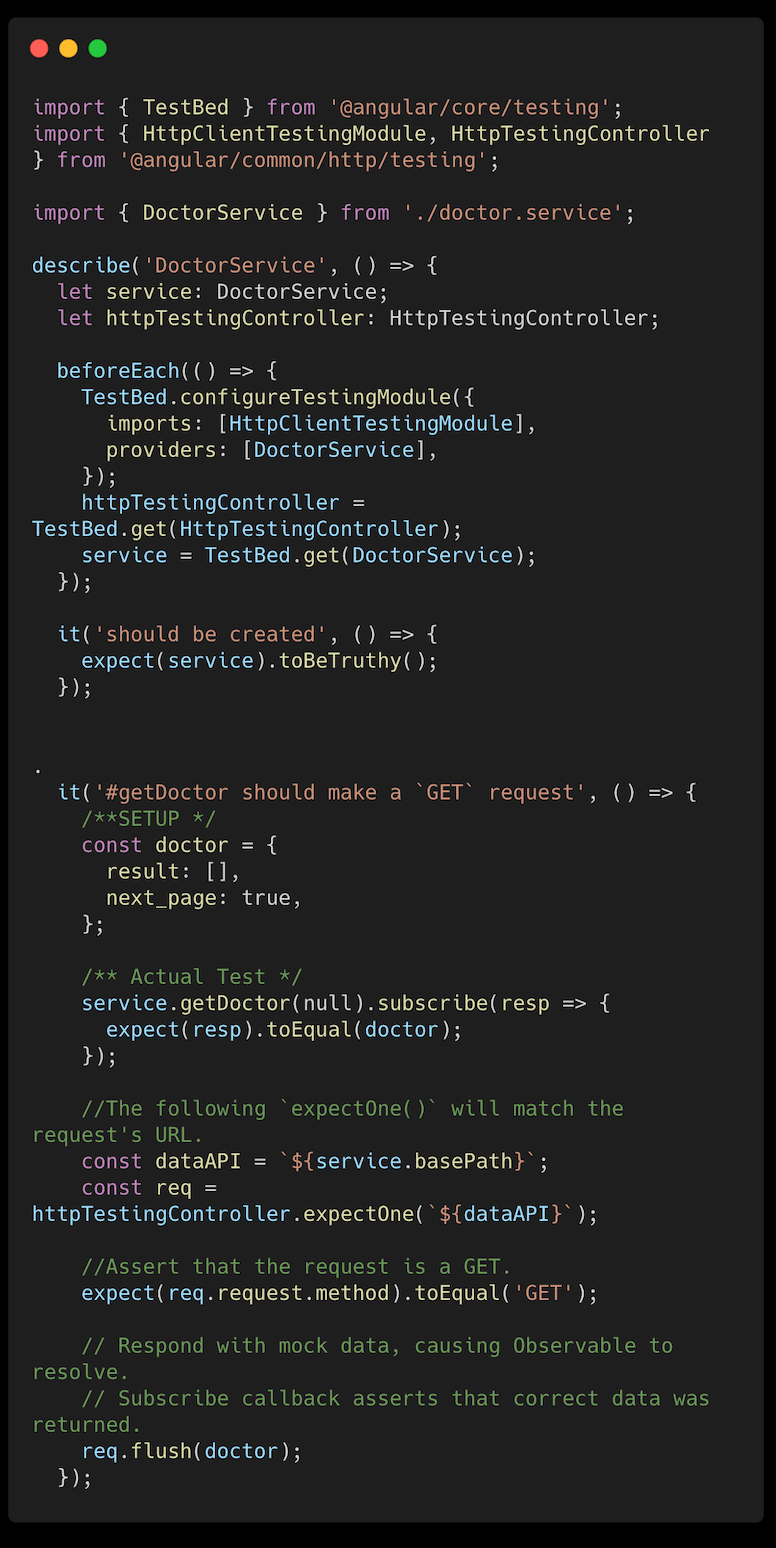
To test this we create an instance of the service like we did in our previous example.
- We import HttpClientTestingModule so that it mocks HttpClientModule as we don’t want to make actual http calls.
- HttpTestingController is a service of HttpClientTestingModule that is used to mock the http calls. Along with our service we also inject httpTestingController with
TestBed.get(HttpTestingController)and store its instance in a variable called 'httpTestingController'.
We provide the service to be tested inside the Provider array, then we inject it inside our test using TestBed.get(DoctorService) and assign it to the service variable.
To start with we first check if our service is successfully instantiated with expect(service).toBeTruthy().
Inside the it(), we do the following to test the 'getDoctor()' method
- We first define a mock doctor which we are expecting from the service method.
- Then we call our method and in the subscribe handler we tell angular that we are expecting the response to be equal to our mock data.
- We use expectOne method of HttpTestingController to fire the requests and this, in turn, ensures that a single request has been made with the given URL and fails if more or no requests are made.
- We also expect the type of HTTP method to be made to the given URL with
expect(req.request.method).toEqual('GET');.
These steps of testing can be followed for other HTTP methods like POST, PUT and DELETE.
Testing a component
Let us take an example of a component.
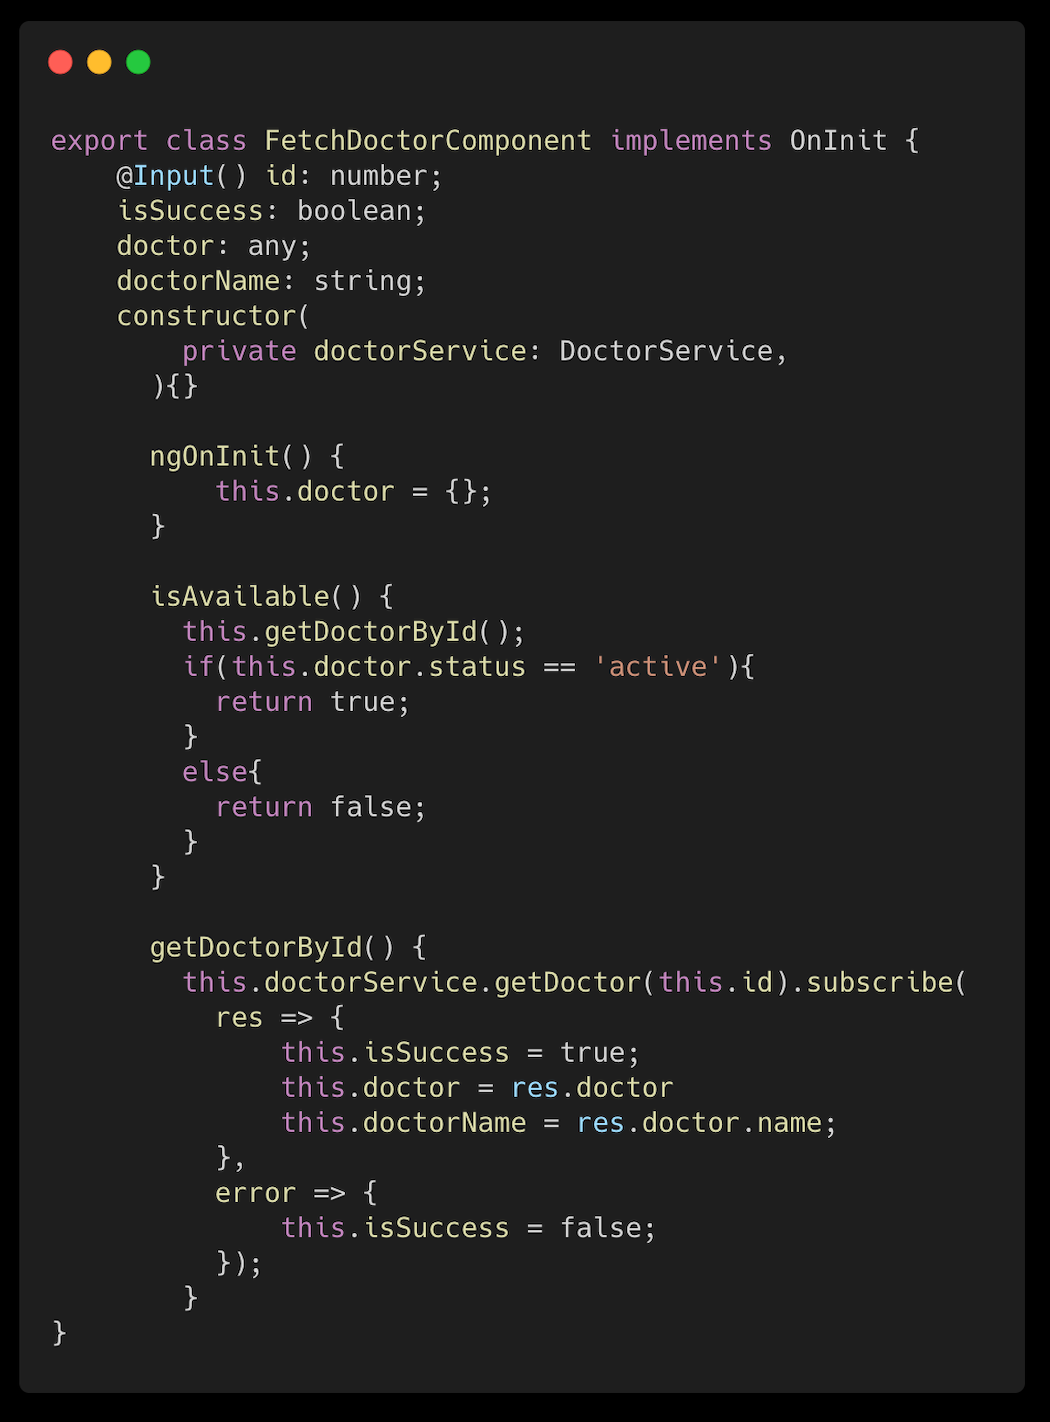
In this example, we have defined a component called FetchDoctor which has a method called getDoctor(). This method calls getDoctor() of our service that we saw before.
To Test this lets first set up the test Environment
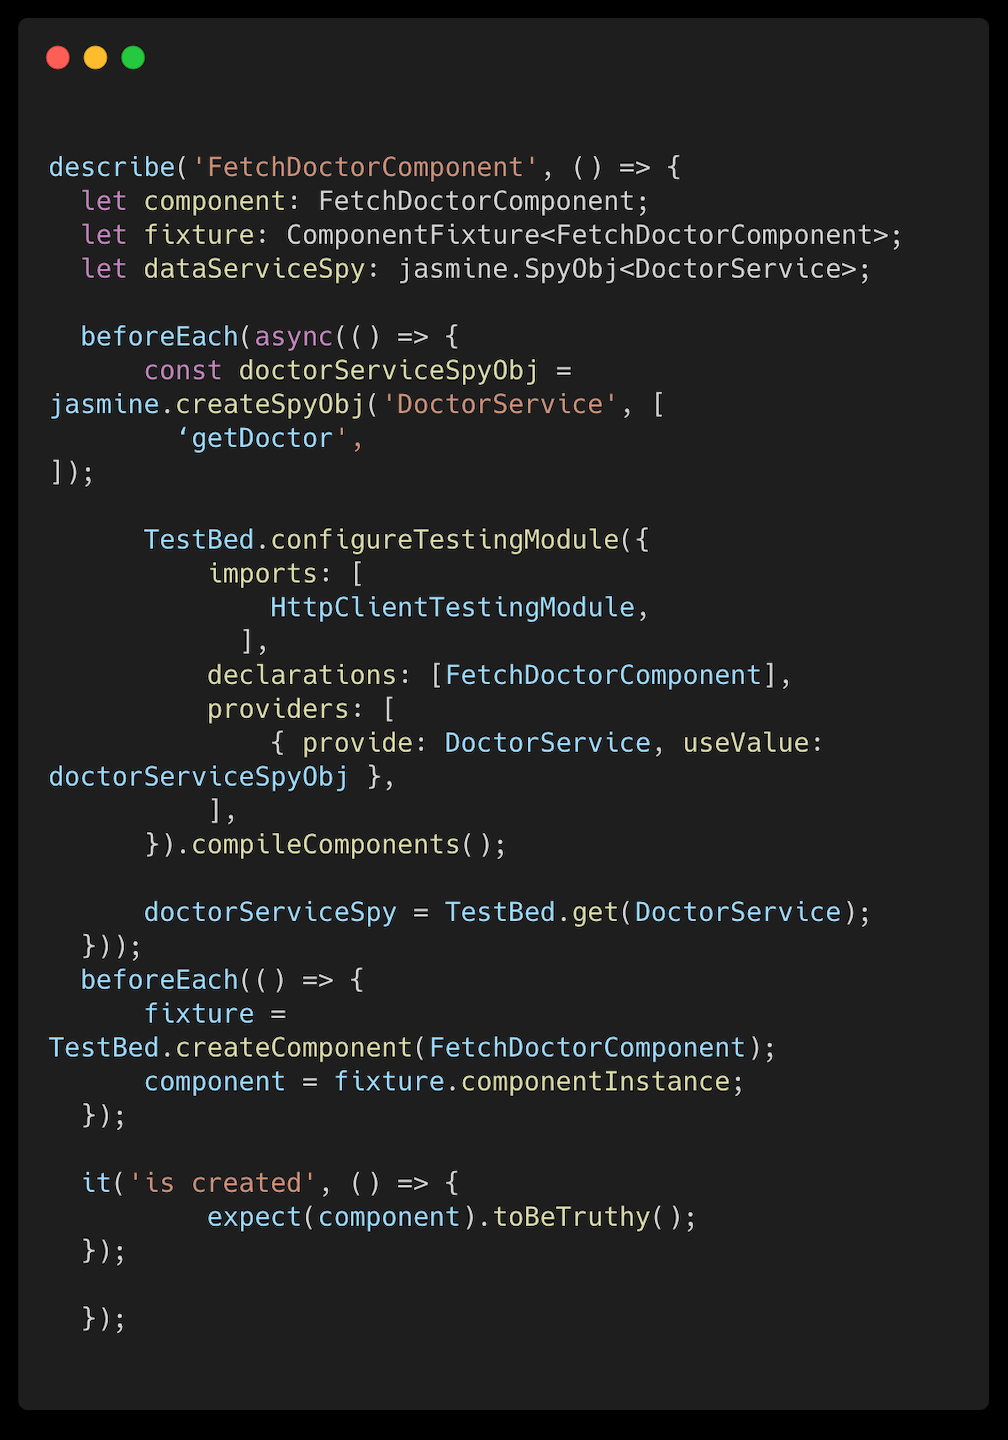
Like we did for class, we create a test scoped variable, then ComponentFixture gives us the reference to the component instance to be tested. Going forward this fixture can also be used for template testing. Components often depend on services that angular injects into constructor so, for those of the injected service. We do the following steps so that they are injected into our testing environment.
- First we create a spyObj for our DataService with
jasmine.spyObj<DoctorService>. - In our beforeEach we add
Jasmine.createSpyObj(‘DoctorService’, [‘getDoctor’]). What this will do is; Jasmine creates a mock object identical to DoctorService Object. - We override the service that is injected to the Testing Module with the spy object that jasmine created. With this, we can change what is returned when our test calls
doctorService.getDoctor(). - This spy will be designed such that every time we call the service method getDoctor(), it returns an observable of the test data(an example for this will be shown later). Hence we can perform multiple test cases based on different conditions.
- In Provider array we override the actual DoctorService with our spy using
{ provide: DoctorService, useValue: doctorServiceSpyObj}. - With
TestBed.get(DoctorService)we inject the DataService and assign its reference to doctorServiceSpy variable and this is used whenever we want to use the service.
Fixture.componentInstance gives reference to the component we are testing and it is stored in the component variable. Going forward, we use this variable to call the methods and component instance variable of the component.
As discussed in the case of service, Here we expect the component variable to be true to check if our component to test has been correctly instantiated or not. After this, we can directly jump into testing our methods. First, we can consider writing unit test for isAvailable() method:

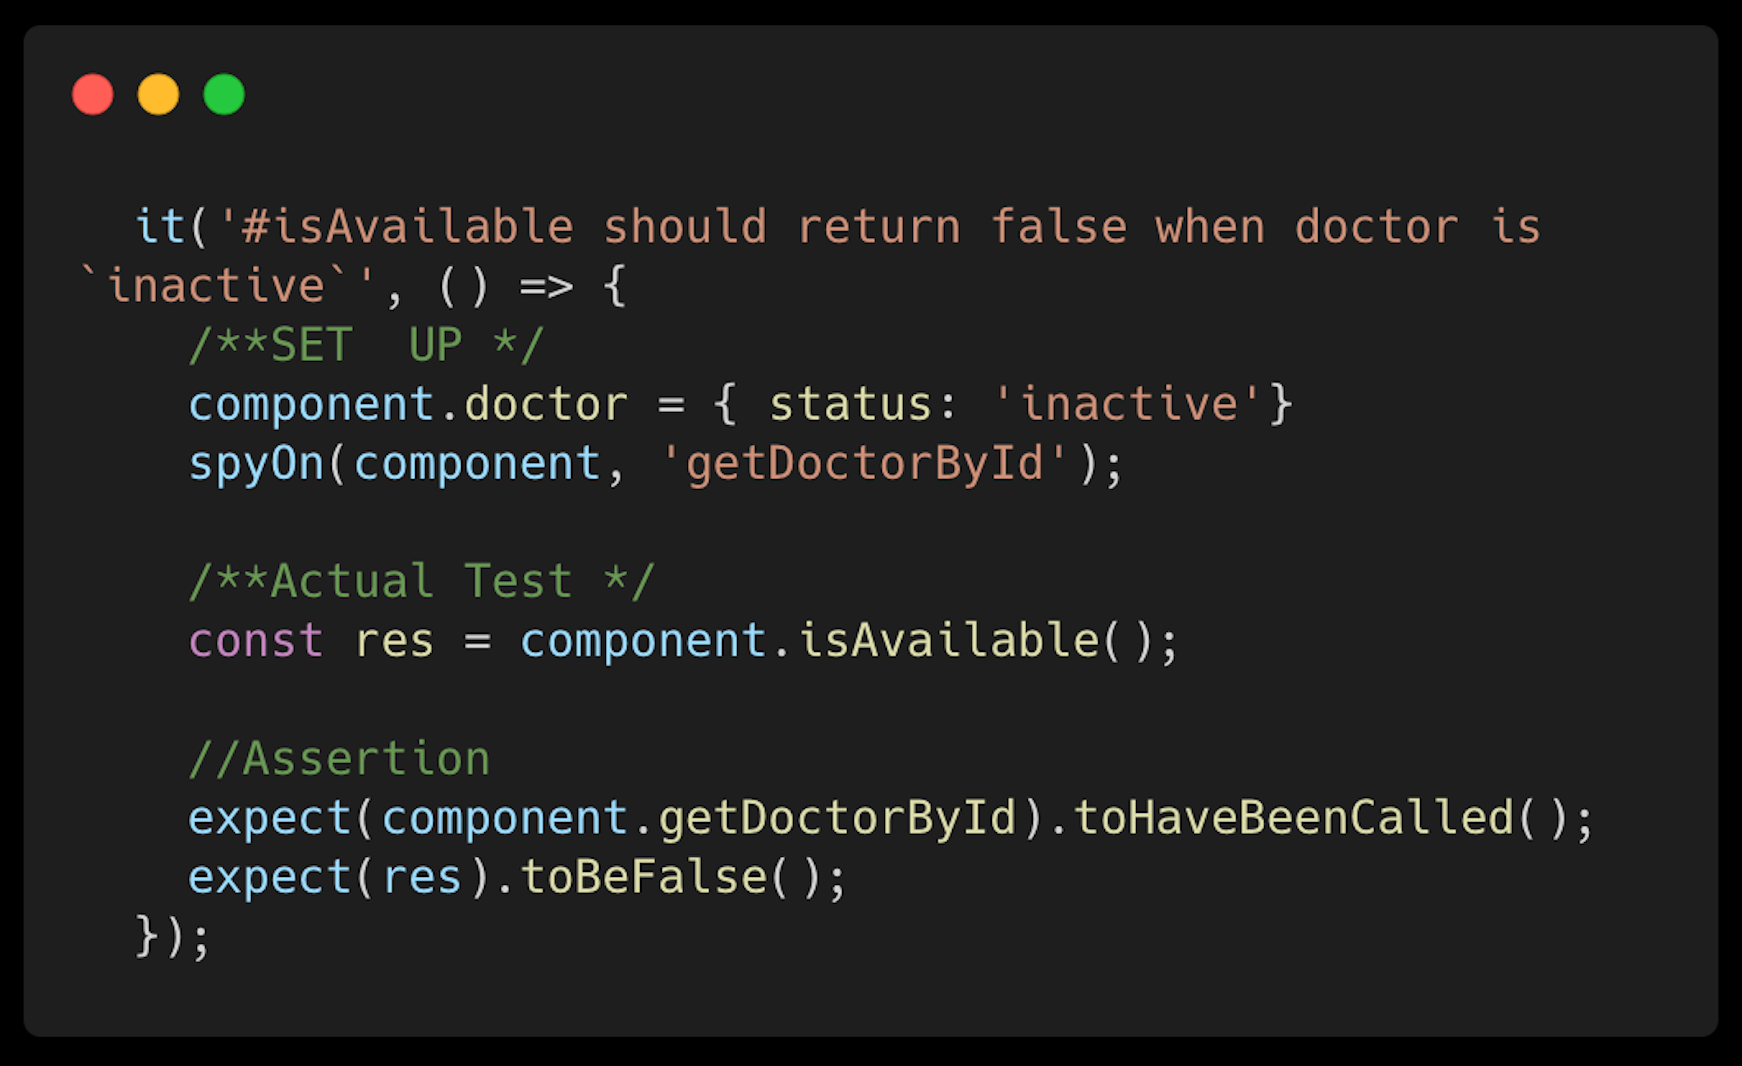
Here in this test, we have spied upon the getDoctorById() method and we have expected that spy to be called in this test by expect(component.getDoctorById).toHaveBeenCalled();. And also we have given the suitable condition for the method to return true, and we have expected res to be True in the assertion.
The other test case where the isAvailable() method returns false is shown below
Testing Asynchronous code
We can make use of fakeAsync along with utilities like tick for testing asynchronous code. Below is an example test (SUCCESS CASE)
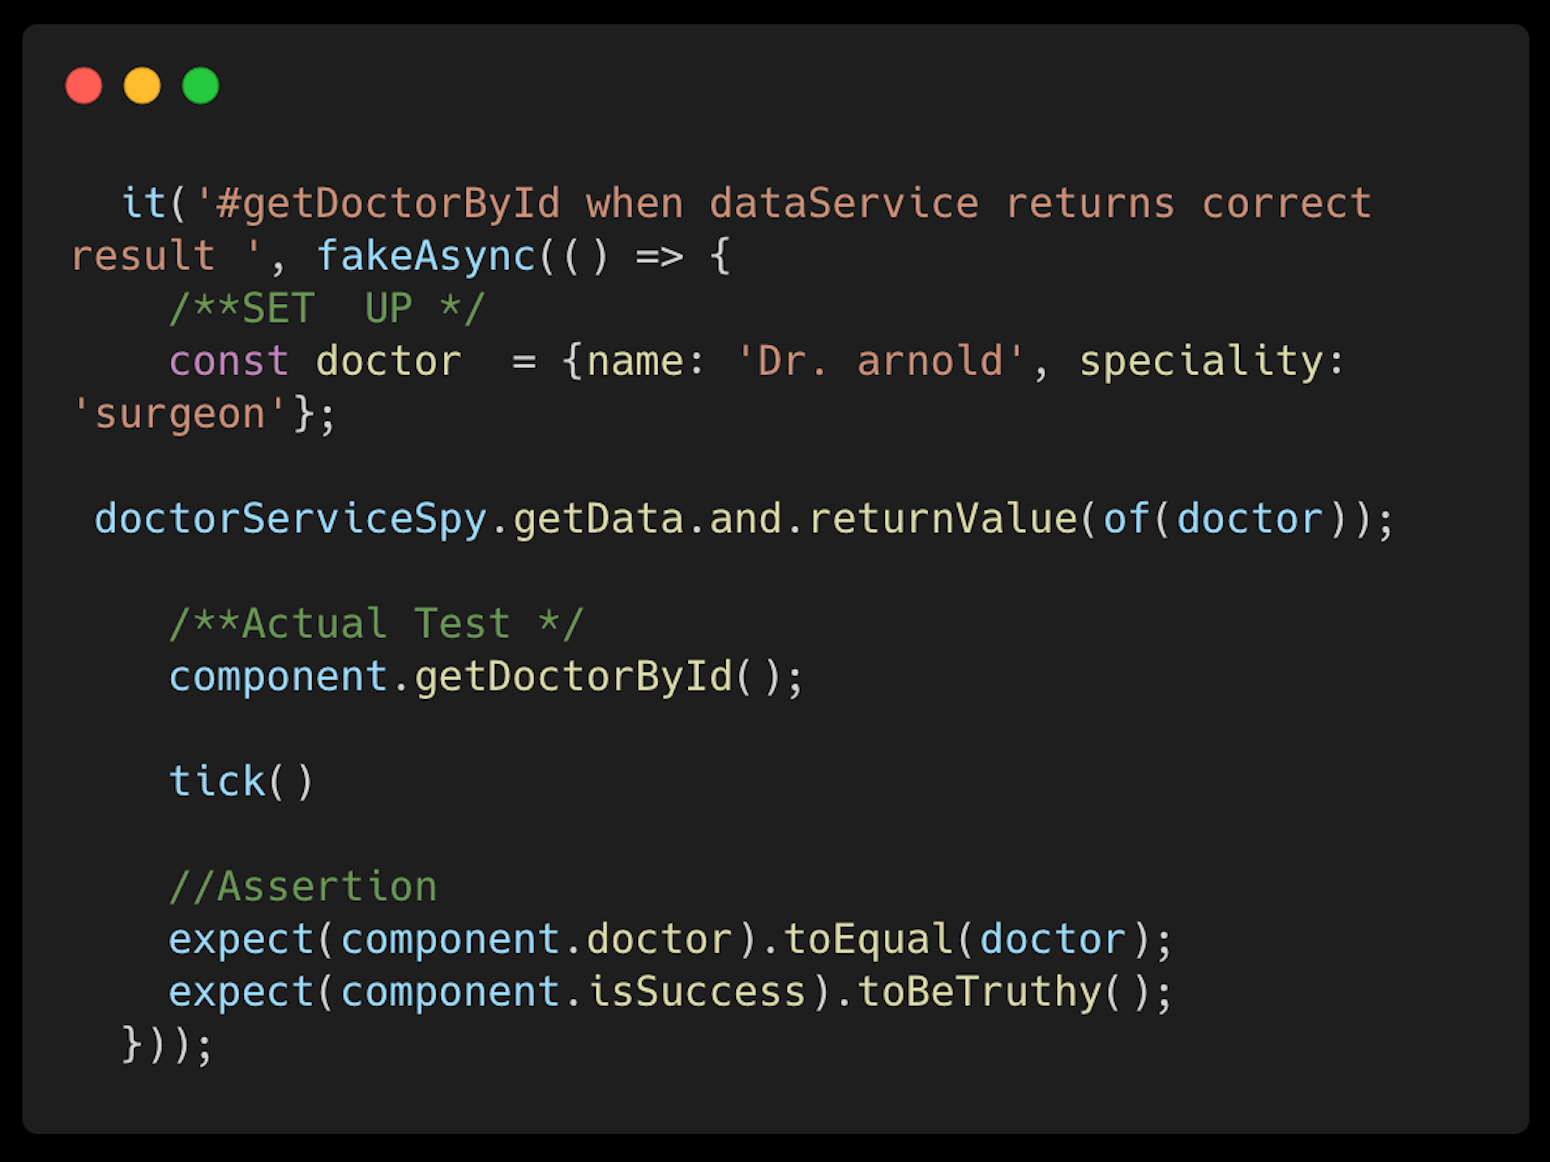
For the first case we use doctorServiceSpy.getDoctor.and.returnValue(of(doctor)), where 'doctor' is a mock value which we want to return as observable using of (RxJS Library) when service call occurs. Then we call our component method with component.getDoctorById(). We now expect the result on a successful call of the service with expect(component.isSuccess).toBeTruthy().
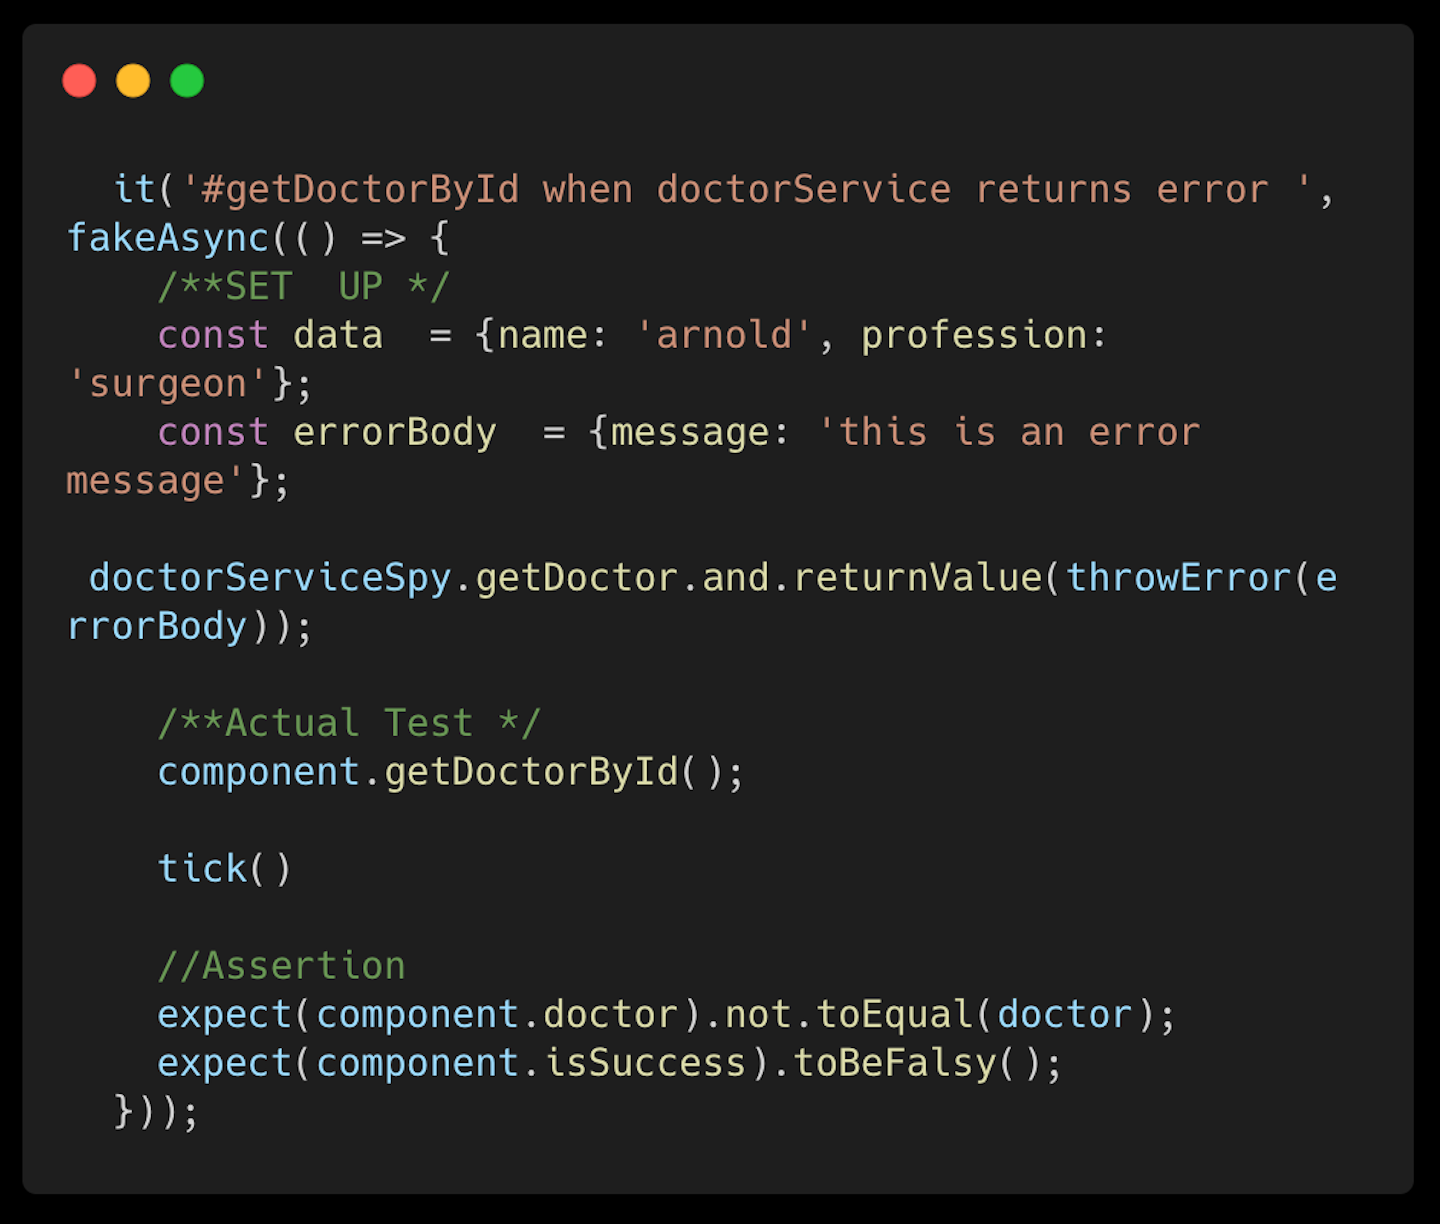
The tick() function is used only inside a fakeAsync zone. It gives us the power to simulates the asynchronous passage of time using a virtual clock. We can divide our test into two, one when service returns right observable, another one when it throws the error.
For the second case where the service throws error we use doctorServiceSpy.getDoctor.and.returnValue(throwError(errorBody)). Here we use RxJS library throwError to make service to throw an error with our mock error Body.
Summary
In this blog, we have discussed why unit tests are required, how to get started writing unit tests in angular applications with a simplified approach. Hope this blog will help you get started with writing unit tests, if you haven't yet already.
We are always looking out to hire for all roles in our tech team. If challenging problems that drive big impact enthral you, do reach out to us at careers.india@halodoc.com
About Halodoc
Halodoc is the number 1 all around Healthcare application in Indonesia. Our mission is to simplify and bring quality healthcare across Indonesia, from Sabang to Merauke.
We connect 20,000+ doctors with patients in need through our teleconsultation service, we partner with 1500+ pharmacies in 50 cities to bring medicine to your doorstep, we partner with Indonesia's largest lab provider to provide lab home services, and to top it off we have recently launched a premium appointment service that partners with 500+ hospitals that allows patients to book a doctor appointment inside our application.
We are extremely fortunate to be trusted by our investors, such as the Bill & Melinda Gates foundation, Singtel, UOB Ventures, Allianz, Gojek and many more. We recently closed our Series B round and In total have raised USD$100million for our mission.
Our team work tirelessly to make sure that we create the best healthcare solution personalized for all of our patient's needs, and are continuously on a path to simplify healthcare for Indonesia.